As I stated last week, there are three key ingredients to create a quality image: the quality of the subject, the quality of the composition and the quality of light. In part one of this series, I addressed front light. In part 2, I now touch upon backlight.
Backlight
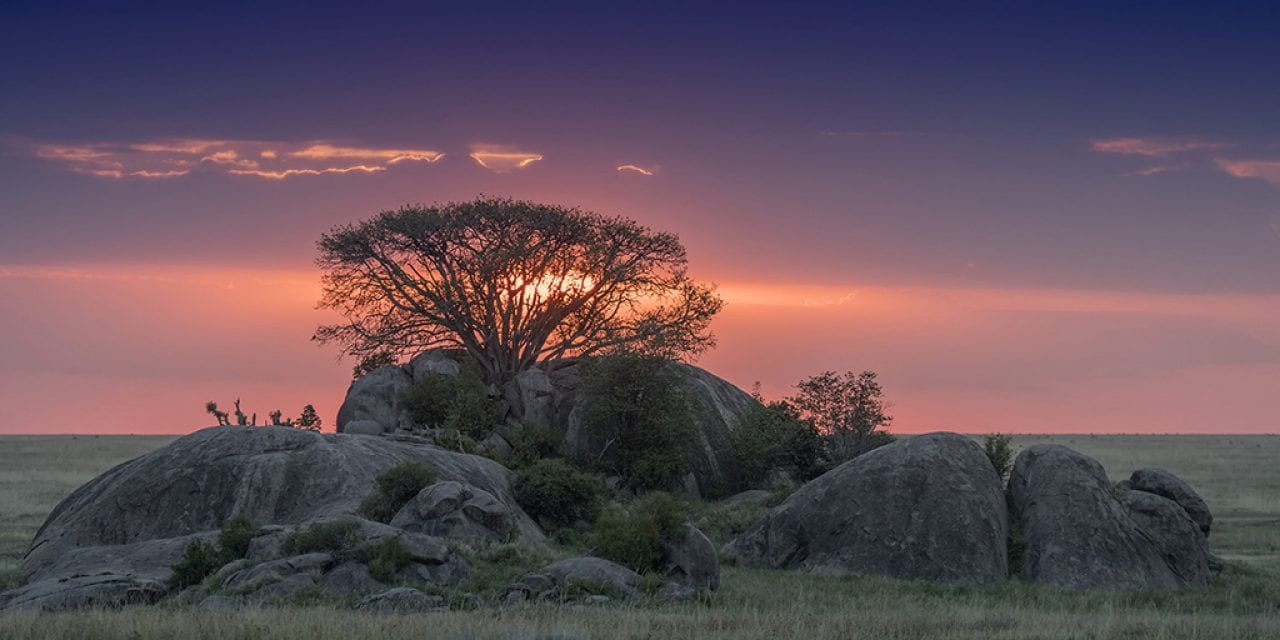
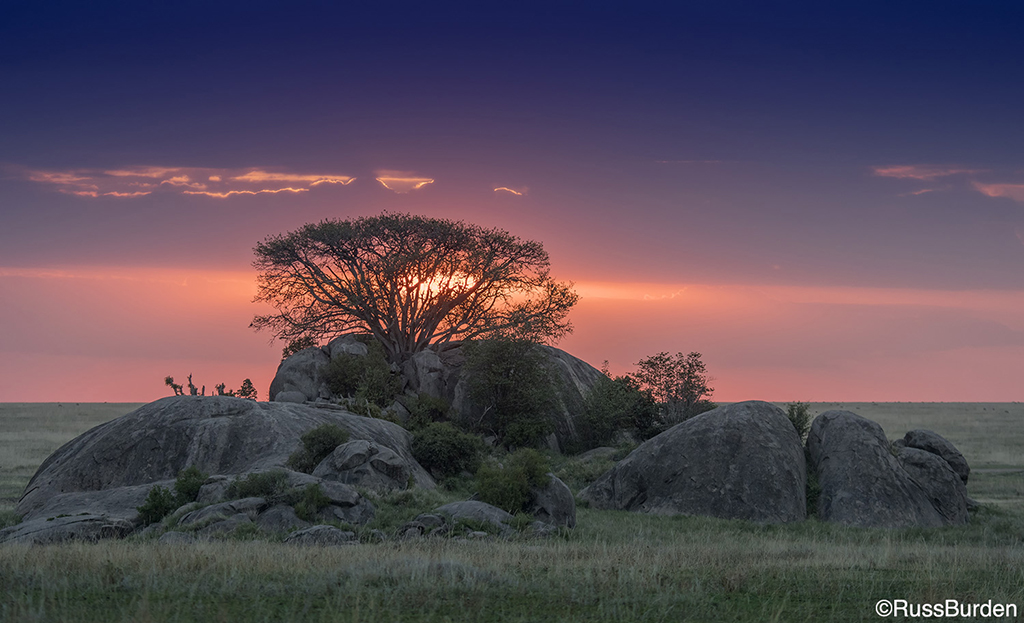
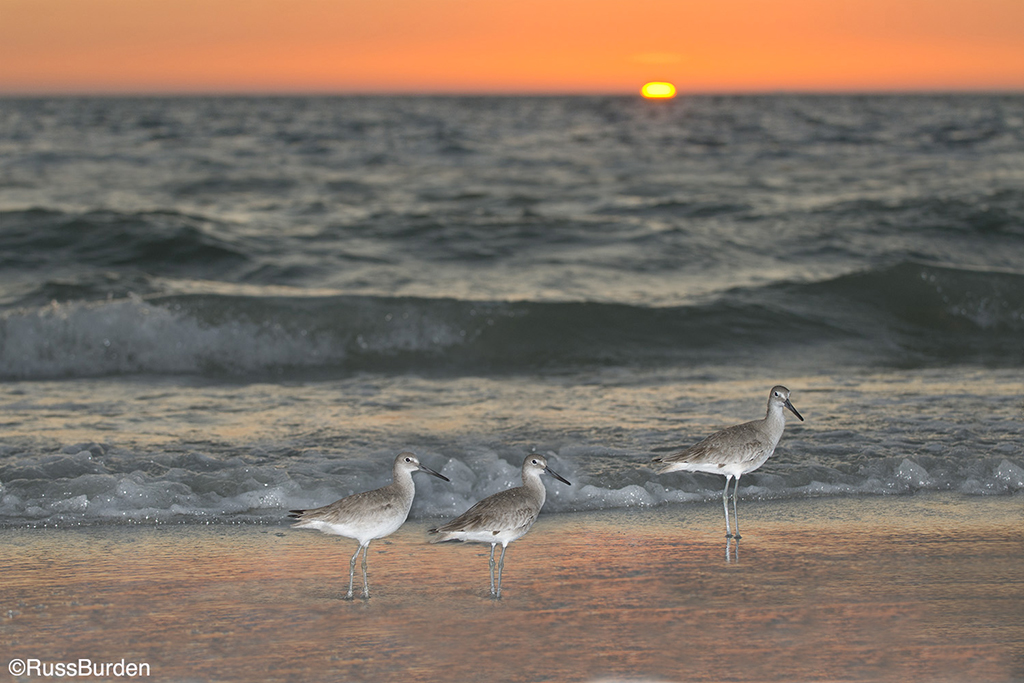
Alluring results can be obtained when backlight is the primary source. Depending upon the subject and intensity of the light, images with mystery and radiance can be created. Subjects can be portrayed as silhouettes or bathed in a rim-lit glow revealing shape, rim lit texture and form.
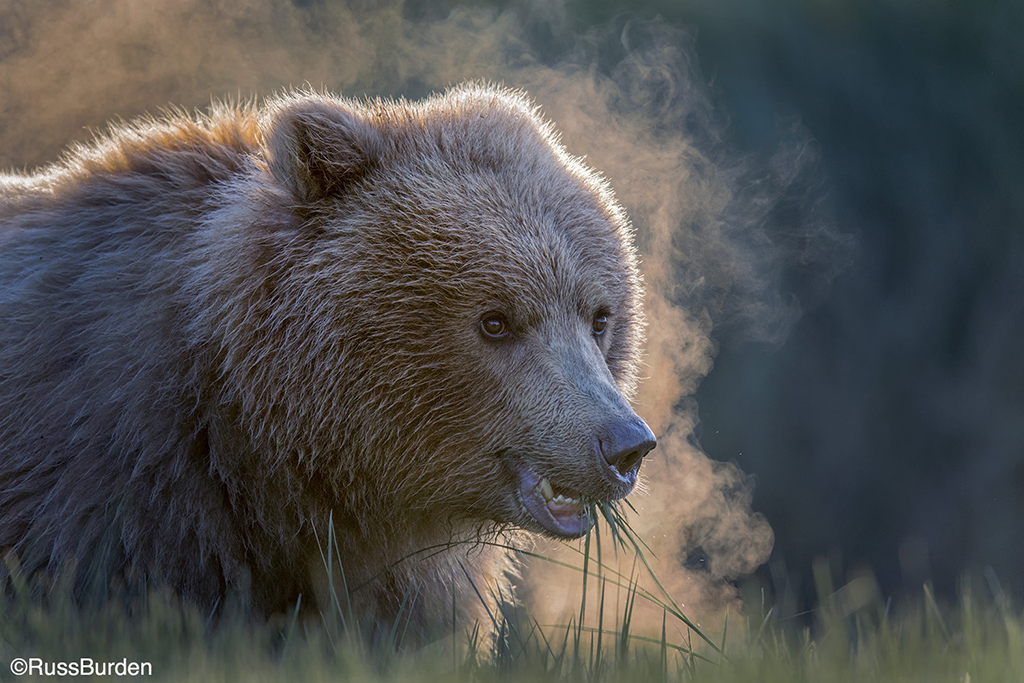
Backlight provides dramatic illumination. Because it isn’t the norm, when it’s incorporated into a photograph, the image is more unique. The caveat is it’s hard to master. Exposure and lens flare problems must be dealt with to create successful photographs.
Exposure
Exposure can be tricky if the goal is to reveal detail. The best way to obtain proper exposure is to use spot metering. If your camera doesn’t have it, go up to the subject and take a reading off the most critical area if possible. Lock in the reading and return to the point where the photo is to be made and fire away.
Sounds simple, but here’s the rub. Now that proper exposure on the subject has been achieved, it comes at the expense of having the background overpower it. The subject looks great, but the highlights in the background are washed out and hold no detail. Don’t despair. Before I hear the simultaneous clunk of thousands of cameras being discarded, there are solutions. The first and easiest is to move closer to the subject. By doing so, less background is presented. If the subject can be moved, place it in a location with fewer background distractions. Backgrounds that are darker or those that can be thrown out of focus work well.
Reflectors
Add detail by using a reflector if the subject is small. They come in white, silver or gold. White kicks back soft light, silver is used to make it harder and gold warms the light. In backlit situations, a reflector is very easy to use. In that the sun is aimed directly at it, all the photographer needs to do is redirect the bounced light toward the subject. With more light on the subject, the balance of light between the subject and the background is more evenly distributed and the beauty of the backlight is maintained.
Fill Flash
To remedy the balance of light, I most often use flash. Fill flash portrays a professional touch. Balance just the right amount of flash with the ambient light reading and great results can be achieved. With today’s technology, fill flash has become simple to use. The higher-end units have a compensation button so the output of the light emitted from the flash can be adjusted—this is powerful. The more light output, the more detail is revealed on the shadow side of the subject. The color and quality of the light can also be modified. Straight flash mimics light from a silver reflector. It’s a hard source. To mimic the light of a white reflector, diffuse the flash with a pop-on plastic diffuser. To add warmth to a scene, tape a small gold or yellowish gel to the head. With TTL compatibility, regardless of the modification, proper exposure will be maintained.
Lens Flare
Lens flare is a problem with backlight. If the light source is pointed into the lens, flare is the result. The overall contrast of the image is reduced and circles or hexagons appear depending upon the aperture at which the photo was made. To eliminate flare, the sun or other light source must be blocked from the lens. Use a lens shade, hat, your hand or another device to block direct light from hitting the front element.
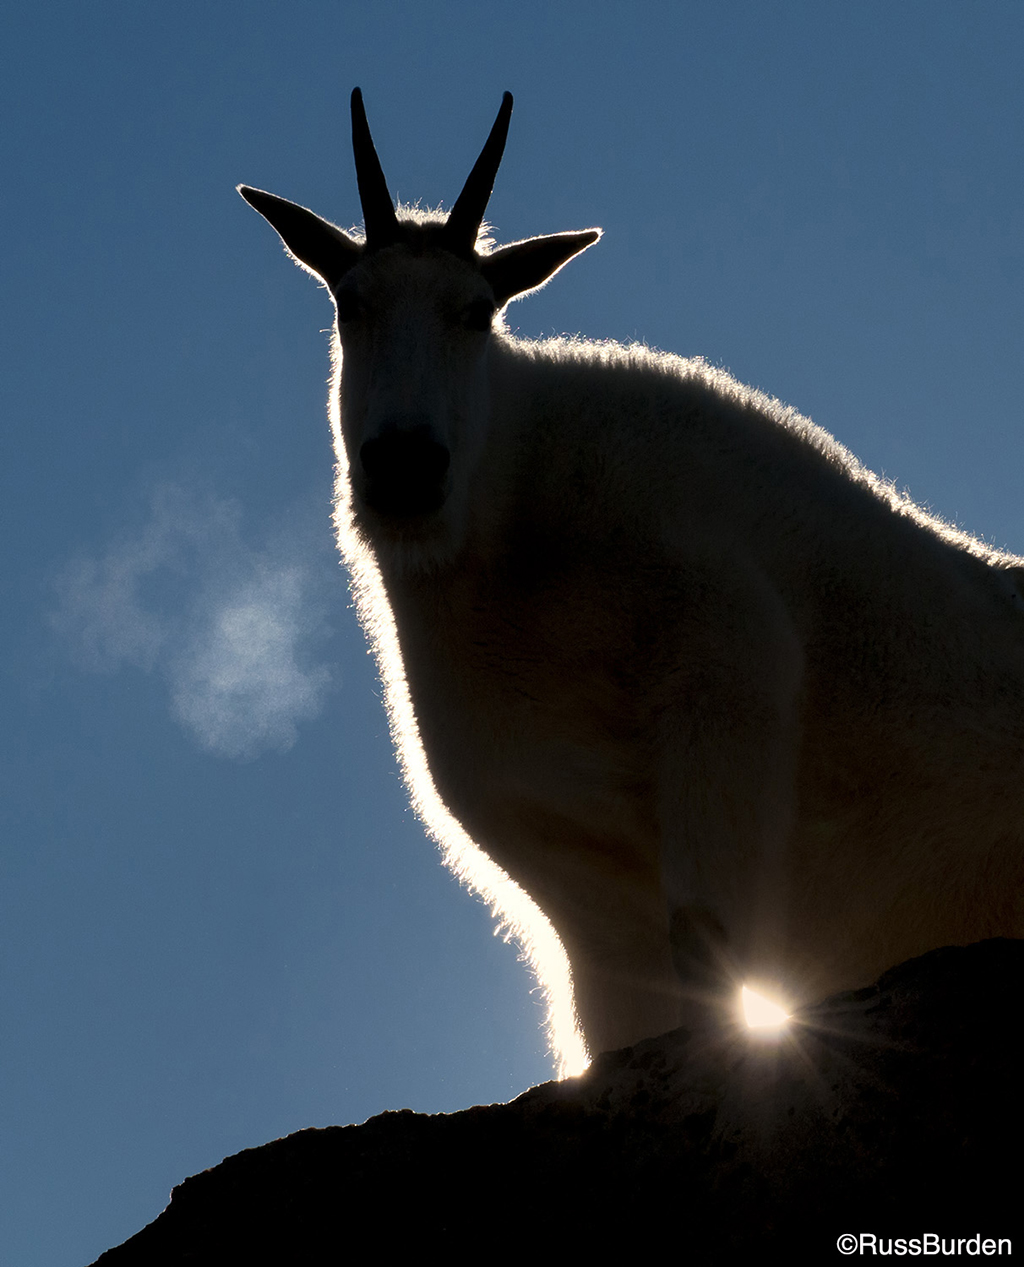
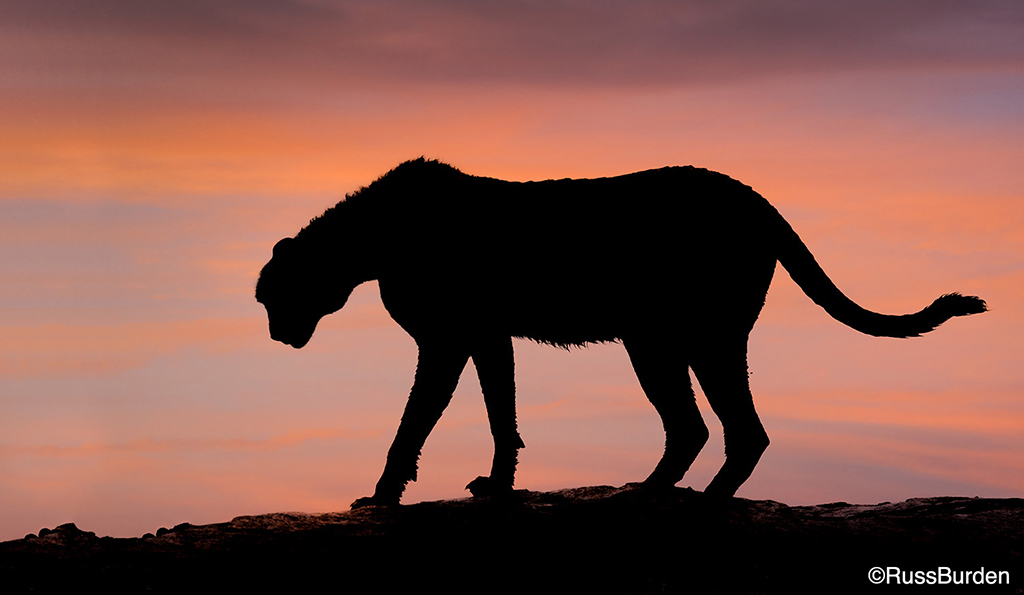
Creating A Silhouette
My favorite reason to incorporate backlight is to create a silhouette. The end result can be very dramatic. I use no compensation or modification because I want my subject to become an outline. I take a meter reading off the background. The wider the range of light falling on the subject and background, the blacker the silhouette. Subjects rimmed with tiny hairs or fuzzy coats produce a glow when backlit. Exploit backlight when you make images of subjects that fit this description. Shoot when the sun is low on the horizon as the quality of light is superior and easier to get the sun to create a glow around your subject.
Part 3’s primary topic will be side light and soft light, so check back next week!
Visit www.russburdenphotography.com for information about his nature photo safaris to Tanzania.
The post The Guiding Light, Part 2: Backlight appeared first on Outdoor Photographer.