Learn how to use various shutter speed settings to create the look you desire so your pre-visualized concept becomes the end result. It will enhance your picture making exponentially. As I stated in part 1, the auto setting of today’s cameras has become immensely sophisticated, but it still hasn’t learned how to read a photographer’s mind of the effect they want as an end result.
Using Aperture Or Shutter Priority
Use Aperture priority or Shutter priority to control the shutter speed necessary to obtain the effect you see in your head. I utilize Aperture priority. I dial in a given aperture while I simultaneously note the corresponding shutter speed to obtain a proper exposure. Regardless of the situation, I’m always aware of the working aperture and the working shutter speed. I spin the dial that controls the aperture until I obtain the shutter speed I need to capture the necessary effect.
Fluidity In Motion
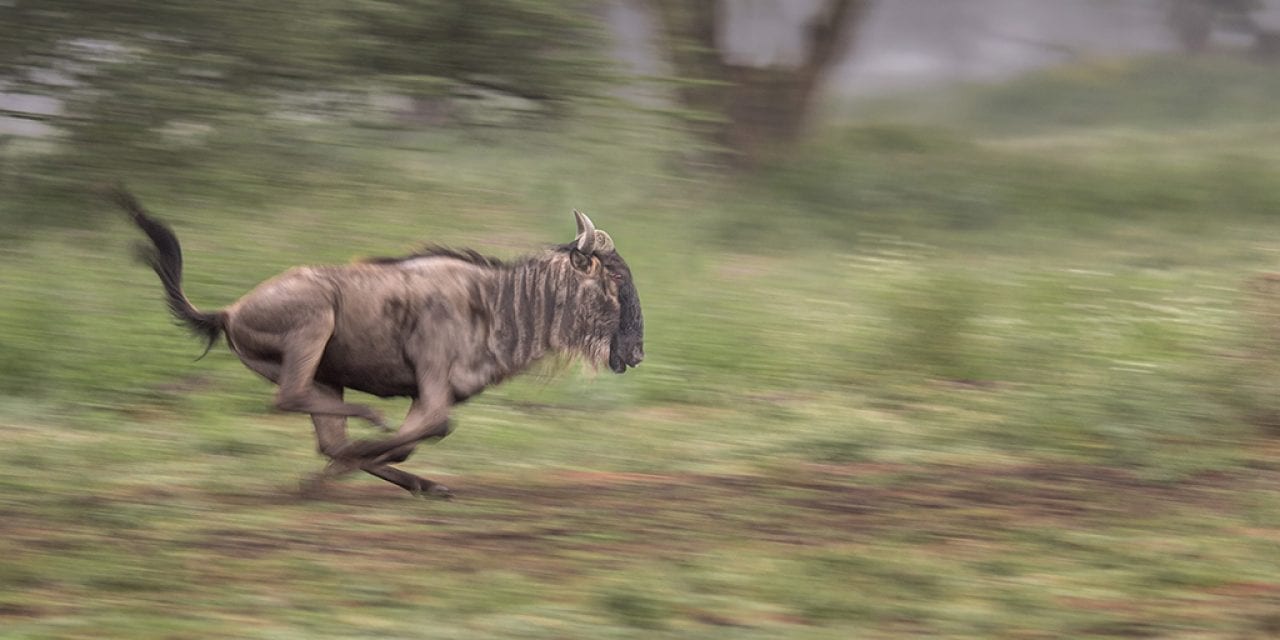
The focus of this week’s tip is to show fluidity in motion. This is done using a shutter speed much slower than one that would freeze the action of the moving subject. To acquire the desired shutter speed, I spin my aperture dial while I note how it changes the shutter until I get the speed I use as a baseline from which to start. I make an image, look at the LCD and analyze the effect. If too much motion is portrayed, I speed up the shutter and if not enough is depicted, I slow it down. The shutter speed setting controls two outcomes: A) the amount of light that reaches the sensor in conjunction with its relative aperture and B) the amount of movement that’s recorded to either stop the action or deliberately create a blur.
With regards to shutter speed, I make an analogy to a front door opening and closing. The faster it’s opened and shut, little or no movement will be seen of a moving subject that’s outside. As the duration increases, more movement will be visible. The shutter works the same. Fast shutter speeds freeze the action; slower ones exaggerate it.
Why Use A Slow Shutter
In keeping with the focus of this week’s tip, there are a number of reasons to use a slow shutter. I went to my favorite wildflower mountain area to photograph the super bloom earlier this year. Upon arrival, I was in awe of the intense color and shear number of flowers in peak color. The light was intense, but the upslope wind is constant at 18 mph. I could raise my ISO to a high number to stop the motion of the flowers or I could exaggerate the motion of the flowers and let the movement “paint” color across the image. I’d use the wind-blown effect to my advantage and reveal implied motion. Everything else would remain motionless creating an end result of an impressionistic painting. The colors of the moving flowers would streak across the sensor. Experiment with different shutter speeds to create different effects.
Implied motion can be engineered in other ways: pan the camera with the subject, zoom the lens during the exposure, make a double exposure where one image is focused sharply and the other is completely out of focus—it creates a halo effect around the subject.
Panning
Panning allows the photographer to use a slow shutter speed to “freeze” the movement of the subject because the photographer moves the camera in conjunction with the subject. The net result is a sharp subject against a blurred background. This effect evokes a feeling of speed even though the subject’s movement is stopped. To obtain this effect, move your camera smoothly with the subject as it passes in front of you. As carefully as possible, don’t move the camera up or down—simply move the camera along with the subject. The speed of your subject will determine what shutter settings yield the best effect.

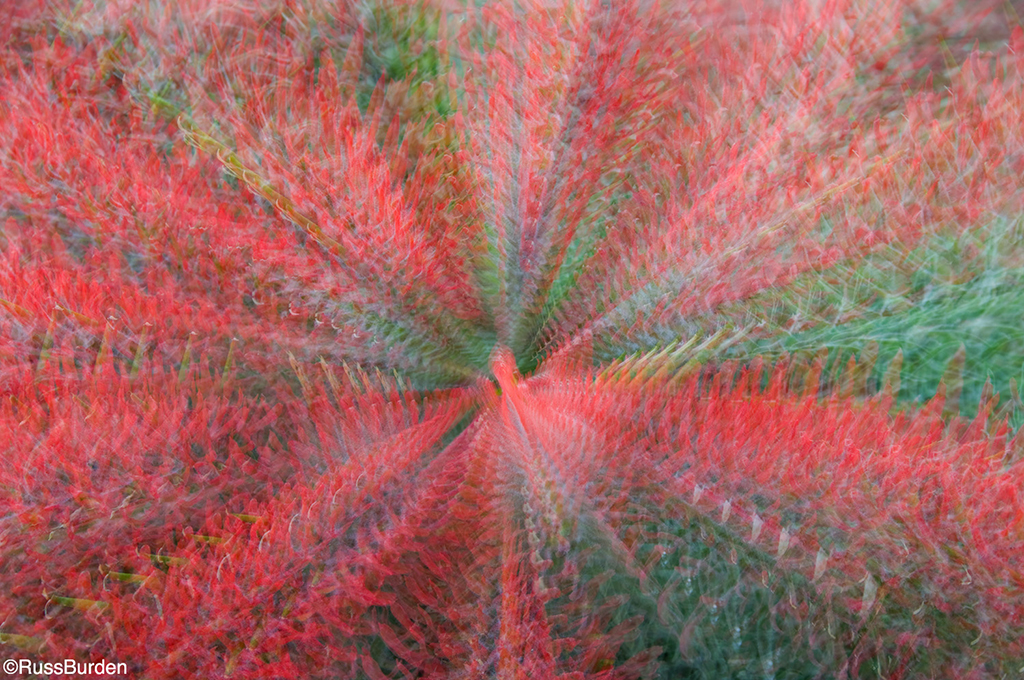
Zoom The Lens
Zoom the lens while you make an exposure of a stationary subject to give the viewer a feeling of implied motion. If the subject is centered, a series of radial lines will converge from the perimeter of the frame inward, creating a 3D effect. By offsetting the subject from the middle of the frame, the radial lines become more pronounced from one side or the other, changing the effect. Whether the lens is zoomed from the wide to tele setting or vice versa will determine whether the movement seems to be coming toward you or moving away.
For best results, mount the camera to a tripod. This will produce radial lines that are smooth and straight. Should you want lines that aren’t uniform, handhold the camera during the zoom. Use a shutter speed no faster than 1/15 sec. and experiment with settings up to five seconds. The length of time the shutter is open determines how long you zoom the lens.
Use Neutral-Density Filters
Neutral-density filters are essential tools to control shutter speeds. If the light is bright and a special effect calls for a shutter speed of one second or slower, neutral-density filters are invaluable to reduce the amount of light that strikes the sensor.
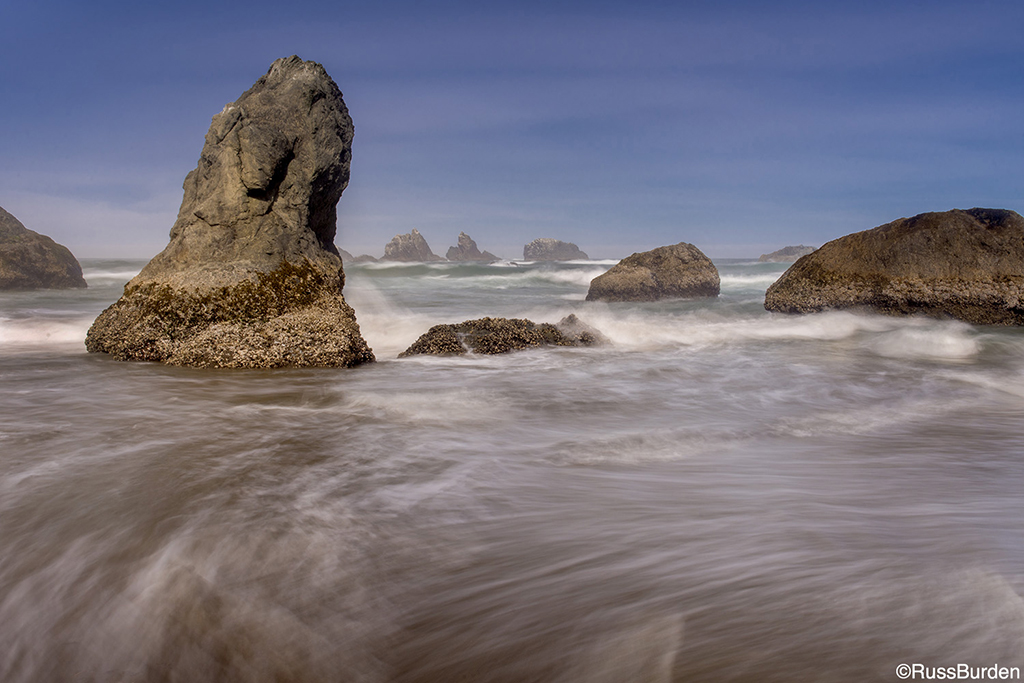
When I photograph water, I utilize lots of options. One is to freeze every drop suspended in midair. Of equal impact is to slow the water down past the point at which the human eye can’t experience it. This in turn creates an intriguing look. It requires shutter speeds in the range of 1/2 sec. or slower. Use your lowest ISO setting and if necessary, attach the ND filter to the lens. Don’t be shy to use a heavy ND to obtain shutter speeds of 30 seconds or more. Very creative effects can be the result. My go-to ND is a variable neutral-density model. I can dial in up to 8 stops of darkness.
Visit www.russburdenphotography.com for information about his nature photography safaris to Tanzania.
The post Shutter Speed Significance, Part 2: Emphasize The Action appeared first on Outdoor Photographer.