Many of the principles I mentioned in Part 1 of this 3-part series that relate to sunrise hold true for sunset photography. What’s different between the two is threefold: the color temperature of sunset is slightly different in hue, the subject matter tends to be different and there will be more people with which to contend.
Both sunset and sunrise produce warm tones. Depending upon the atmospheric conditions, colors can range from yellow to orange to red. If the western skies contain pollution, smoke or haze, the color leans toward red and orange. If the skies are clear, degrees of yellow prevail.
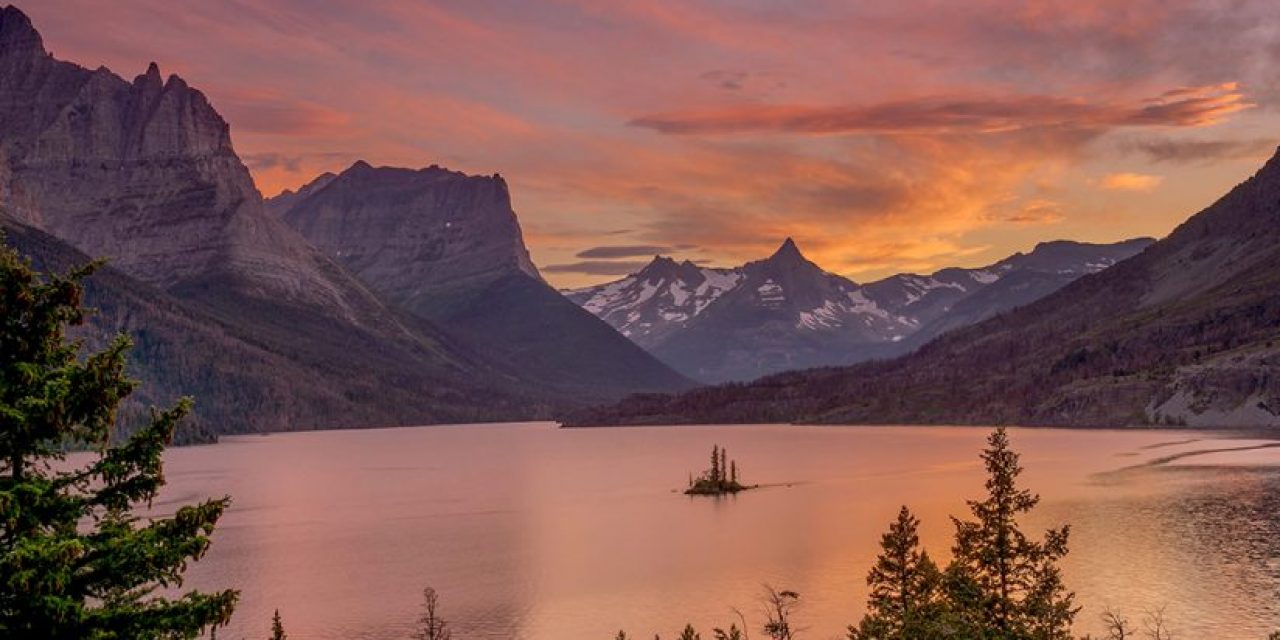
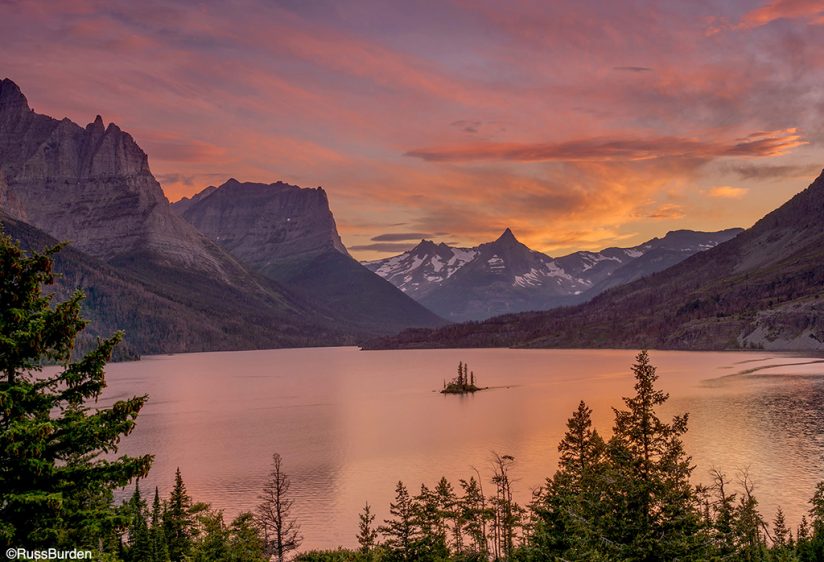
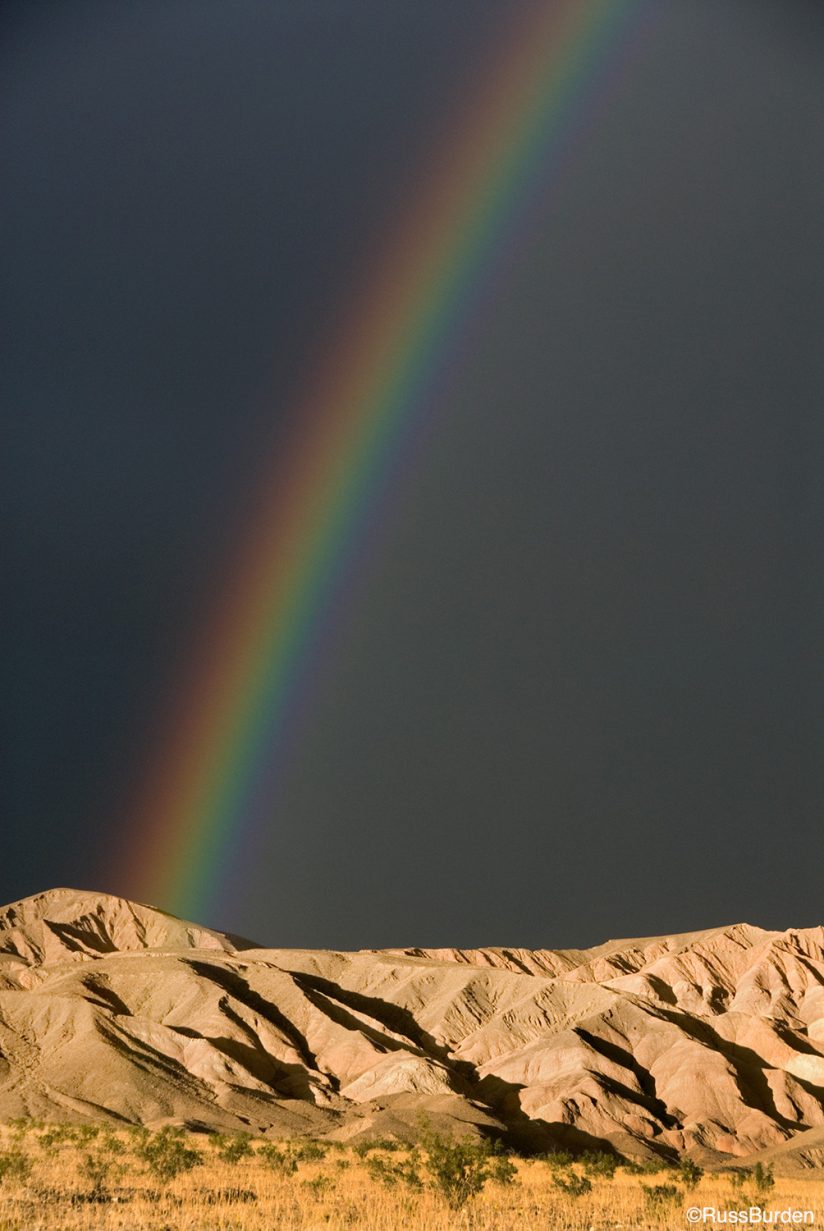
Summer months usually mean late-afternoon thunderstorms. Hot air rises and produces upper air disturbances. This results in cloud-covered sunsets. Yet, it’s this same production of clouds that can turn a sunset into one to behold. Clearing storms mean dramatic skies. Holes may open that allow the sun to create unique lighting situations. The underside of clouds above the horizon may ignite in fiery reds. Occasionally, serendipity may bless you with a rainbow.
Good winter sunsets materialize more frequently than in summer. Additionally, the color lasts longer. In winter, the sun skims across the horizon whereas in summer, its path is more vertical. This translates to prolonged periods of warmth in tone. The slower descent allows more time for the clouds above the horizon to reflect the sun’s color from below.
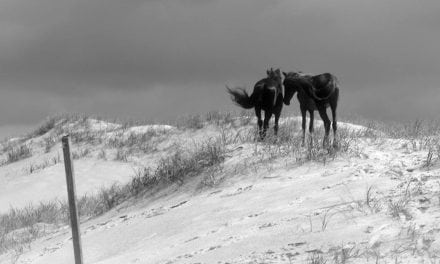
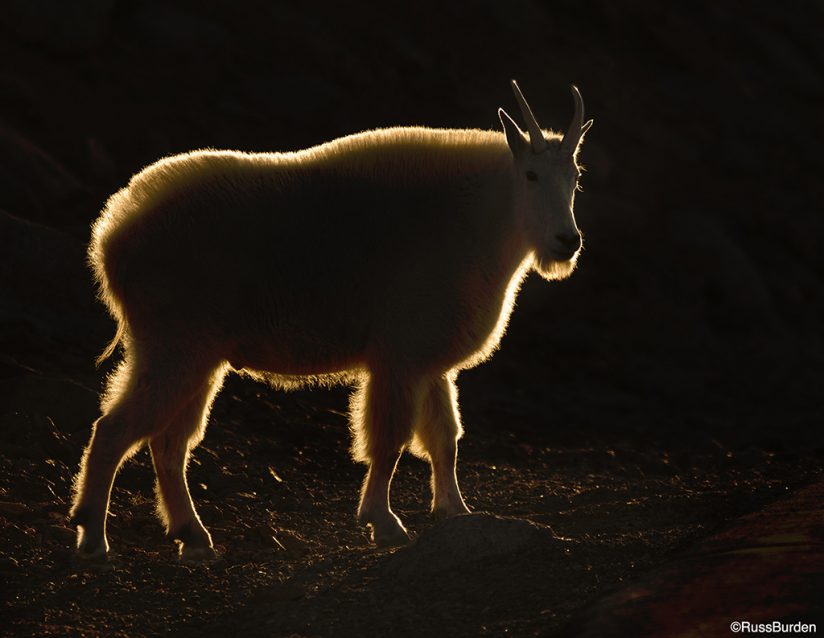
Sunset is a great time for wildlife photography. When front lit, animals take on golden color with soft light. When backlit, they glow and make dramatic silhouettes. In harmony with great lighting potential, it’s this time of day when animals tend to become more active. They exit the shade from where they’ve bedded down and begin their quest for dinner. Shy away from photographing animals while they have their heads down. Wait for a momentary pause when they pick them up and look more alert.
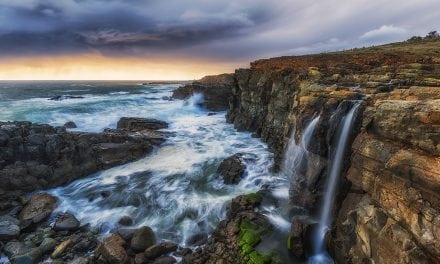
Sunset, as well as sunrise, is a great time to photograph landscapes, seascapes and other scenics. What was front-lit at sunrise will now be in silhouette. Photographing the same subject at both times of the day is fun to do. It makes for wonderful wall hangings and works well in photo presentations. As with sunrise, side-lit subjects reveal shape, form and texture. As gorgeous as sunsets are, sunrises are more photographer-friendly because there are fewer people out and about. This translates to keeping a scene more natural.
Don’t be adverse to including the actual sun in your image, but if you do, there are factors to take into account. The key ones are obtaining the proper exposure, controlling the contrast and being cognizant of how the atmosphere diffuses the sun. As a safety measure, never look at the sun through your viewfinder as eye damage may occur. Looking through the viewfinder doesn’t diminish the damaging effect of staring into the sun. The longer the lens, the greater the risk.
Metering a scene with the sun included will net an underexposed image. The meter will be tricked by its brightness. The resulting image may be too dark. To obtain a correct exposure, take a meter reading off the sky area to the left or right of the sun. Lock in the reading, recompose the shot and still make a bracketed series to ensure one of the exposures is the best and so you can combine them in HDR software.
Once the sun drops below the horizon, the shooting day isn’t over. For the half-hour period after sunset, the sky has the potential to take on a radiant glow. As with dawn light before sunrise, dusk can oftentimes be more dramatic than the sunset itself. Look for silhouettes with interesting outlines to juxtapose against the sky.
Atmospherics play a big role in determining the success of the photograph. Crystal-clear days provide the greatest challenge. Even at the horizon, the sun can be extremely bright. This causes problems with flare and contrast. On days when no horizon haze diffuses the sun, it becomes impossible to shoot even before the sun reveals half of itself.
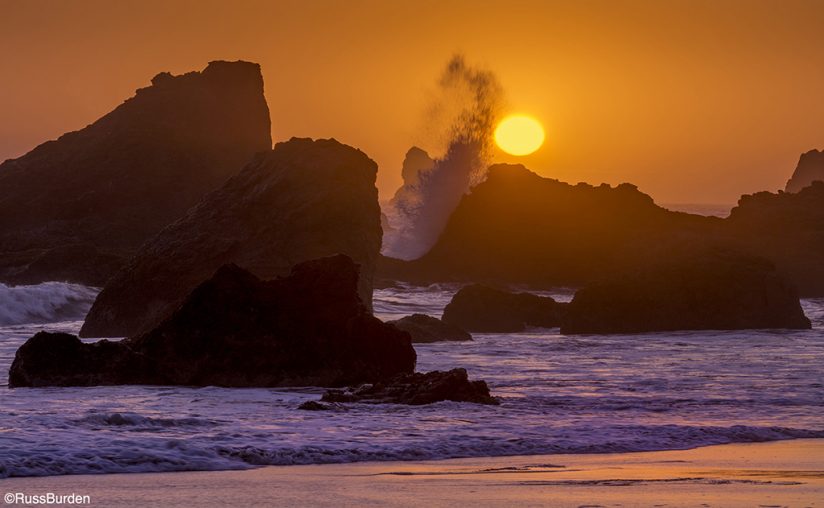
Thin layers of pollution, haze or moisture bestow the photographer with the greatest opportunity to achieve the best results shooting into the sun. Contingent upon what constitutes the diffusion, a glowing ball of red or orange may await the lucky photographer. Finding an arresting silhouette will enhance the composition. Obtaining proper exposure with a diffused sun is easier because the atmosphere provides a natural barrier to tame its brightness. Even so, I still recommend bracketing.
As wonderful as it is to learn all the above information, a major player in determining good sunrise and sunset pictures is Mother Nature. One may have all the mandatory equipment, the right gear, proper filters and the know-how with which to produce the image, but if gray clouds wreak havoc, it’s best to wait until tomorrow. Sometimes it’s best to wait until the next trip and sometimes that isn’t even a guarantee. Going to magnificent locations doesn’t guarantee magnificent shots. But being there at sunset sure enhances the opportunity.
Be sure to check out the two previous week’s tips for info on sunrise light and how to come back home with winning images in midday.
Visit www.russburdenphotography.com for information about his nature photography tours and safari to Tanzania.
The post When It Dawned On Me, Part 3: Sunset appeared first on Outdoor Photographer.