Many know the familiar quote with a direct connection to Mount Everest (the highest mountain in the world). The quote is, “Because it’s there.” George Mallory uttered the phrase when he was asked why he tried to reach the summit. Although his initial climb was unsuccessful, he saw it as a challenge. He wanted to be the first to summit the peak. On his third attempt, he fatefully perished and never attained his lifelong dream. But his words live on and have become a metaphor for whenever a challenge is encountered. Others followed Mallory’s desire to ascend the peak. Edmund Hillary, along with Sherpa guide Tenzing Norgay, finally conquered the summit and are the first known people to reach the top of Mount Everest.
The above mini history lesson got me thinking about a different question regarding mountains as they relate to photography. While not life threatening, it still has a direct relationship to a challenge. It sparked the idea for this week’s tip. Why do scenic photographers love to photograph mountains? “Because they’re there” is a feasible answer, but it’s already become too famous a quote. More questions came to mind: Why some peaks and not others? Why do geologically newer mountains attract a greater number of photographers? Why do older, lower mountains lure photographers in the autumn? Why is mountain light so spectacular? Here I share with you some of my tricks and techniques to assist you in capturing your mountain images so you can elevate your photos to new heights!
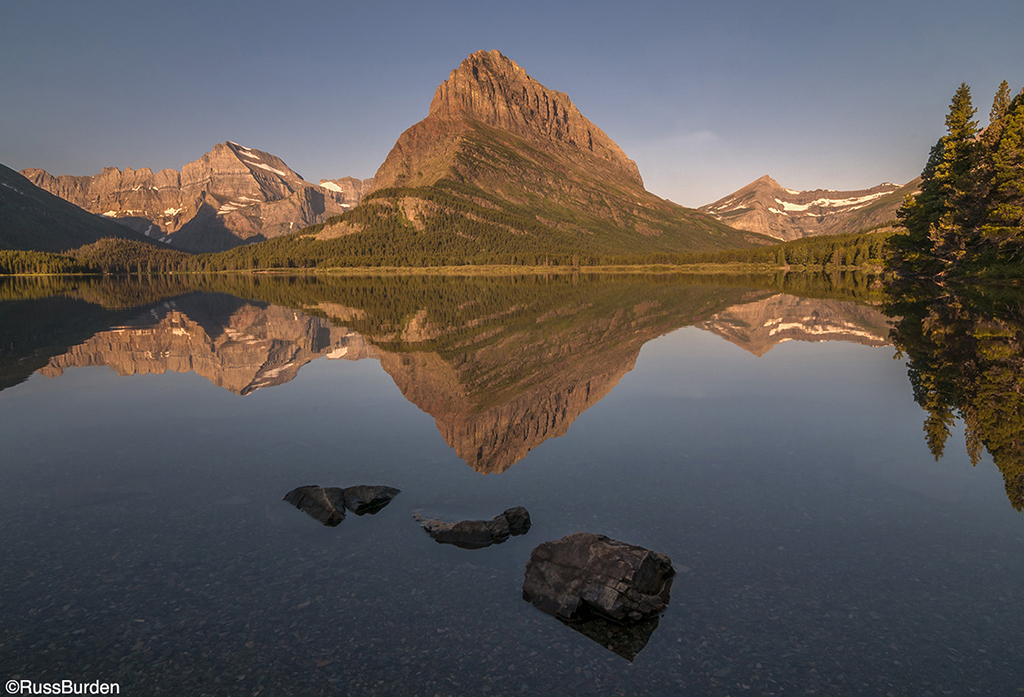
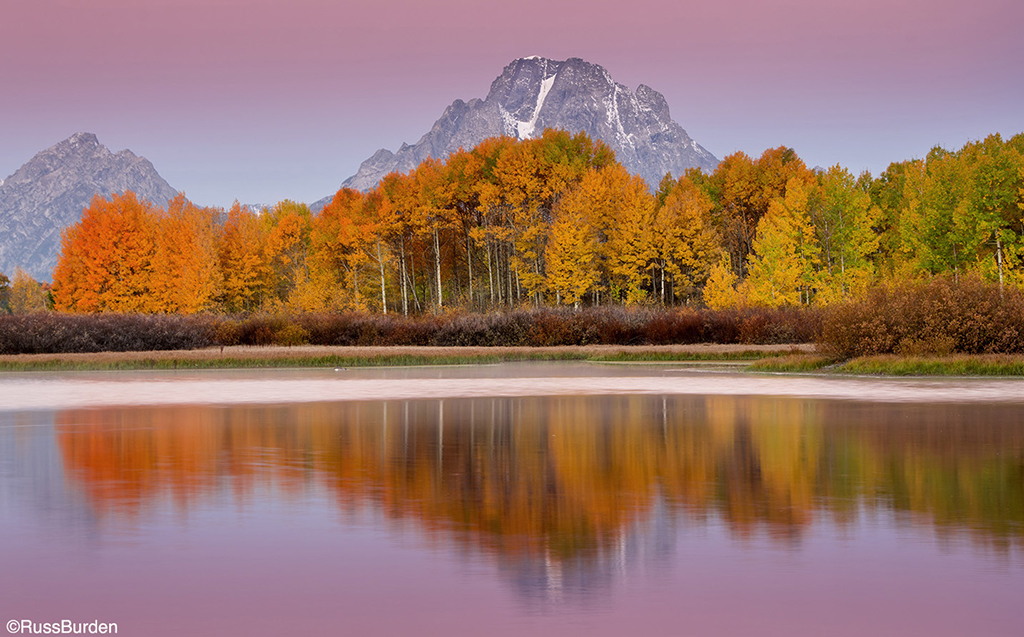
Include a Reflection
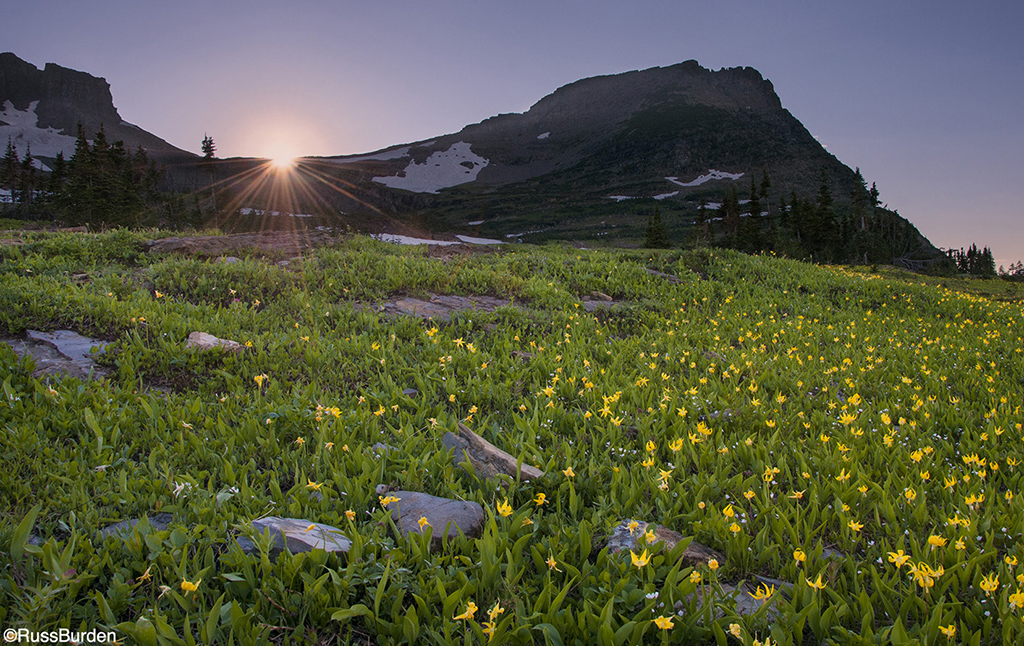
Mountains and lakes are often found in conjunction with each other. This works great for lake water in that mountain air is much more still in early morning. This may provide a mirror image of the actual peak and surrounding area. Include this reflection to add an additional compositional element. Still air is rarely found in high elevations in the afternoon, so to improve your chance of getting a reflection, wake early and be at your destination for alpenglow and first light.
Think Wide And Telephoto
One of my favorite expressions is, “Exhaust all possibilities.” Mountain photography and wide-angle lenses are often paired for obvious reasons. But, don’t miss out on a great photo opportunity and limit your captures to a single focal length. Attach a medium to long telephoto to isolate just the peak in early or late light. Use a telephoto to compress individual layers to produce a receding atmospheric effect. Use a long lens to zero in on a patch of fall color. Think outside the box and add diversity to your files.
The Bonus Shots
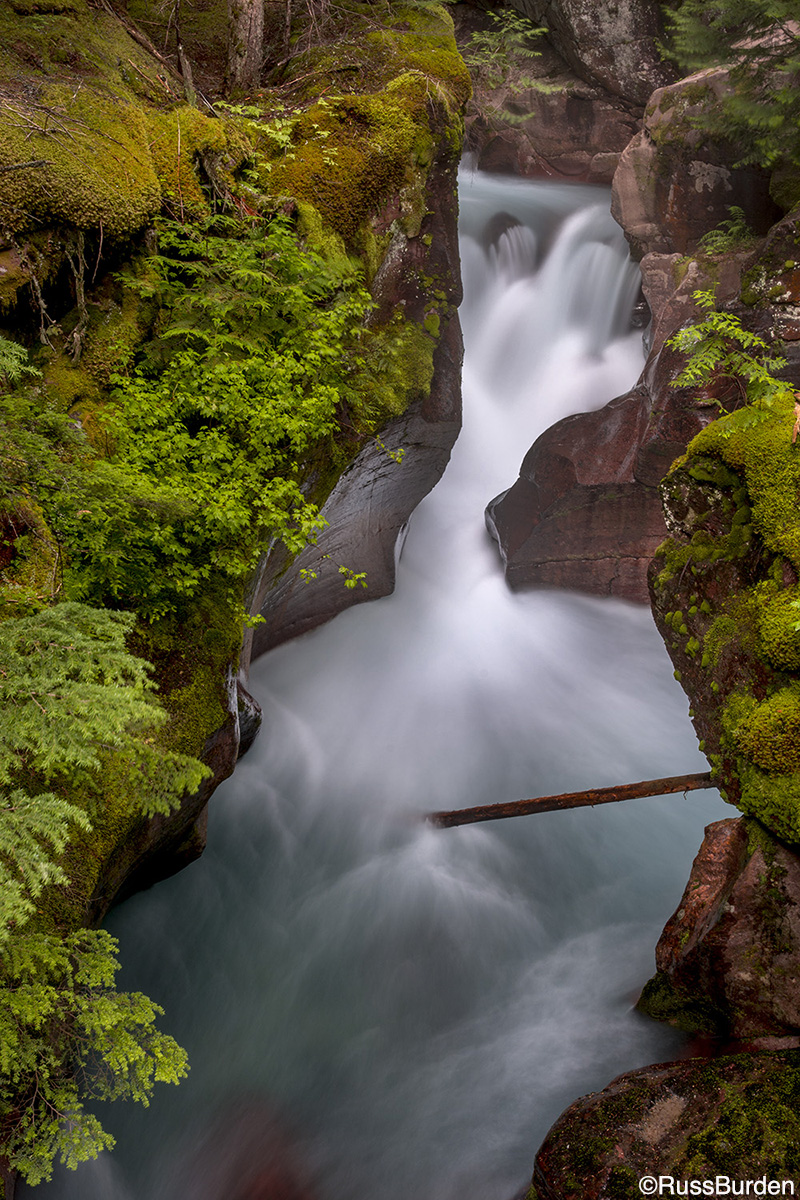
There’s more to photographing mountains than just their facade. Take a hike, immerse yourself and explore the mountain itself. Bring your gear on one of the hiking trails and photograph waterfalls that appear along the path. If it’s summer and you’re up in elevation, go where the wildflowers bloom and use them as both a foreground and to make individual portraits. Mountains are often associated with wildlife, so don’t overlook the animals that rely on the vegetation as a source of food. Additionally, if there are small critters consuming the greenery, chances are predators are around that consume the little ones. And don’t forget about the gorges that cut through the rock and create gorgeous scenes. So much potential.
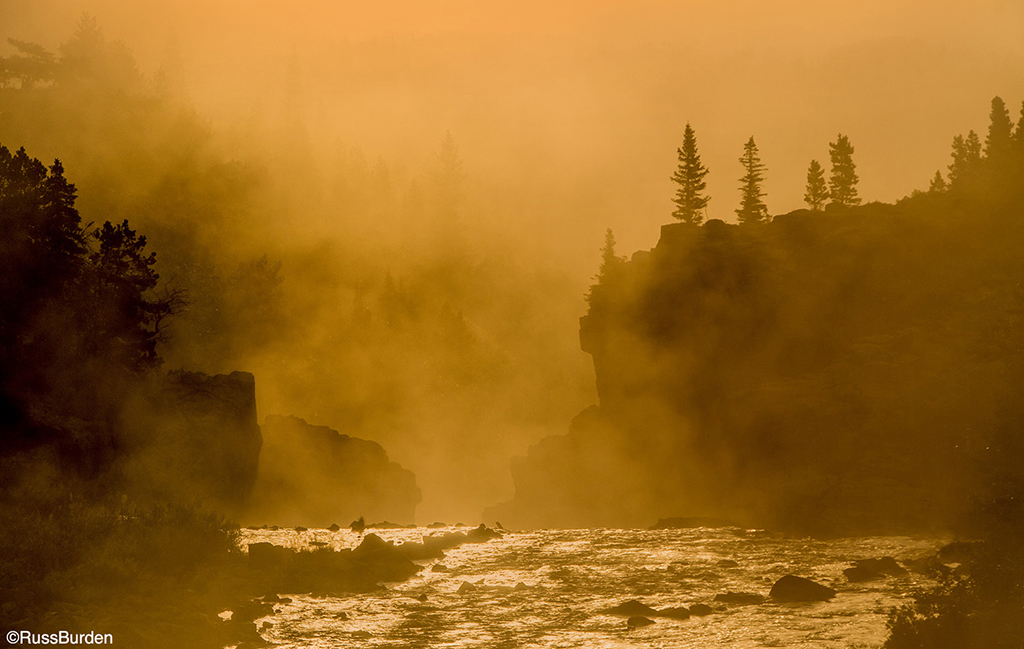
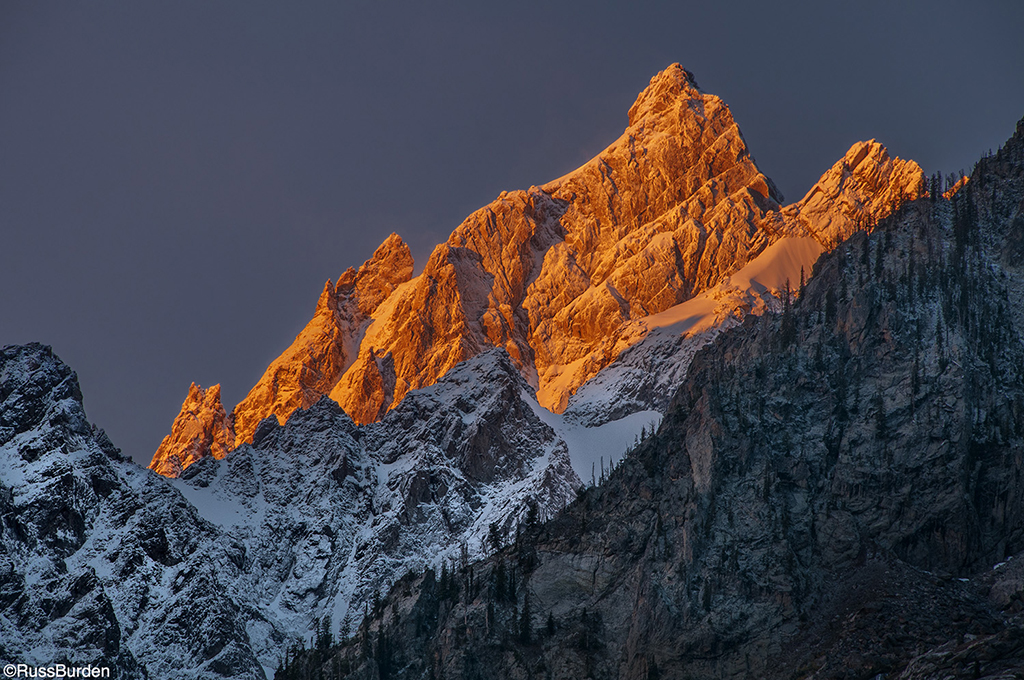
Dramatic Light
Blue sky days can be a photographer’s friend. But when it comes to creating eye-popping mountain images that stop viewers in their tracks, dramatic light elevates this friendship to a lifelong blood brother. Check the latest weather apps for impending weather. If the edge of a storm coincides with sunrise or sunset, be at your favorite peak. Is it guaranteed something wonderful will unfold? It’s the luck of the draw, but if drama is what you want in your photos, you need to go the extra mile, roll the dice and hope it’s bestowed upon you.
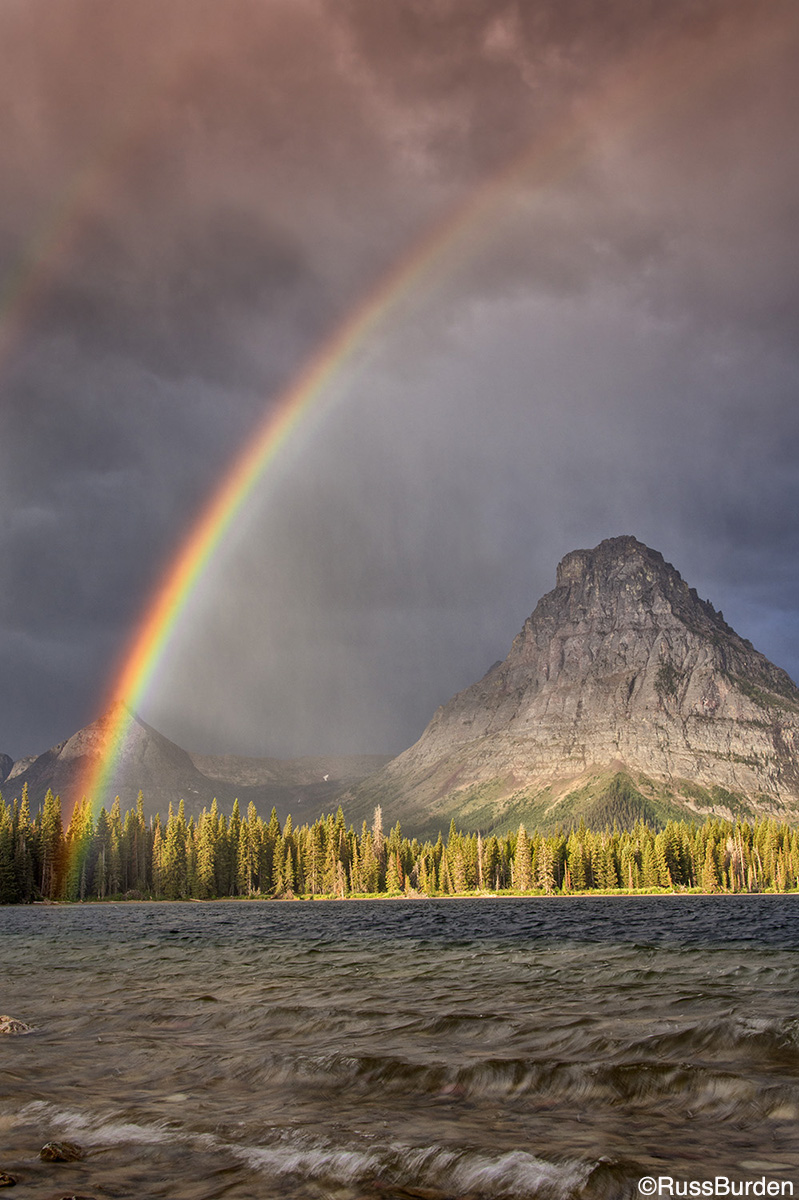
Filter It
A polarizer and graduated neutral density filter are a mountain photographer’s best friends. The polarizer helps add drama to the sky and the grad filter helps control the exposure discrepancy between a sunlit peak and a shadowed foreground. Post processing allows you to mimic the effect of a grad filter by creating multiple exposures of varying densities and combining the best parts of each exposure with software. The effect is great, but it takes time sitting in front of the computer doing the extra work. Dropping a grad in front of the lens at the time the shutter is pressed is much more efficient. With regards to a polarizer, its effect can’t be mimicked with post processing, so it’s essential you carry this filter to control glare, saturate the sky, enhance reflections and more.
To learn more about this subject, join me on a photo safari to Tanzania. Visit www.russburdenphotography.com to get more information.
The post Tips For Better Mountain Images appeared first on Outdoor Photographer.