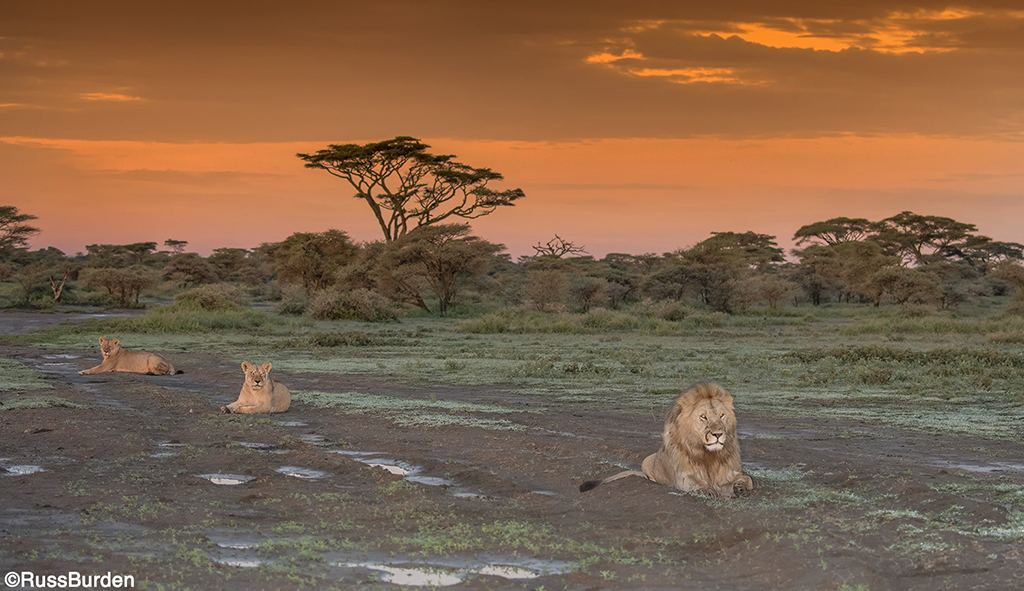
When you gain an understanding of a concept, it’s referred to as “seeing the light.” For photographers, this expression has much greater depth and meaning both in a literal and figurative way. It takes on a much broader meaning. The key to “seeing the light” lies in the word seeing. Every time a camera is held to a photographer’s eye, does he or she see the composition, the balance, the shapes, the textures, the mergers, etc? These are additional concepts that should be addressed before pressing the shutter. Figuratively, does the photographer actually see the light? After all, it’s the light that makes or breaks the picture. What it boils down to is it’s of great magnitude to see everything taken in by the lens.
Study The Light
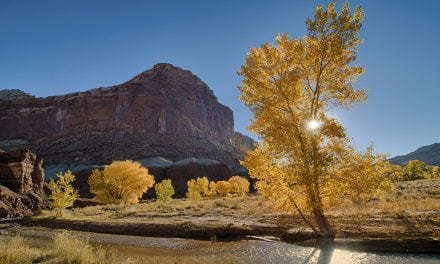
When I used to run autumn tours to the Tetons, one morning we came upon a stand of side lit aspens that were in peak color. We got out of the van to make some pictures with the Grand Teton in the background. The sound of clicking shutters filled the air. Mine was in harmony with the others, but I abruptly stopped and continued to listen. The shutter sounds carried on until I tapped everyone on the shoulder and asked, “What are you doing?” With incredulous looks, I heard a chorus of, “I’m taking pictures of the aspens and mountains.” “Of what?” I responded and explained the following: A huge dark cloud obscured the sun and the beautiful light that was illuminating the aspens went gray. This eliminated the dramatic sidelight in the foreground. Referencing the above literal explanation of “seeing the light,” I pointed out what happened and the “Aha!” moment was very powerful. We spent an additional 15 minutes at the location and each time a cloud blocked the sun, nobody pressed the shutter! Learn to see the light.
Kokerboom Trees
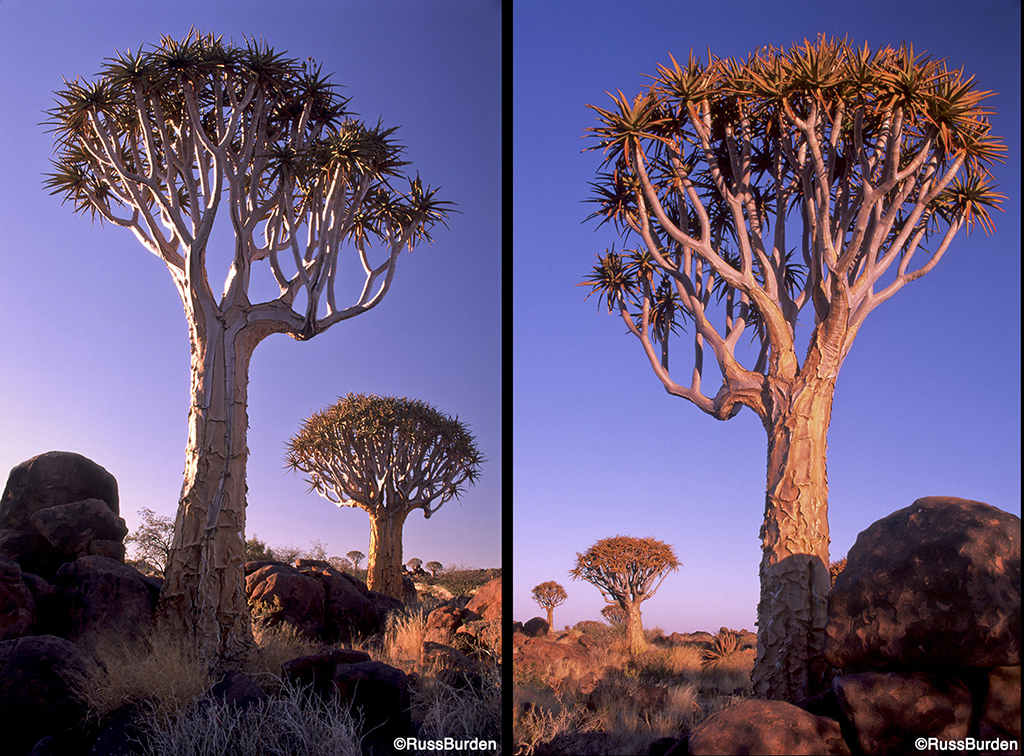
In the side-by-side images of the kokerboom trees, the photo on the left is very contrasty. In order to show detail on the shadow side, it was necessary to blow out the highlights. Additionally, the beautiful warm sunrise color that appears on the right is lost. When possible, always walk around your subject and study the light from every angle. The more familiar you become with the color, angle and intensity of the light, the more quickly you’ll be able to go to the exact spot where the light is the best and get right to work.
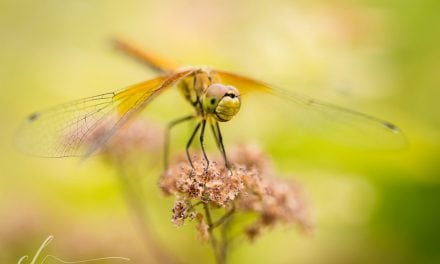
Reflection
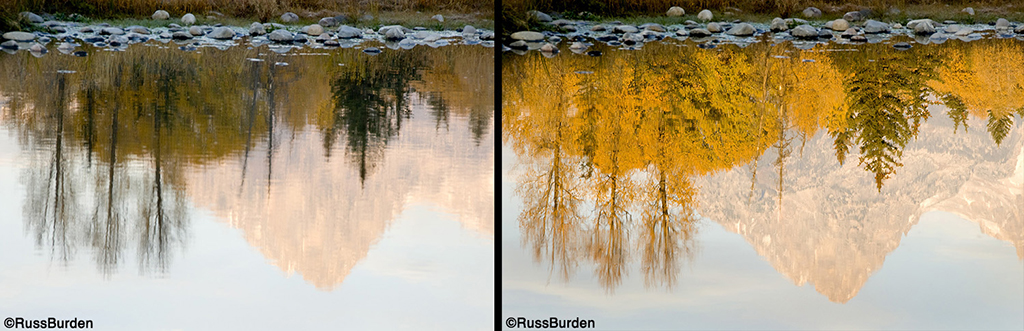
The image on the left is flat, dull and has obvious gray hues. These factors were caused by a passing cloud that blocked the sun from hitting the illuminated trees. Compare the light to the photo on the right when the sun lit the foreground and warmth and dimensionality is portrayed. Additionally, the line of rocks in the background in the dull image blend in tonality with the flat light that’s reflected. The photo on the right displays a line of contrast as the lit reflection is offset against the line of rocks that still appear in shadow.
Pygmy Falcons
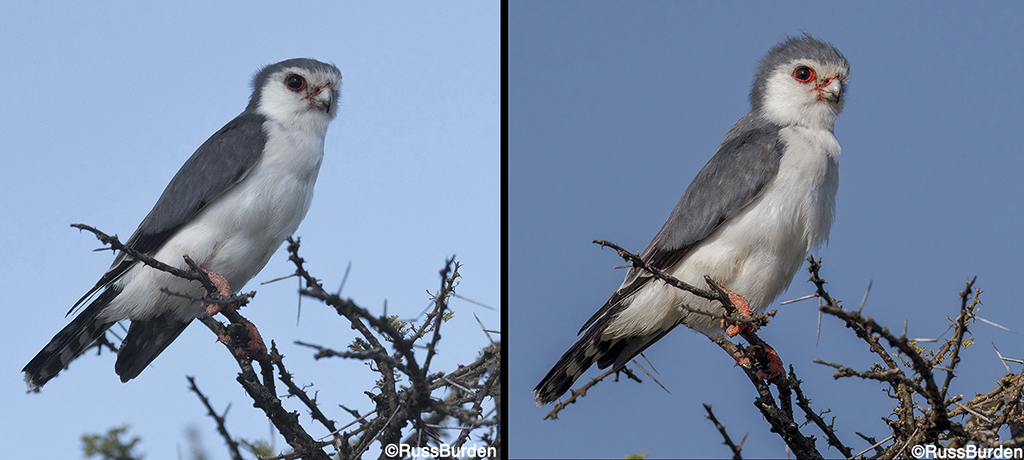
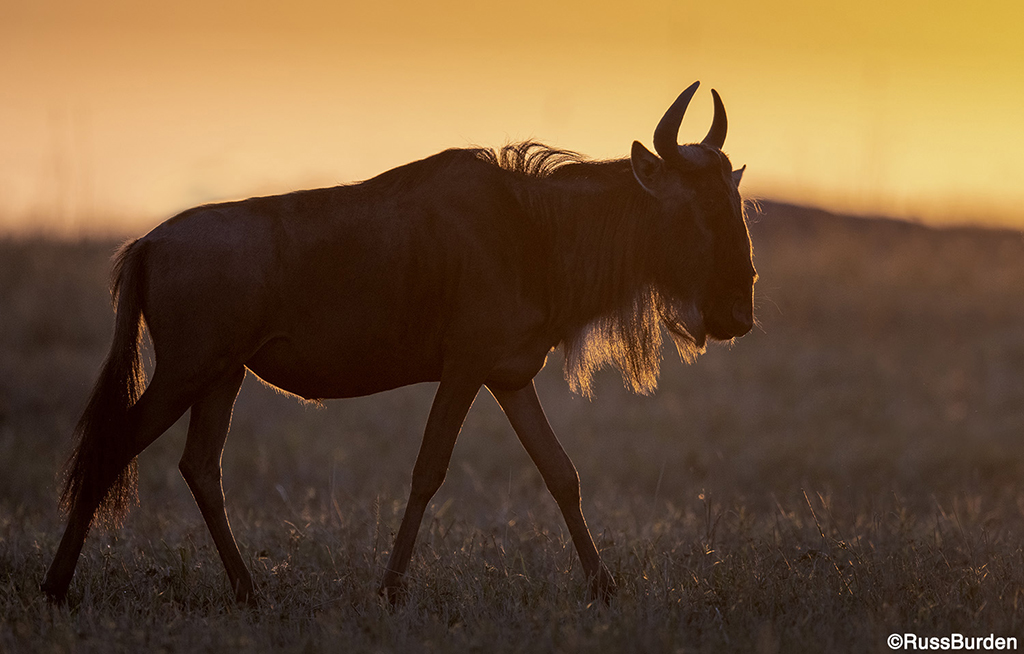
The difference in the light and look of the two photos is dramatic, but here’s the dilemma: The problem is being in a new place and seeing a species for the first time. When I lead my safaris, I refer to it as “The First Zebra Syndrome.” Regardless of the conditions, when safari participants see their first zebra, shutters fire nonstop. I agree that if it’s the first time you’ve seen the subject, take one or two shots. No need to make 100 images of badly lit, busy, terrible background, awful conditions, etc. Make the record shot and then wait for everything to fall into place. When we came upon the pygmy falcon, the light was flat, so I told people we’d wait as the cloud was small. As soon as the sun revealed itself, the shutters fired and we made some nice portraits.
Not Just The Light
Light is critical, but it’s not the only factor that can make or break an image. Be sure you also study the background since the background is equally as important as the subject. Study the conditions and if they’re not conducive to making great images, be light on the shutter. Wait until there’s separation so the animal doesn’t merge with others. Study the balance so all parts of the composition are weighted evenly. Go back through the archives of the Tips of the Week to pick up on these other concepts so you can bring your photography to the next level.
To learn more about this subject, join me on a photo safari to Tanzania. Visit www.russburdenphotography.com to get more information.
The post See The Light appeared first on Outdoor Photographer.