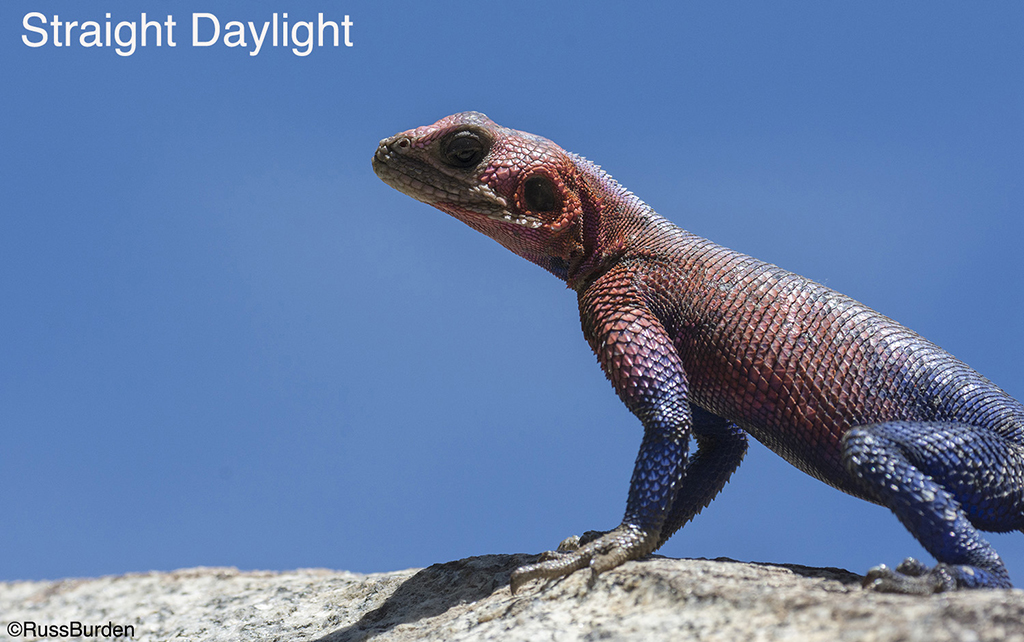
Bad light produces bad photos. If your subject matter is a grand landscape, a huge building, a towering bridge or any other large item, the sun is your main light. If it’s obscured by ugly clouds, too contrasty or the wrong angle, not much can be done to improve the light except return on another day. But, if the subject is small enough to be lit with a flash, bad light can be augmented and even overpowered and made to look good.
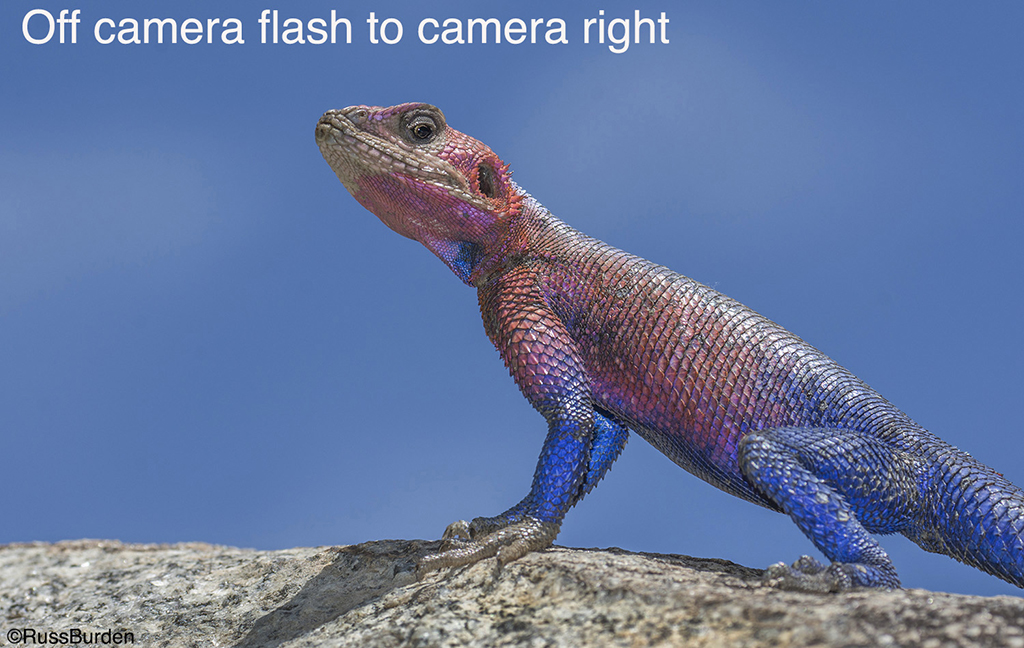
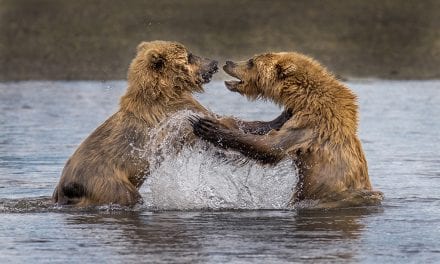
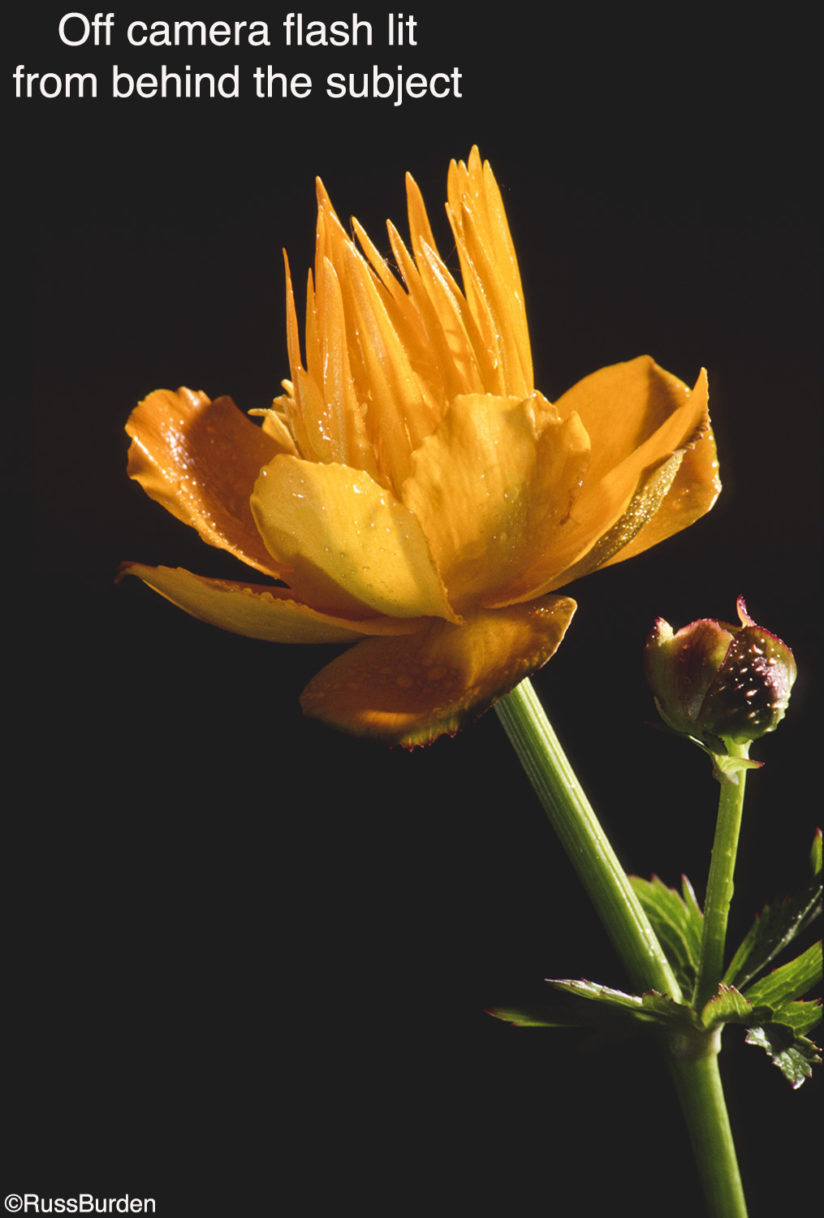
On small subjects, flash can be used to fill in shadows. This softens the overall contrast, which provides a more pleasing look. Rather than use the flash on the hot-shoe, get it off camera and aim directly at the deepest shadow or create side or backlight. The light becomes more directional and more strategically aimed. The more directional it can be channeled, the more control you’ll have over the look of the photograph.
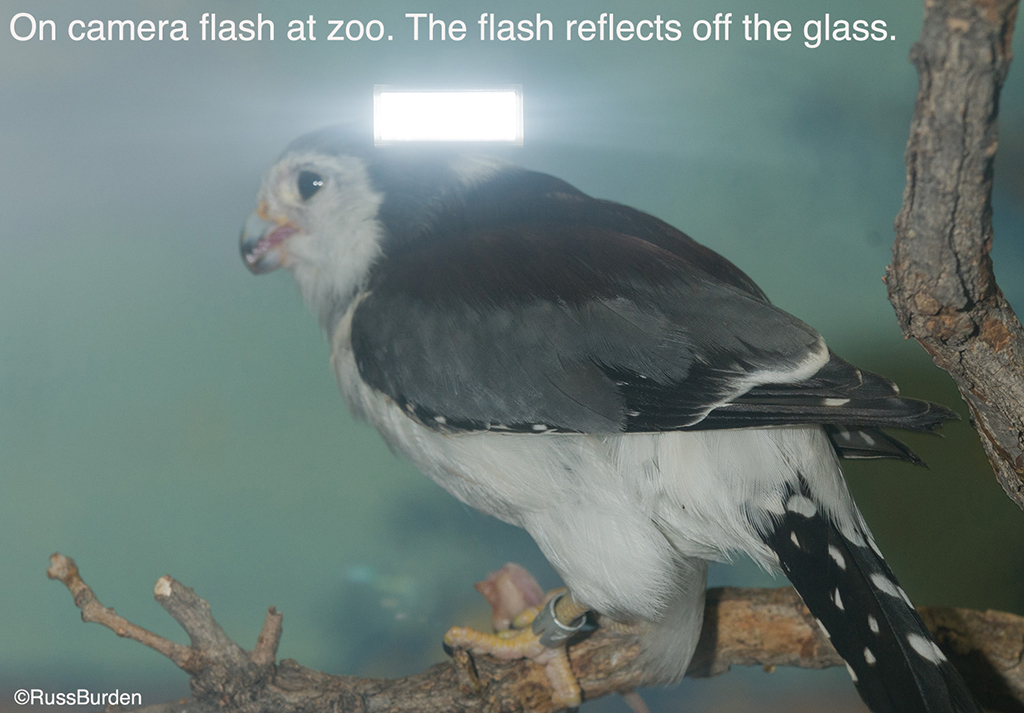
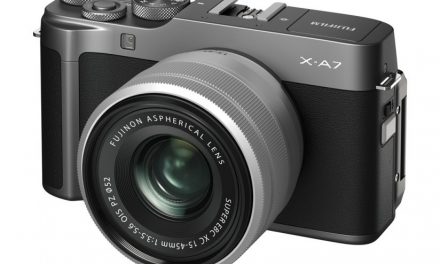
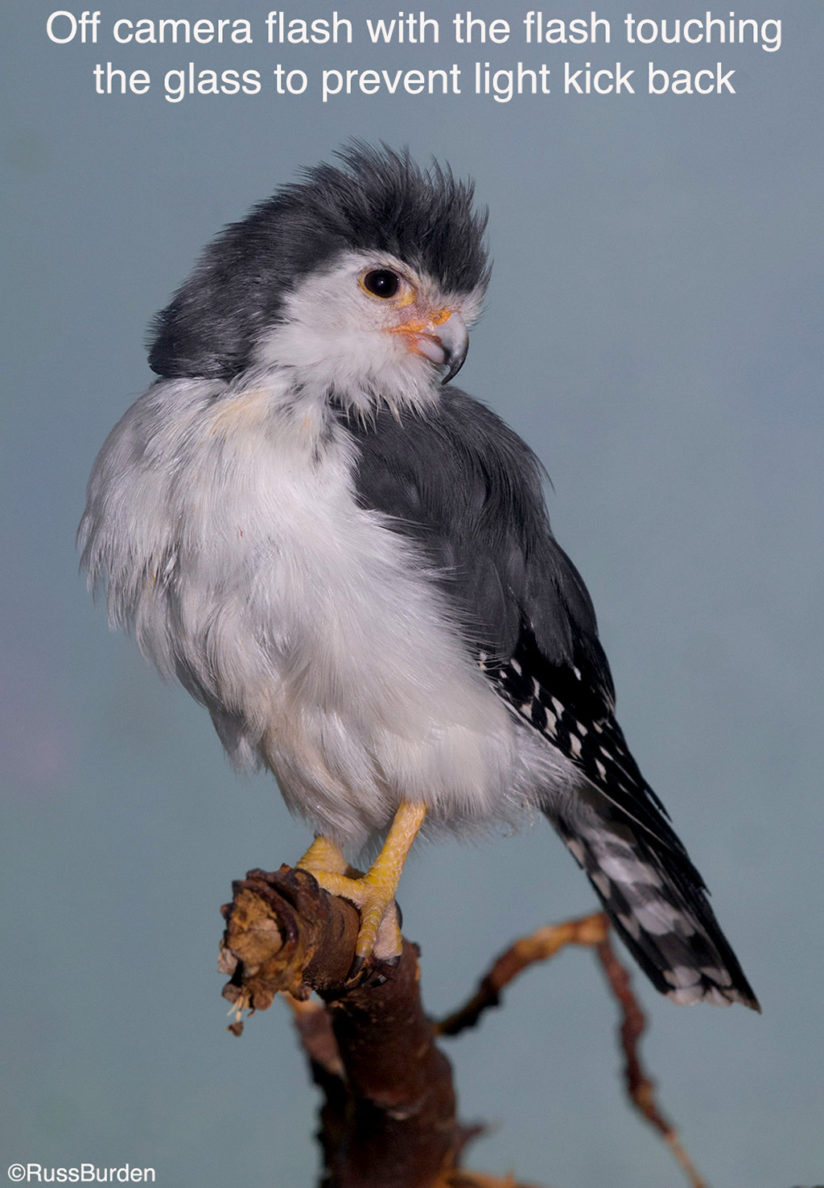
Depending on the DSLR you own, there are a number of ways to trigger off-camera flash. If the flash and camera are wired cord compatible, use the cord to connect the camera to the flash. Auto TTL flash can be maintained if you use a dedicated cord in which one end connects to the hot-shoe and the other accepts the flash. These cords are coiled and come in various lengths. If your camera has wireless capability, take advantage. The pop-up flash is used as a trigger to fire the off-camera flash. If your DSLR doesn’t have a pop-up flash, infrared transmitters can be mounted to the hot-shoe to accomplish the same. They’re sold as accessories. The most efficient way to fire an off-camera flash is with a radio-controlled transmitter and receiver system such as a Pocket Wizard. They can be triggered from hundreds of feet away and are not impacted by bright sun the way an infrared system can be influenced.
There are a number of quick ways to add intrigue to your photos made with off-camera flash:
- If the light is flat and dull, add a spotlight effect. Put the camera into manual mode. Set the ambient exposure to at least one or more stops below the meter reading. Set the flash to normal. The light from the flash will illuminate the primary subject, but the ambient light will be underexposed. Vary the amount of underexposure of the ambient light to produce varying intensities of the spotlight effect. It may become necessary to use High-Speed Synch the more you underexpose the background.
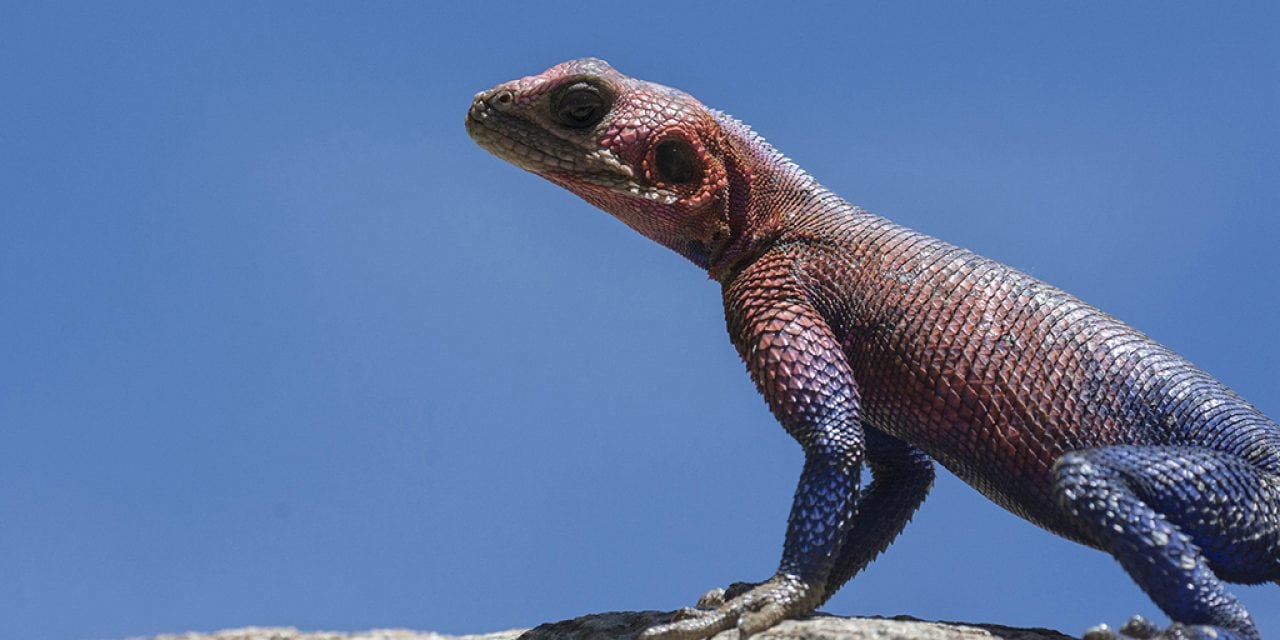
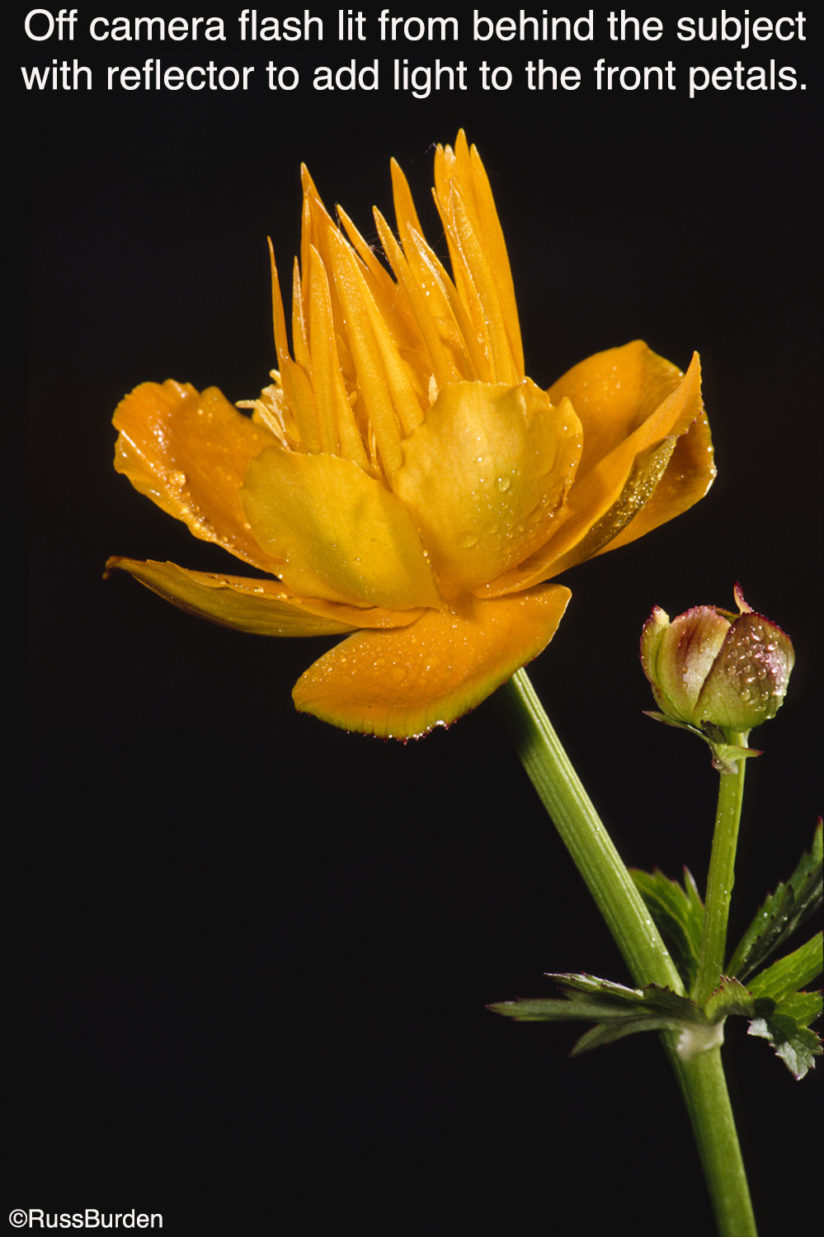
- Bounce the flash into a gold reflector with it placed to either side of the subject or in back of it, but out of the composition. The warm light will bounce back onto the subject and provide interesting warm results. An alternative is to add a warm tone gel to the head of the flash.
- Add multiple flashes—Vary the strength of each to draw the viewer’s eye to the brightest part of the image.
- Tunnel the flash—Many high-end flashes have a zoom button on the back. Press the zoom button to its most telephoto setting. The more telephoto, the narrower the beam of light. This works great when you want to spotlight an area of your subject.
- Experiment—Hold the off-camera flash to the left side of the subject and make the image. Now place it on the right side of the subject. Bring the flash to the back and use a reflector to bounce light onto the front of the subject.
- Gel the flash or flashes you use. Interesting effects can be achieved if you place a colored gel over the head of the flash. Light the left side of a still life with a warm-toned gel and the right side with a cool-toned gel.
Flash is one of the single most important tools that can add impact to an image, yet it’s underutilized. There’s a learning curve, but with a small investment in time and practice, you’ll easily see its power and wonder why you didn’t jump on the bandwagon a long time ago.
Visit www.russburdenphotography.com for information about his nature photography tours and safari to Tanzania.
The post Off-Camera Flash appeared first on Outdoor Photographer.