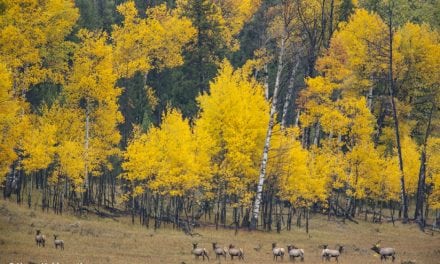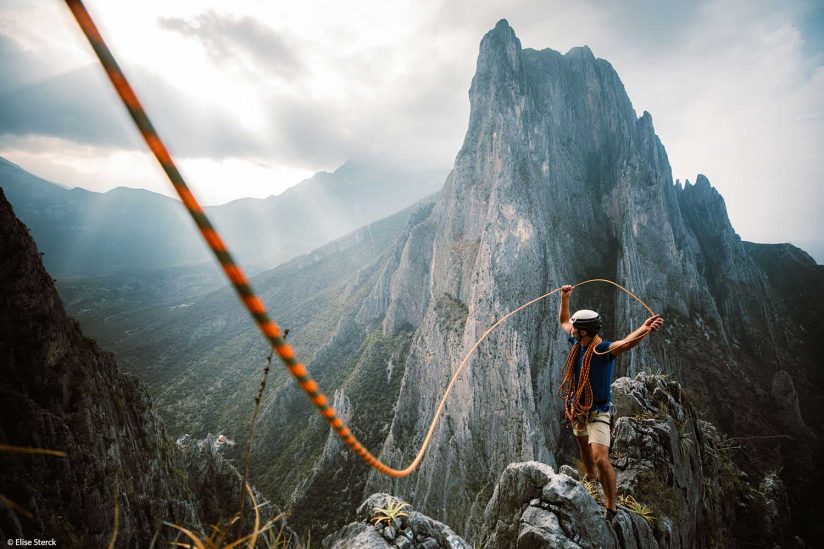
Ryan Burke “flakes” a rope after reaching the top of a climb in El Potrero Chico, Mexico. Ropes offer many opportunities to create leading lines in photos.
Creating great climbing imagery is a challenge. Knowing where to start and how to go about taking photos in a complex environment may be intimidating, and it can be difficult to successfully capture the spirit of climbing in a way that is visually appealing. The amount of effort that goes into crafting compelling images that evoke the adventure of the sport sometimes feels overwhelming—but that also makes it so rewarding when everything comes together.
I’ve been climbing for almost a decade, and that has allowed me time to learn the ins and outs of the sport and transition into photographing it. I’ve had the opportunity to create climbing images for fun as well as commercially for clients, but even after years of practice, I can say that there is always something to improve. This guide outlines some useful tips and tricks I’ve learned along the way to help you get started.
Waiting for the perfect light can be a powerful influence in creating a unique climbing photo.
Find The Right Angle
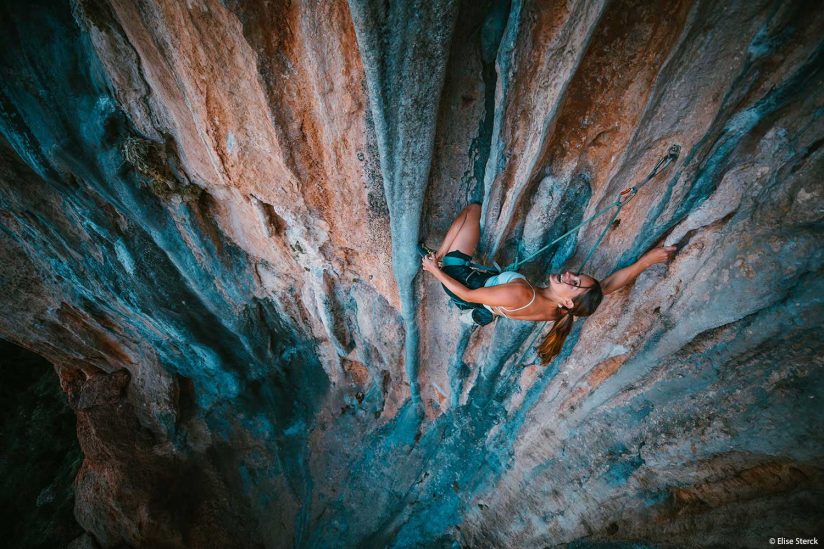
There are a few different ways to capture climbing, but one of the best methods is ascending a fixed rope with your camera to shoot down at the climber as they scale a rock face.
Ascending (also known as jugging) a rope is a technique that involves a rope being fixed to an anchor at the top of a climb so a photographer can attach themselves via specialized gear and move up the rope to gain a vantage point above the subject they plan to photograph. The top-down angle gives the viewer a sense of the exposure the climber is experiencing and is an awesome way to highlight the features of a route. If you flip through the pages of a climbing magazine or look at ads published by brands specializing in rock climbing gear, it’s likely that many of the photos you see were photographed via this method.
However, photos taken from the ground can often be just as powerful if the right composition is achieved. So, take a good look around to make sure you’re choosing the best location for your shot.
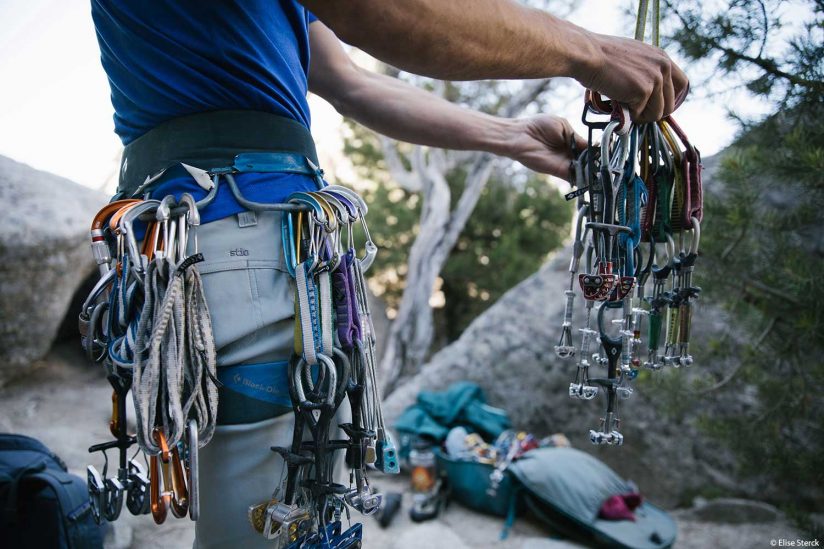
Max Pramer prepares his gear before a day of climbing in City of Rocks, Idaho.
Look For Body Positions
When photographing climbing, I like to tell myself that the perfect, five-star shot is one that shows the climber’s face and all four of their limbs. The face and each limb are valued at one star each, so you’ve got to get all five for a five-star shot.
The climber’s face can give the viewer a sense of what the climb is like and set the mood for the image. If the climb is really challenging, your climber might have an intense or focused expression, but if the climb is mellow, they might appear calm and collected. Regardless, adding an element of human emotion is a great way to take your climbing photo up a notch.
The climber’s limbs in a photograph help the viewer understand what kind of rock features a climber is moving over if you can see both of their hands and feet. Including all four limbs will also illustrate if the climber is stretched out reaching for a hold or doing some kind of dynamic move, which is usually more interesting to look at than a scrunched-up body position. It’s not always easy or possible to fit everything in, but it’s something I try to keep in mind when I’m taking these kinds of shots.
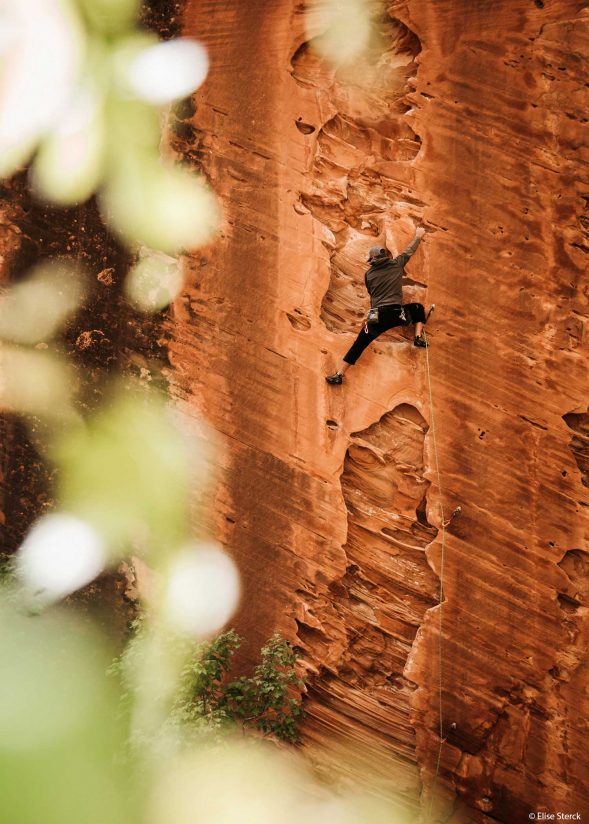
Photographing a climber from the ground can offer a variety of unique compositions, including the addition of foreground elements.
Posing & Direction
Being clear about what you want from the climber you’re shooting is essential to creating compelling imagery. Chances are, they’ll be excited about getting high-quality photos of themselves climbing and will be more than willing to accommodate a few requests.
For starters, asking your subject to wear clothes that stand out from the rock color will help make your photos pop. Climbing culture celebrates brightly colored clothing in general, so most climbers will likely have a variety of options for you.
When shooting and giving direction, be specific about how the climber can help you capture the best angles. If it makes the image stronger, don’t be afraid to ask your subject to reach up for a hold that they might not actually need, angle their face in a certain direction or redo a move. If the climber is OK with pausing mid-route, ask them to take a break at a bolt while you jug further up the rope to get more photo opportunities higher up on the climb. Creating captivating climbing photos is a team effort, so make sure you’re working with your subject to capture the best images possible.
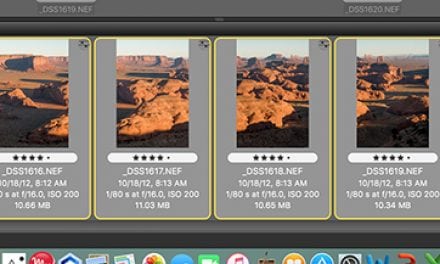
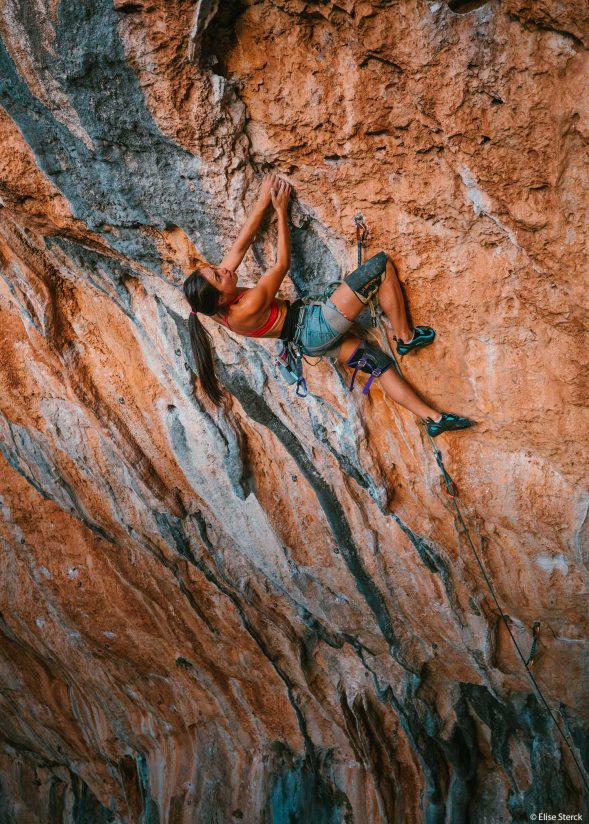
Lizzy VanPatten finds a knee bar in textured rock while climbing a route in Leonidio, Greece.
Prioritize Lead Climbing Photos
As you learn more about the sport, you’ll better understand the types of photographs that will be most interesting to other climbers. Focus on “lead climbing” instead of “top-roping.” Lead climbing is the more advanced and riskier climbing method as there is a higher chance for large falls. This will add an element of excitement to your photos. Top-rope photos can be useful for very specific stories, like an article on someone learning to climb, but in general, the majority of climbing images focus on a lead climber. Photos that feature the climber above their last bolt or piece of gear are especially exciting.
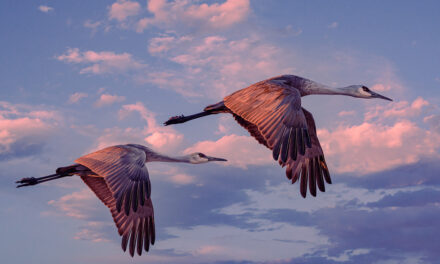
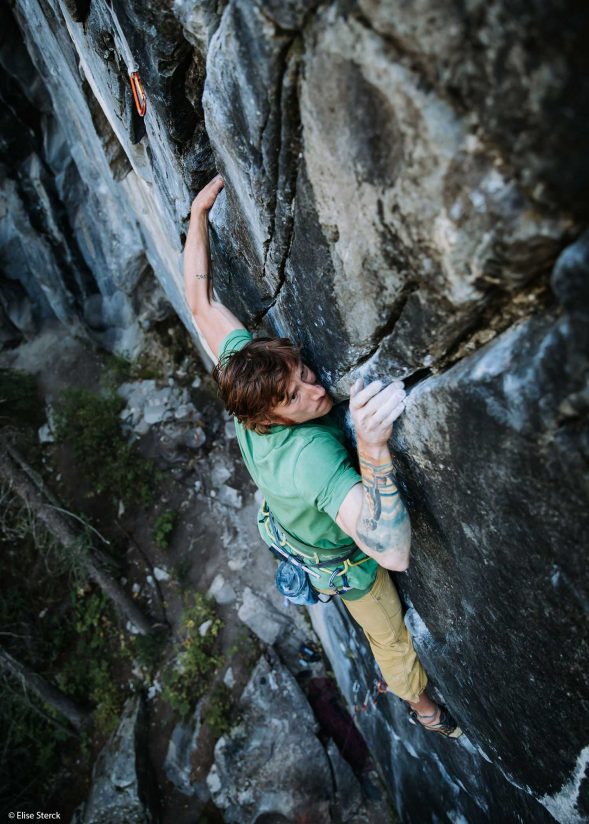
As demonstrated in this image of Jules Jimreivat, capturing a climber in an outstretched position allows the viewer to understand the nature of the climb.
Find Something Unique
Learning in advance what makes a climb interesting will give you an idea of how to photograph it. Take some generic shots, like photos of the climber “chalking up” or clipping a bolt to complete the story but focus most of your photography on what makes the climb exciting.
If you’re looking to capture something noteworthy about the route you’re photographing, your athlete may have some insight on the nature of the climb. Perhaps there’s an overhang that the climber will have to do a dramatic move to surmount, a one-finger pocket that they’ll have to hang from or a knee-bar that would make for a more unique shot. Asking them ahead of time where these distinctive features are will help you previsualize your shots.
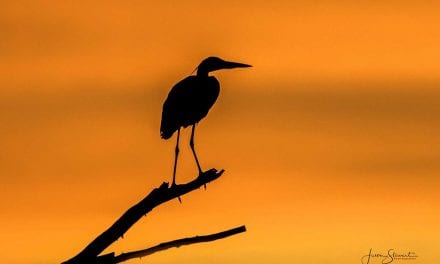
Andrew Hall demonstrates the value of wearing brightly colored clothing to stand out from the rock while climbing a route in Teton Canyon, Wyoming.
The Right Light
As with other forms of photography, planning for the right conditions is key to creating the perfect climbing photo. It may seem counterintuitive to non-climbing photographers, but it’s often best to photograph climbers in the shade or on an overcast day when the light is evenly diffused. If you’re shooting top-down shots, direct sun can often create harsh shadows on the subject and the features of the route.
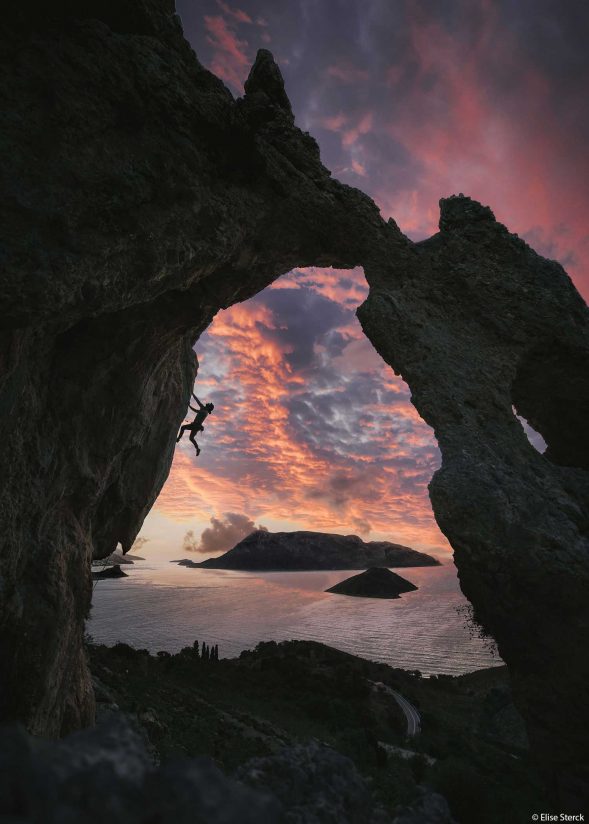
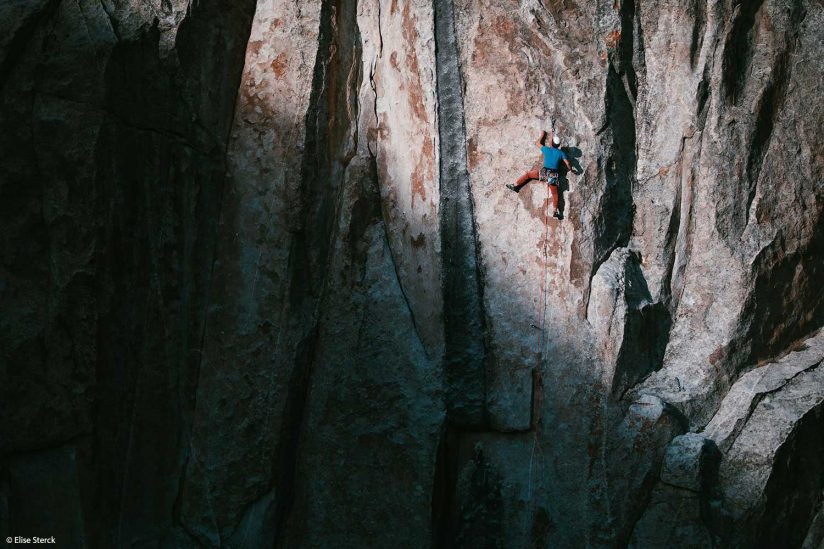
Playing with dramatic light tends to work better when shooting the climber from a distance in a “big landscape, tiny person” style shot.
Ryan Burke chases the light on a route in City of Rocks, Idaho.
Carrying Your Gear
Pack your camera in a well-protected bag or case, ideally one that is specifically designed for camera gear and provides ample padding. If you’re bringing gear to ascend a rope, make sure your camera and any additional lenses are isolated in their own case or camera cube inside your pack. The carabiners and ascenders required to jug up a rope could easily scratch your camera equipment if everything is jumbled in a bag together.
If you are ascending a rope, it’s best to bring a smaller camera bag that slings over the shoulder and gives you easy access to your gear once you’re ready to shoot. I like to use the Wandrd ROUTE chest pack, which accommodates a camera body with one attached lens and can easily be slung over my shoulder as I work my way up a fixed rope. Some climbing photographers ascend ropes with just their camera slung over their shoulder via the camera’s strap, but I wouldn’t recommend that for beginners, as you’re more likely to hit your camera on the rock face or your ascending equipment on the way up the rope. Unless you’re very confident and proficient with your skills ascending a rope, it’s best to keep your camera safely stowed until you’re ready to use it.
Another advanced technique is to bring a carrying case that can accommodate an extra lens should you want to change lenses. I also don’t recommend that for beginners as switching lenses while you dangle mid-air from a rope is much harder than it sounds, and dropping a lens is a very real possibility. For this reason, it’s best to choose a zoom lens that can allow for multiple focal lengths. If I’m ascending a rope, I know that I’ll likely be close to the climber and will usually choose my 16-35mm lens. This way, I can capture the climber when they’re close to me but also zoom in a bit if they happen to be further away. On occasion, I’ll choose a 24-70mm lens if the rope I’ve ascended doesn’t bring me very close to the climber. Use your best judgment as each climb and scenario is unique.
Safety
Climbing is a complicated sport that can be dangerous if you use gear incorrectly, so understanding your systems is of utmost importance. If you plan to climb or ascend a rope to get photos, it’s essential to be confident in your rope skills so you can keep yourself and those around you safe during the climb.
If you’re a climber and already understand the sport and the gear required for it, learning to ascend a rope likely won’t seem too complex. However, if you aren’t a climber, ascending ropes might feel more intimidating. You’ll want to make sure the person you’re learning from is credible. The best option may be to hire a rock climbing guide to show you the ropes. If you do choose to invest in learning how to climb or ascend a rope, you don’t have to be an amazing climber to capture great climbing imagery. Several of the photos in this article feature routes that I personally wouldn’t be able to climb, but I’m still able to shoot quality images because I have an understanding of how the sport works, and I know my gear well.
Alternatives For Beginners
If you’d like to try climbing photography but aren’t invested enough to go through the process of learning how to climb or ascend a rope, there are still ways to try your hand at it. One of the best ways to start photographing the sport is to shoot bouldering.
Bouldering doesn’t involve the use of a rope and typically involves much shorter routes than other forms of climbing. This makes it easy to get up close without having to ascend a rope or climb anything yourself. It’s also a great way to observe climbers and how they move over rock, which will help you learn what body positions photograph well.
Another alternative is to go to a climbing area and focus on lifestyle shots of climbers interacting with their gear. Capturing climbers flaking their ropes, putting gear on their harnesses or chalking up can be a great intro to understanding how the sport works and deciding whether you’re interested in shooting more of it.
Whether you’re a seasoned climber or new to the sport, be prepared to put in a lot of work to get your climbing photography portfolio to stand out. Both climbing and photography take time and effort to master and maintain, so expect lots of preparation, communication and practice. Hopefully, keeping these tips in mind will help inspire confidence and boost creativity for your next climbing shoot. OP
See more of Elise Sterck’s work at elisesterck.com.
The post Learning The Ropes: How to Photograph Rock Climbing appeared first on Outdoor Photographer.