When one thinks about what constitutes great light to photograph wildlife, early morning and late afternoon comes to mind. The rich golden hues at the edges of the day provide magnificent illumination that’s highly desirable. The highlights that appear in the eyes of the animal reflect the low angle of the sun, the warm color is sublime, contrast is softened, shadows are minimal and the overall feel it provides keeps wildlife photographers smiling for hours after the shoot. While it reigns number one in terms of desirable brilliance, it’s not the be-all and end-all. If you haven’t incorporated sunrise and sunset light into your repertoire, by all means, get out there and exploit it. But, if you’ve photographed a certain species multiple times and have lots of files made during this time of sweet light, it’s time to branch out and aim for the sun.
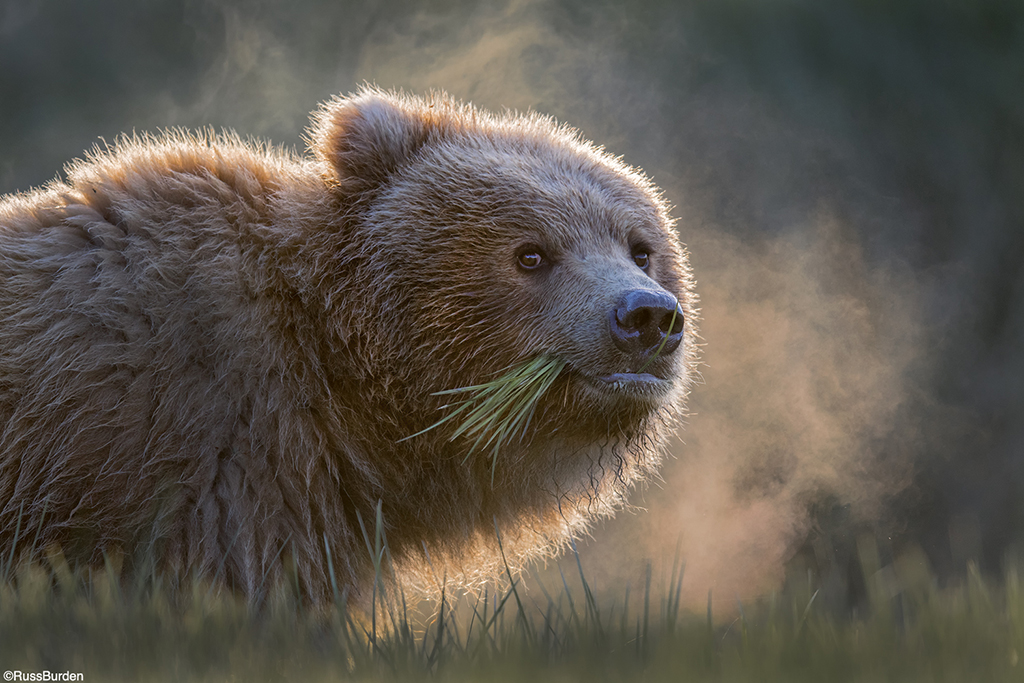
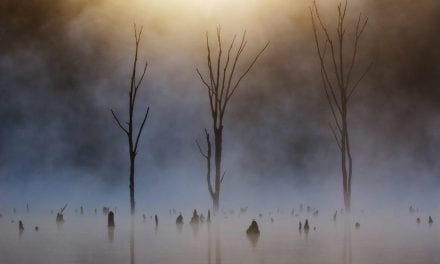
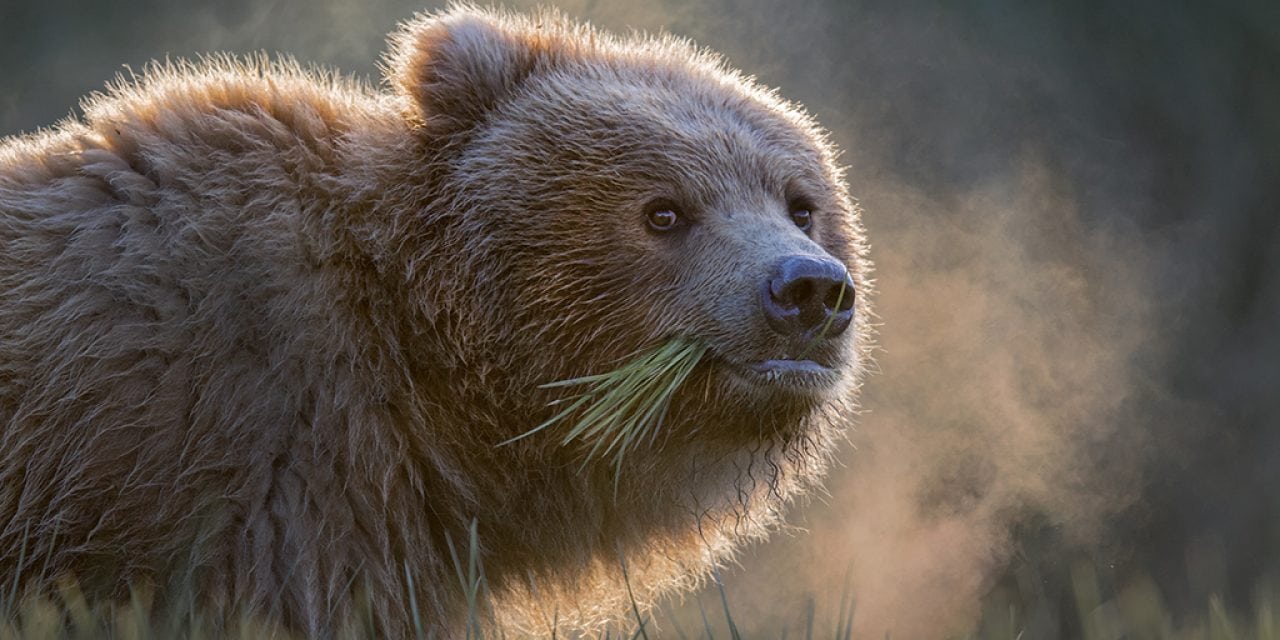
Mist, Fog and Condensation: Mist, fog and condensation are more likely to be found in early light, and when it is, I implore you to take advantage. When fog is front lit, a peaceful scene is created and it’s often sought. But, when you introduce a wildlife subject into the mix and you backlight the animal enveloped in the mist, magic occurs. A rim of light surrounds the subject revealing a gorgeous outline. This effect is heightened with animals that have bristly fur or ruffled feathers. Their perimeter glows and mimics the color of the rising sun. A second bonus is revealed as the backlit mist also glows as the sun shines through the condensation and also shares its warm colors. The tricky part is that it’s essential you’re extremely cognizant of your exposure. There’s a very fine line that determines if you blow out the highlights versus how much you can open the shadows in post-processing to bring out all the details. If the animal remains still, HDR is an option, but any movement destroys that option. Instead, take three seconds to check your histogram and make sure you nail the exposure.
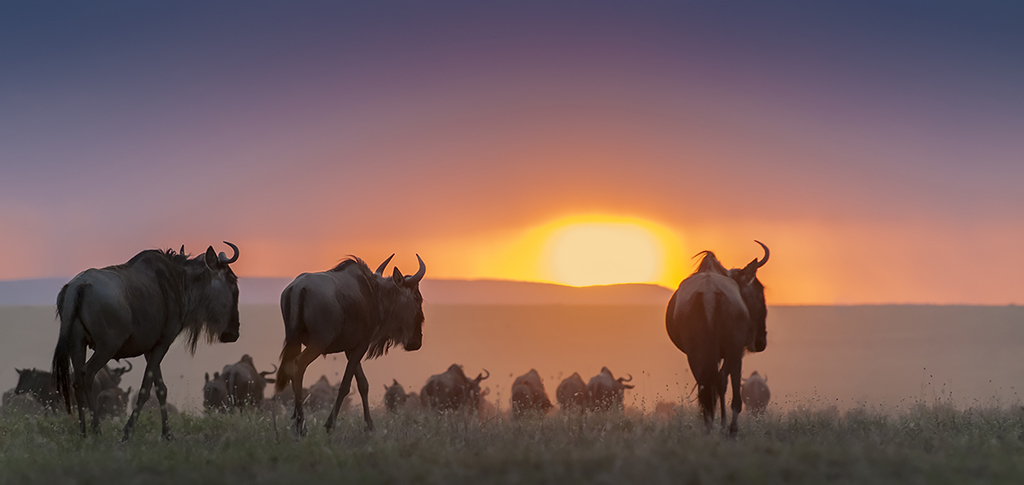
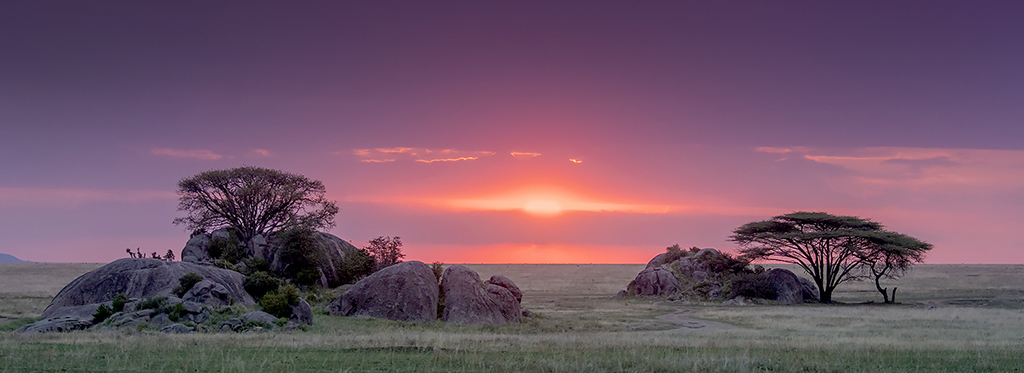
Put The Sun In The Photo: I love to shoot right into the sun when conditions line up that allow it. If the sun is very bright with no diffusion, I avoid pointing my camera toward it for a number of reasons. The most important is damage to my eye and the second is damage to my camera. But if the sun is somewhat diffused by moisture, if thin clouds conceal its intensity, if it’s partially draped behind the horizon or something else that blocks its path, I go into high gear and use that light to my advantage. I find that a low camera angle works well, so I don’t extend the legs of my tripod. Even more so, I’m often found prone on the ground. In the image of the wildebeests, I laid across the grasses of the Serengeti and waited for the three foreground subjects to frame the sun. Again, be cognizant of your exposure to maintain shadow and highlight detail that can be rescued in post-processing.
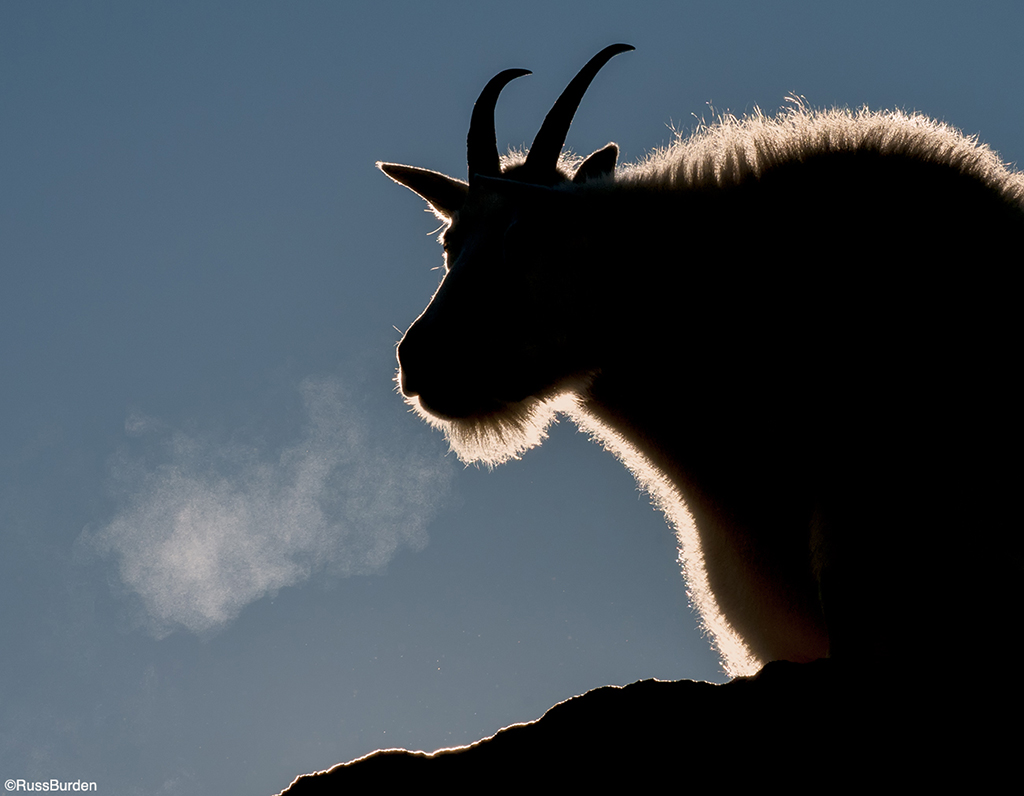
Bright and Intense Sun: In the image of the mountain goat, I used an extremely bright sun. I was on the top of Mount Evans, above 14,000 feet, and the sun was intense. There was no way I could place the sun in the composition, but I still wanted to create backlit images. The mountain goat was crawling among the rocks about 30 minutes after sunrise. The light had lost its warmth, but given its intensity, I knew if I were able to place it directly behind a subject that would glow, it had the potential to make a successful image. I got down low in front of the goat, and with a shorter lens, I maneuvered so it blocked the ball of the sun. Given the chill in the air due to the elevation, as the goat exhaled, the carbon dioxide became a focal point. This image is all about the backlight: the glow around the goat, the backlit breath and the rim light on the lower left rock. Had I sought a front-lit image of the same goat, it would look like so many other ones I already have in my files. Aim for the sun!
Carpe Diem: When you’re out in the field making wildlife photos, you’re often found in a location that’s scenic. By all means, if a great backlit scenic falls into your lap, don’t overlook the opportunity to make a dramatic shot. Before I began to concentrate on wildlife photography, I shot nothing but scenics. I still keep my eyes open for them and take advantage when they’re bestowed. I use the same guidelines found above to make the images successful. The one aspect I do want to emphasize when it comes to landscapes is to be sure you incorporate the rule of thirds. Place significant subjects in the upper and lower left and/or in the upper and lower right. If there are multiple subjects, be sure to maintain balance so no one side is “heavier” than the other. So head out to photograph your favorite animal, and if you’re bequeathed gorgeous surroundings, make a landscape where you aim for the sun.
Visit www.russburdenphotography.com for information about his nature photography tours and safari to Tanzania.
The post Aim For The Sun appeared first on Outdoor Photographer.