If you’re a Windows user who would rather pass on the monthly subscription for Photoshop and Lightroom, but don’t want to compromise on features or capabilities, ACDSee Photo Studio Ultimate 2019 is a comprehensive and incredibly powerful option. This software suite combines sophisticated digital asset management and RAW developing tools with an extensive range of photo adjustments and effects, making it the only application you need for a complete digital image workflow—a terrific value at just $149 for a lifetime license.
Last year, we took an extensive look at ACDSee Photo Studio Ultimate 2018, and reviewed some of our favorite features in depth. Be sure to check out those articles if you aren’t familiar with what this software can do, as they provide thorough introduction to its workflow and major features.
In this article, we’ll focus on a few of the new features in the latest version, ACDSee Photo Studio Ultimate 2019—available now—that will be of particular interest for nature and landscape photography.
Brush On Adjustments
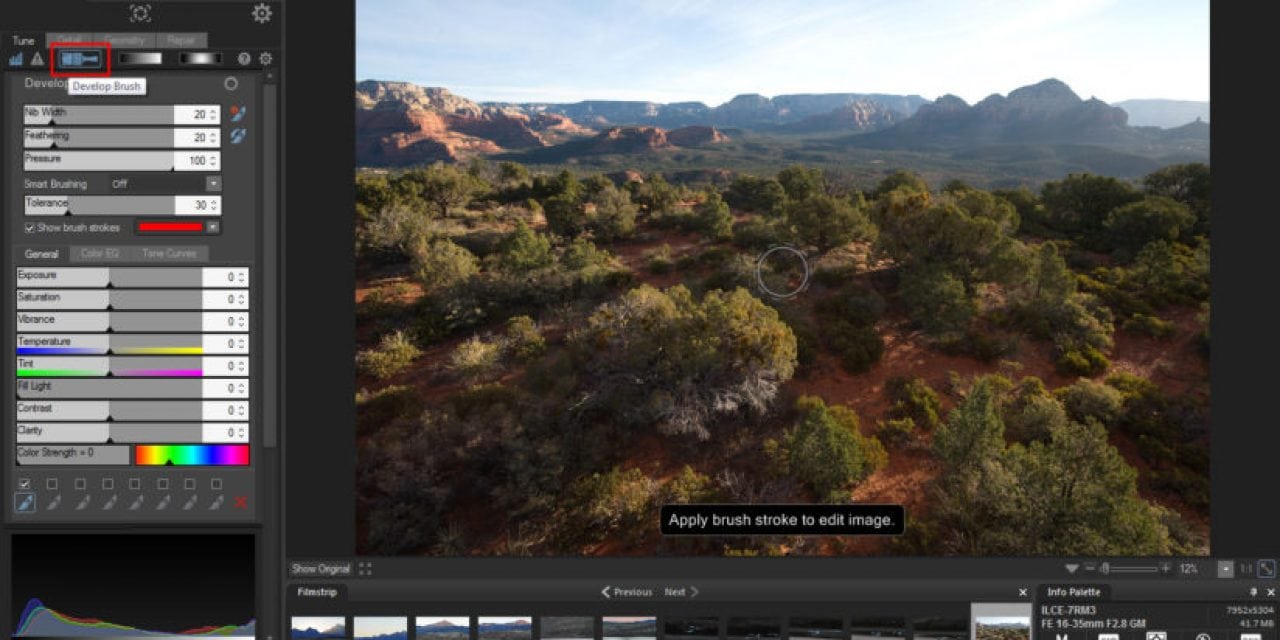
Develop Mode offers a Develop Brush that allows you to “paint” a variety of adjustments on to specific areas of an image, rather than applying those adjustments globally. Photo Studio Ultimate 2019 expands the available adjustments, which include Exposure, Saturation, Vibrance, Contrast and more.
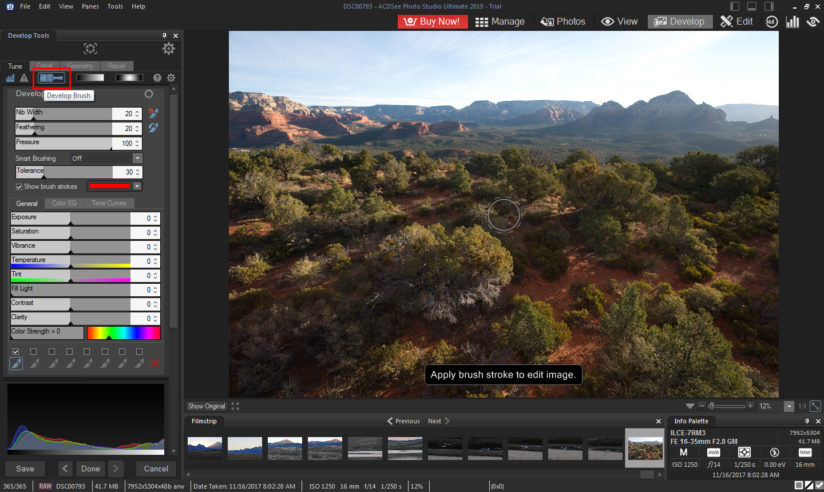
To activate this tool click on the Develop Brush icon near the top of the Develop Tools palette (outlined in red in Figure 1.) In this example of an early morning landscape image taken in Sedona, Arizona, we’re going to use the brush to bring down the exposure in the sky and background to better match the exposure of the foreground.
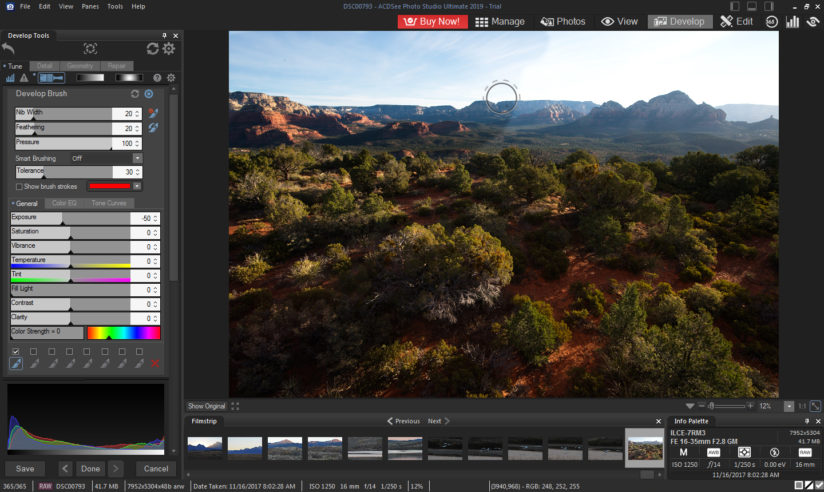
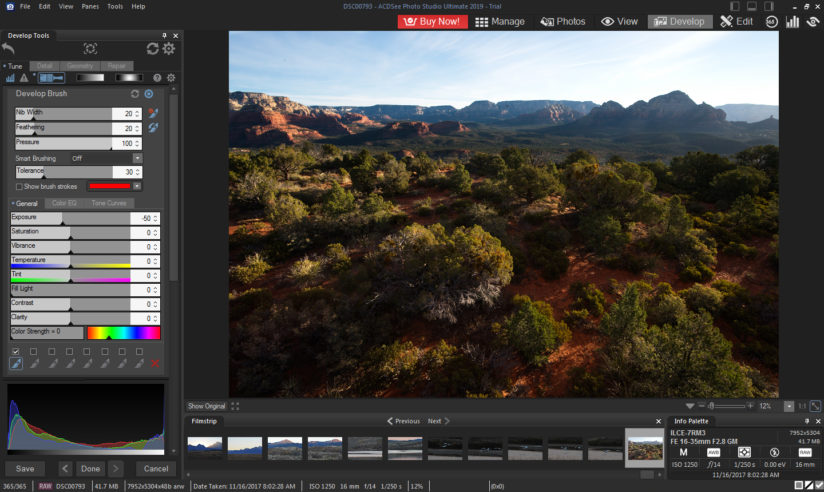
First, we increased the contrast globally to +25 to give the image a little more depth in the shadow areas. Then, we activated the Develop Brush and set the Exposure to -50. In Figure 2 (above), you can see the adjustments available for use with the Develop Brush. Notice in the sky, we’ve brushed the -50 Exposure adjustment on to the left half of the sky but not the right. Figure 3 (below) shows the final image after using the brush on the entire sky and lighter areas of the background.
The Develop Brush is great when you want to apply an adjustment to specific areas that aren’t easily defined with a selection tool or a linear gradient.
Black & White Color Contrast
When converting an image to black and white, you can now adjust the contrast of individual colors, and set the brightness range that the contrast adjustment will target for each color. To access this feature, first open the image in Edit Mode and click “Convert To Black & White” in the “Color” section of the Edit Mode Menu. You’ll be presented with a preview of the conversion with default settings, and a sidebar of adjustments as shown in Figure 4.
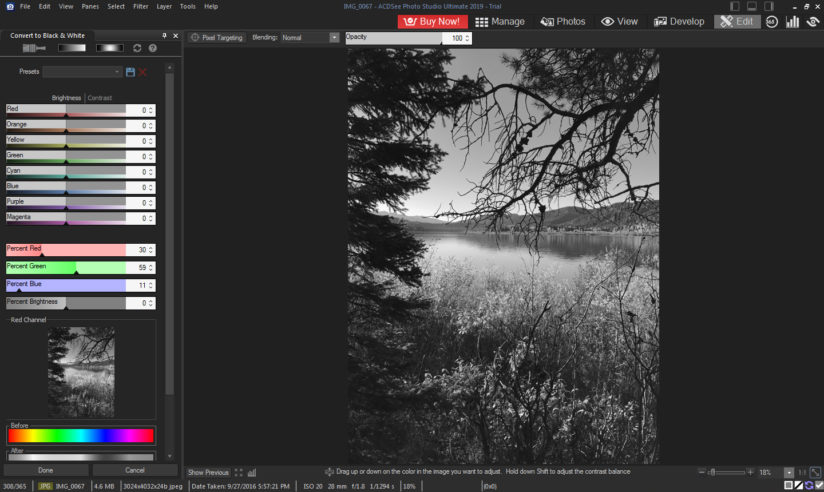
Now you can use the sliders to adjust the brightness and contrast of eight colors to control how they are converted to monochrome. Compare Figure 4 (above) with Figure 5 (below) to see the dramatic difference these controls can make when you are creatively interpreting from color to black and white.

Color EQ: Color Contrast
Similar to the color contrast tools described above for black-and-white conversion, you can adjust contrast of individual tones when developing color images to bring out details in highlights and shadows.
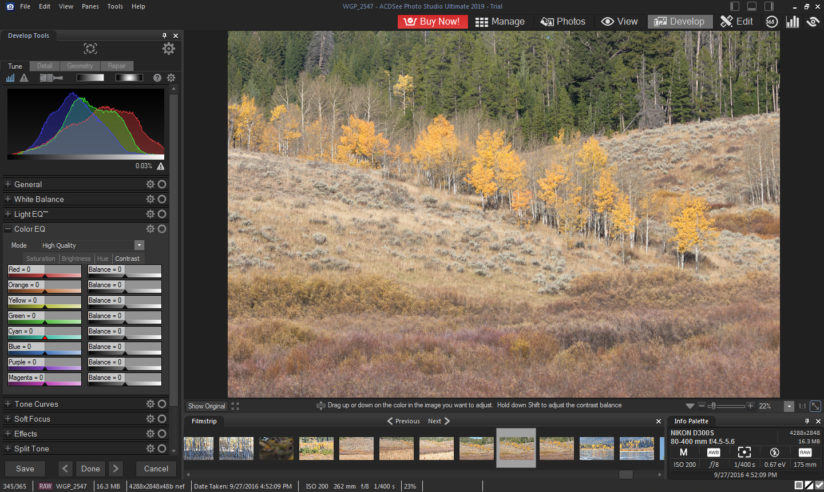
In Develop Mode’s Develop Tools palette, expand the Color EQ section and then click on the “Contrast” tab (Figure 6). Here again are the eight color sliders that allow you to alter the contrast of these colors individually. In this example, the image has a lot of yellow and orange tones, and lacks contrast and definition in those areas. In Figure 7, we have boosted the contrast of the yellow and orange tones while leaving the others untouched, and you can see substantially enhanced the definition of those areas of the image.

Color EQ Color Contrast adjustments are also available in Edit Mode.
Luminosity Selection
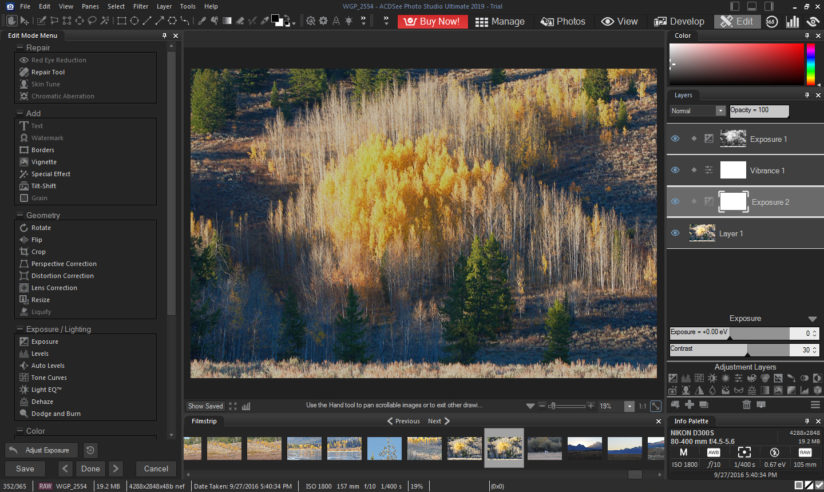
This tool is really handy when working on an image with hot highlights that you want to dial back, such as the fall scene shown in Figure 8. The tool will automatically select the very brightest areas of an image. The software automatically and intelligently feathers the selection depending on the brightness of the individual pixels.
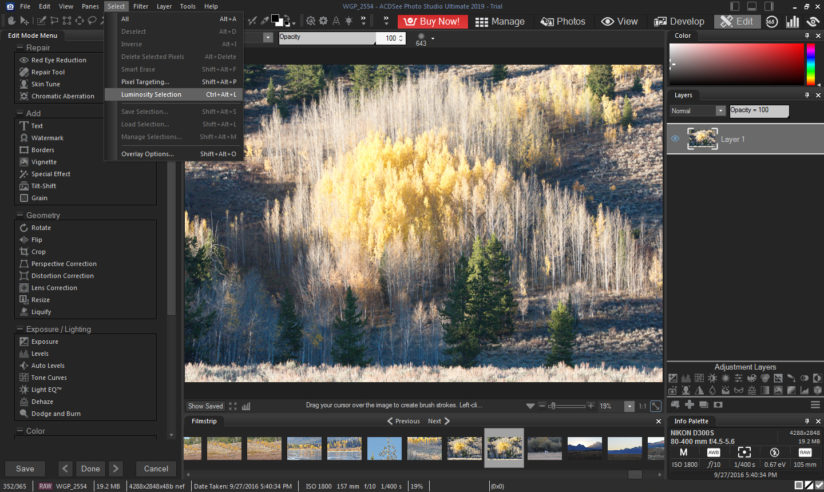
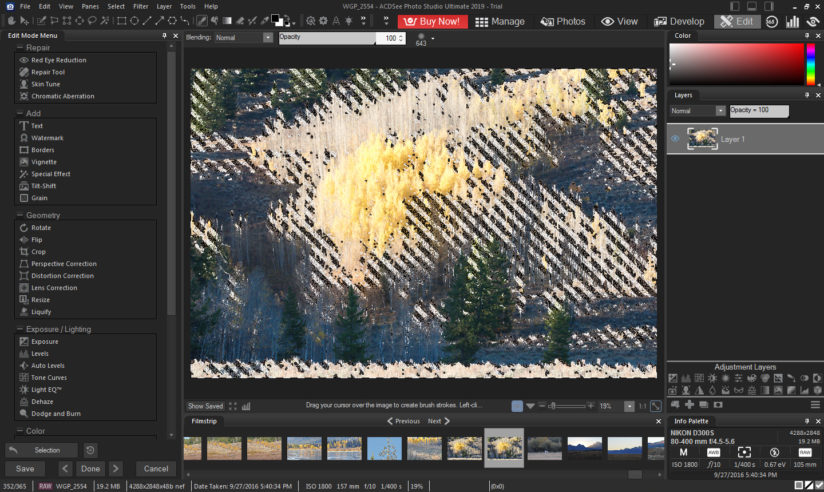
To access this feature in Edit Mode, go to the Select drop-down and choose Luminosity Selection, or use the keyboard shortcut Ctrl+Alt+L. You’ll instantly see the selection appear, as shown in Figure 9.
That’s all you have to do to create the selection. Now it’s up to you how you want to use it. Since ACDSee Photo Studio Ultimate supports Adjustment Layers, we added an Exposure Adjustment layer. The software automatically used the selection created by the Luminosity Selection tool to mask the layer, as shown in Figure 10. We dialed the Exposure back to -80, which brought the highlights into much better balance with the mid-tones and shadows.
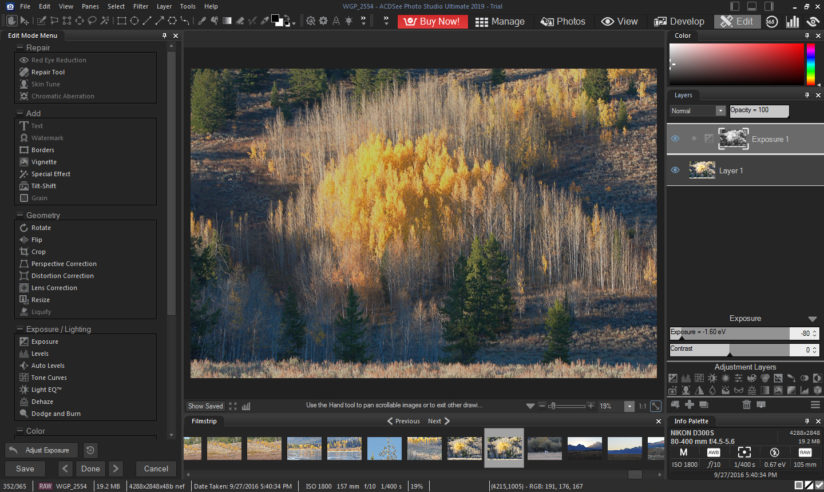
As a final touch to this image, we added two additional Adjustment Layers (without a selection mask, so that they would effect the entire image): a Vibrance layer to slightly boost the saturation of under-saturated colors; and a second Exposure adjustment to boost the contrast of the image overall. Figure 11 shows the results of those adjustments.
The nice thing about Adjustment Layers is that they’re non-destructive, so if you don’t like a change you’ve made, you can just delete the layer and it’s like it never happened. With Luminosity Selection, it’s now easier than ever to limit the effects of an Adjustment Layer to only the brightest areas of an image.
More New Features In ACDSee Photo Studio Ultimate 2019
The features illustrated above are just of few of the great new features in the latest version of Photo Studio Ultimate. Some of the other noteworthy features include:
- Face Detection & Recognition makes organizing and finding photos of specific people a lot easier. The software identifies faces and allows you to assign names to individuals so that the software can learn who is who in your image library.
- You can copy and paste adjustments made to one image in Develop Mode to another image or multiple images from within Manage Mode or View Mode—super handy if you are color correcting several images from the same shoot, for example.
- When editing image metadata, a new Auto Advance function will automatically move to the next image when you’ve completed the info for the current image so you don’t have to click between thumbnails.
To learn more about ACDSee Photo Studio Ultimate 2019 including additional new features, or to download a free trial, visit acdsee.com/en/products/photo-studio-ultimate.
The post ACDSee Photo Studio Ultimate 2019 appeared first on Outdoor Photographer.