Last week, in part one of this two-part tip, we learned about the grand landscape and how to include foreground, mid-ground and background perspectives in your images. This week’s tip has you use telephoto eyes to pick out narrow sections of the landscape and zero in on a smaller scale.
While many people associate landscapes with wide-angle lenses, it limits the number of potential images and subject matter that may wind up on the hard drive. Rather than take in the entire scene, break it into blocks and study each section. Exhaust All Possibilities and break out the telephoto.
Food for thought: Most wildlife photographers reach for the telephoto when they encounter a beautiful subject to capture the elusive portrait. That being said, a better image could be created if a wide angle was used to show the animal in the environment! The same works with landscapes. The sprawling set of sea stacks or majestic mountains may be bathed in light, but a much narrower section of the landscape may have a single shaft of light that needs to be emphasized. Either way, create as much diversity as possible and exhaust all possibilities.
As mentioned last week, a number of factors work in unison to conjure up a peaceful landscape. Although there are many, all of them needn’t be included in a single photo. The bottom line is most great landscape images include just a few. With all these factors, it’s a wonder any great scenic image has ever been created. And yes, another few keys to add to the mix are investing time, patience in learning and practice!
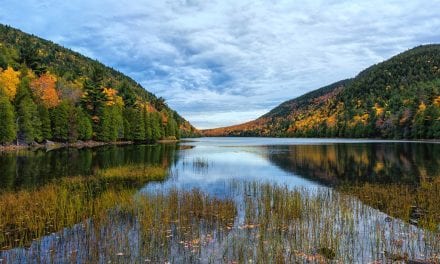
Telephoto eyes work differently than wide-angle eyes when it comes to landscapes. Rather than take in the entire scene, narrow your field of view the same way a telephoto lens works, but take it a step further. Don’t just think in vertical or horizontal slices of the scene. Within each slice, look at the top, middle, bottom and edges. Zoom into the area in to which you just zoomed! Rather than look at the forest, note how the light plays on a single tree. Is that tree offset against a dark background so it will stand out based on the illumination? Look at just the reflection of the mountain peak illuminated by sunset light and dramatic clouds in the calm tarn as the sun sets near the horizon. The possibilities are endless.
Shapes In The Intimate Landscape
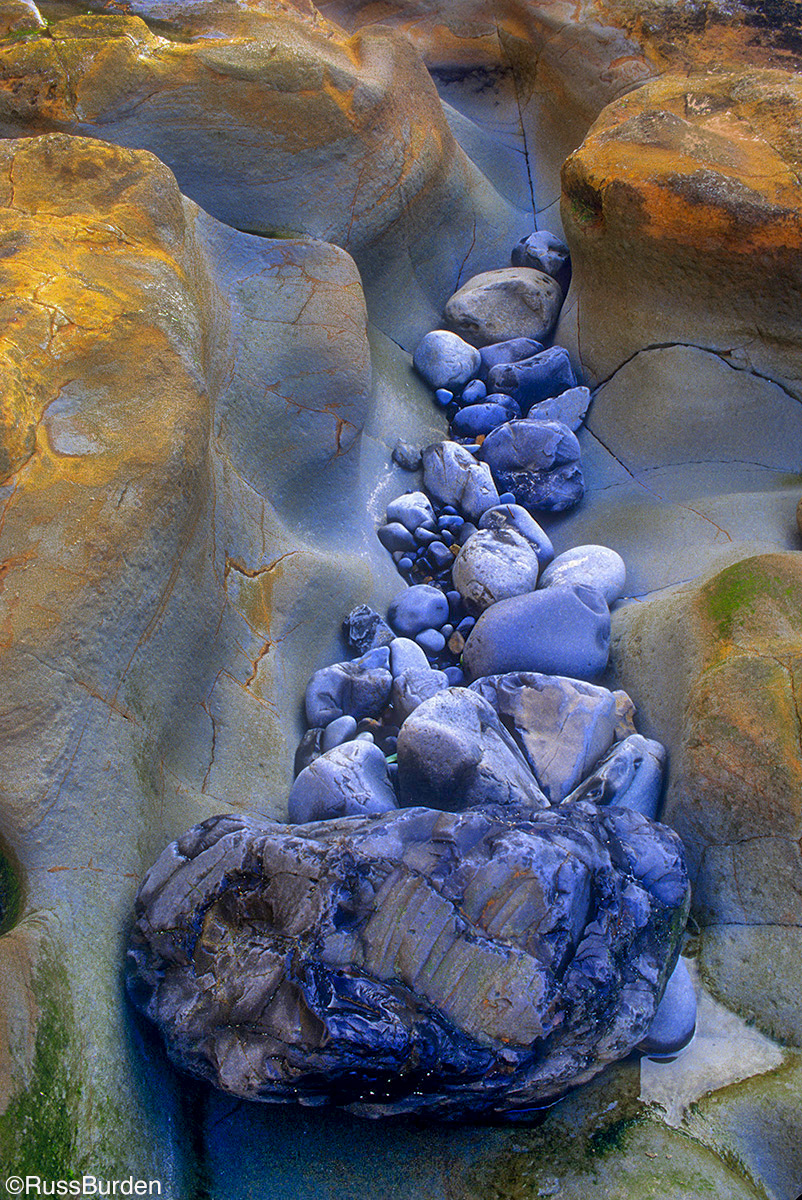
The image of the black rocks lined up in the sandstone caught my eye as I was looking for a vantage point from which to make a seascape along the Oregon coast. I was climbing the rocks when I looked down and immediately abandoned any thought of making a grand scenic of the coast. The way the rocks fell into place in and amongst the sandstone formations accented by speckles of green seaweed was something special. I worked the area until the shapes of both the rocks and sandstone were perfectly juxtaposed.
Shutter Speed
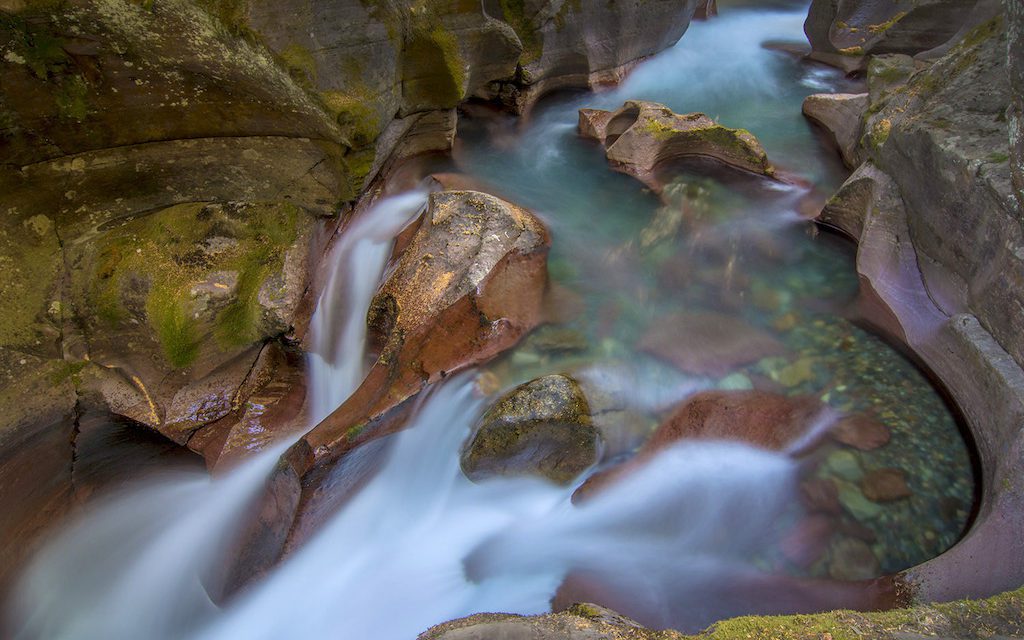
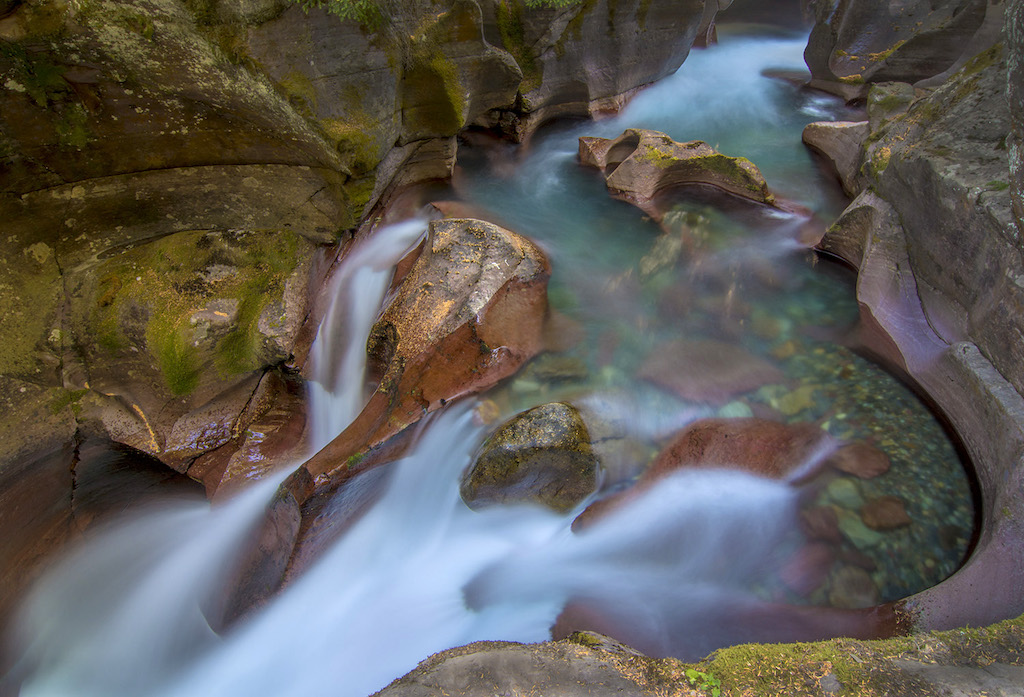
Slow shutter speeds and moving water are synonymous when it comes to photography because the effect is ballet-like and very peaceful. It’s mostly used with waterfalls. While hiking one of the gorges in Glacier National Park, the trail paralleled a stream, so I constantly walked to the gorge’s edge to note the landforms in the water. I finally found the color, shape, texture and form I wanted. I set my camera on a tripod and made an 8-second exposure.
Framing The Intimate Landscape
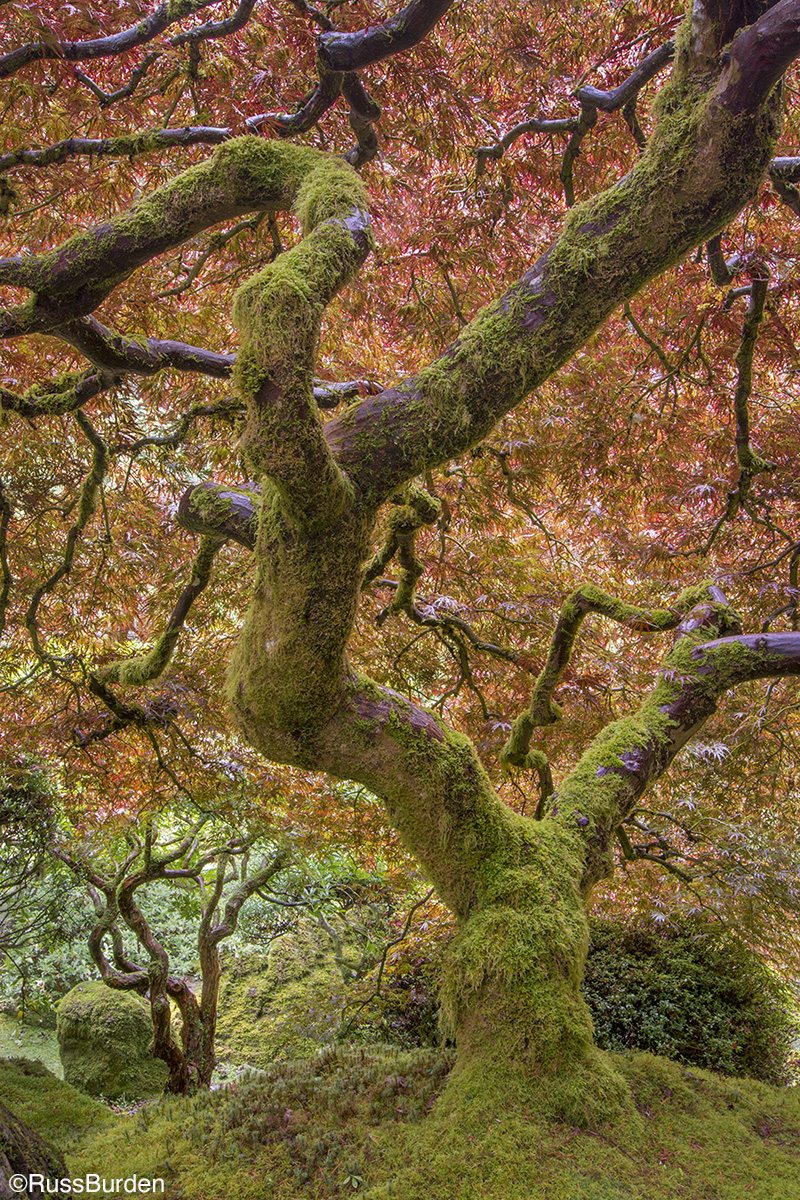
The concept of framing is utilized in all aspects of photography, especially in the grand scenic. With framing, you use a part of the environment to create a vignette of some sort around the primary subject. The same way a frame accentuates a photo or painting by drawing the viewer into the center, the framing technique has the photographer find something in the environment that draws the viewer to a specific part of the image area. In the image of the gnarly tree, throughout the photo one limb frames another and the main trunk frames a different tree in the lower-left corner.
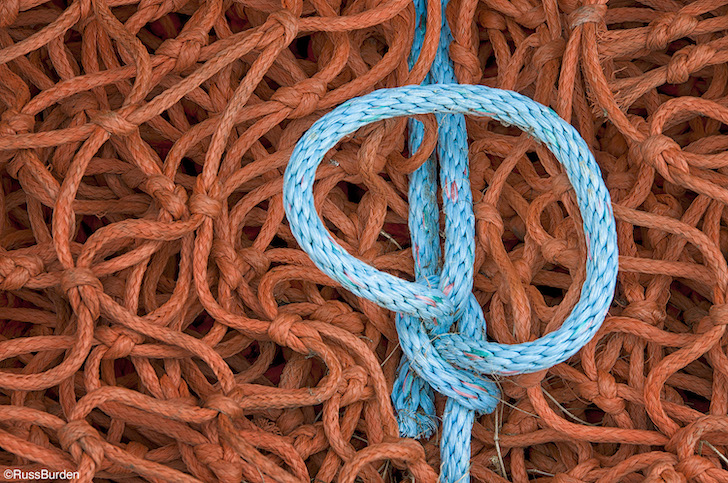
Color In The Intimate Landscape
It behooves all photographers to study and become familiar with the color wheel. This is especially true when it comes to complementary and like colors. Like colors produce harmony as they’re adjacent to each other on the wheel, while complementary colors are on opposite sides. It’s essential you become aware of how colors play off each other. In the photo of the two ropes, one is orange and the other is blue. Note how the blue pops off the page in that its opposite is orange. When used in nature photography, it can be very powerful.
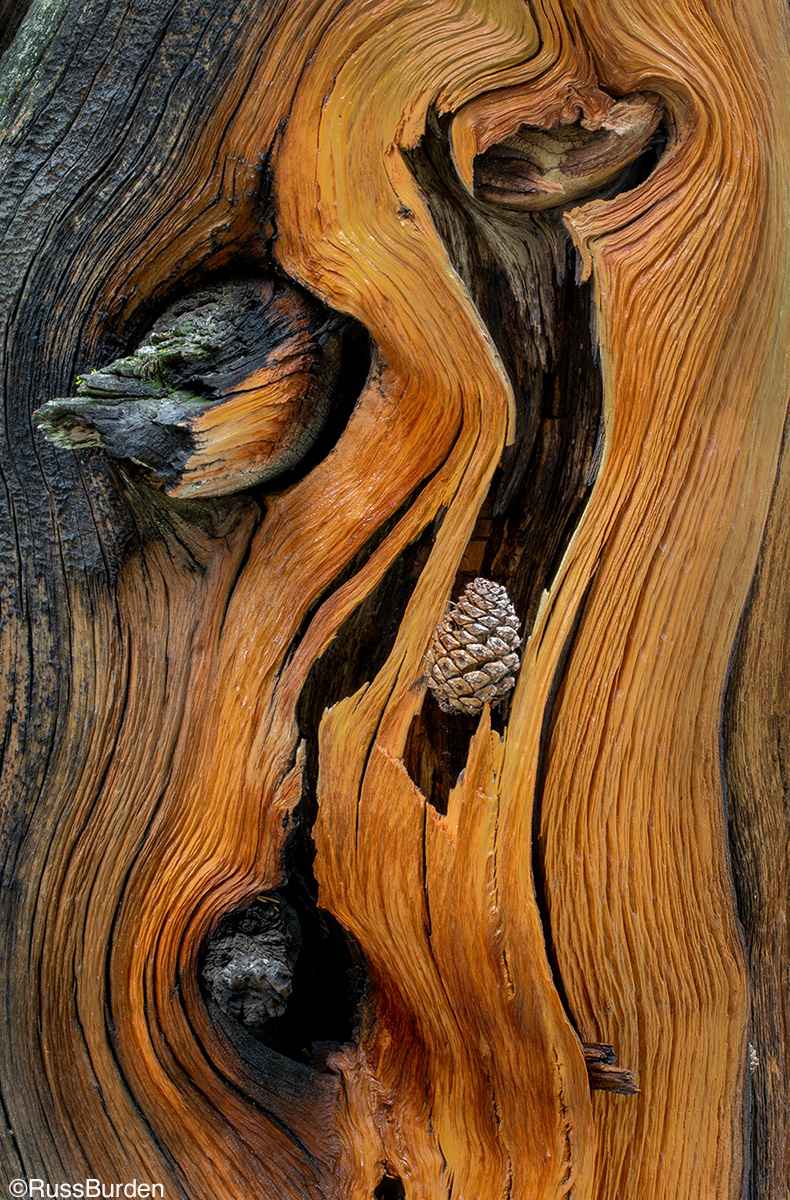
Lines And Texture
In the photo of the bristlecone close up on Mount Evans, I walked through the forest to specifically look for shape, lines and texture. Note the use of the classic S-curve in addition to the incorporation of varying textures and wood surfaces. Color and tonality also come into play as the lights play off the darks and vice-versa.
To learn more about this subject, join me on a photo safari to Tanzania. Visit www.russburdenphotography.com to get more information.
The post Up Close and Personal, Part 2: The Intimate Landscape appeared first on Outdoor Photographer.