Wildlife photography can be challenging for many, especially trying to capture sharp images of birds on land, water or in flight. But you can improve your chances of capturing better bird photos with a few considerations.

Research Your Subject
Learn the behavior of the particular species you wish to photograph. Critical topics include what it eats, where and when it feeds, its typical flight trajectory, its migration pattern, its agitation signals and more. The more you become dialed into these aspects, the more you’ll increase your opportunities to obtain great photographs. Food and water are critical for the survival of any species, so learning as much as you can about what it eats, where it feeds and where the nearest water is located ranks high regarding what to research. Great sources are the internet, bird apps such as iBirdphoto and Audubon books. I also encourage you to look into local birding organizations. Many members are willing to share great hiding spots in return for a nice image they can hang on their wall.
Composition For Better Bird Photos
How and where the subject is positioned is dictated by the focal length of your lens in conjunction with how far away the bird is perched. Based on how much image area the subject comprises determines if the end result will be a full-body portrait or one that shows the bird in its environment. If the bird fills the frame, leave extra room to the side toward which the bird directs its gaze. This allows “breathing room” so the gaze doesn’t “bump” the edge. If the bird isn’t skittish, fine-tune your composition. Walk to your left or right and get higher or lower to minimize any distractions that may appear in the background. Ideally, blue sky will be behind the subject which allows it to pop off the page. A different ideal scenario is a background that becomes a total wash of color. Long lenses in conjunction with wide open apertures work well to accomplish this. Additionally, the bird needs to be somewhat far away from the background in order to throw it out of focus. Avoid bright spots that receive stronger illumination than the light that falls on the subject. The brightest part of the photo should be the bird, not the background highlights.
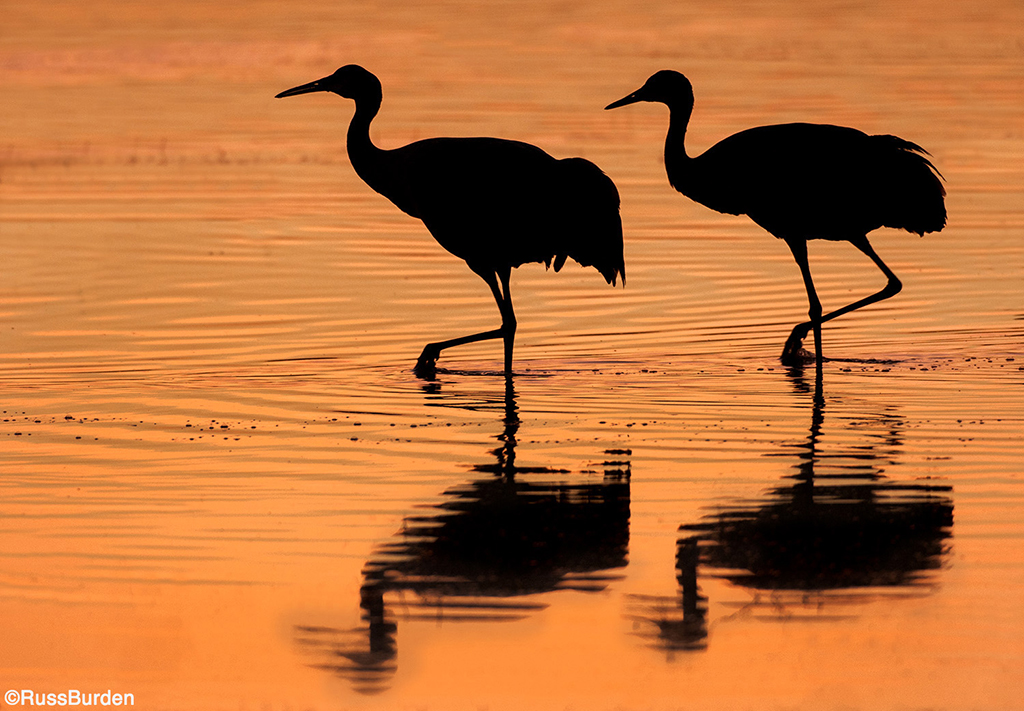
Light For Better Bird Photos
Early-morning and late-afternoon sun provide the best light. The warm color and low angle are the primary reasons to work the birds during these times of day. With regards to the direction of the illumination, I tell people to point their shadow toward the subject. Doing this lights the bird from the front. With the sun nearer the horizon, it’s also softer than mid-day harsh light. Shadows aren’t distracting when the bird is front lit as opposed to mid-day light when the bird is top lit with very contrasty and harsh highlights and shadows.

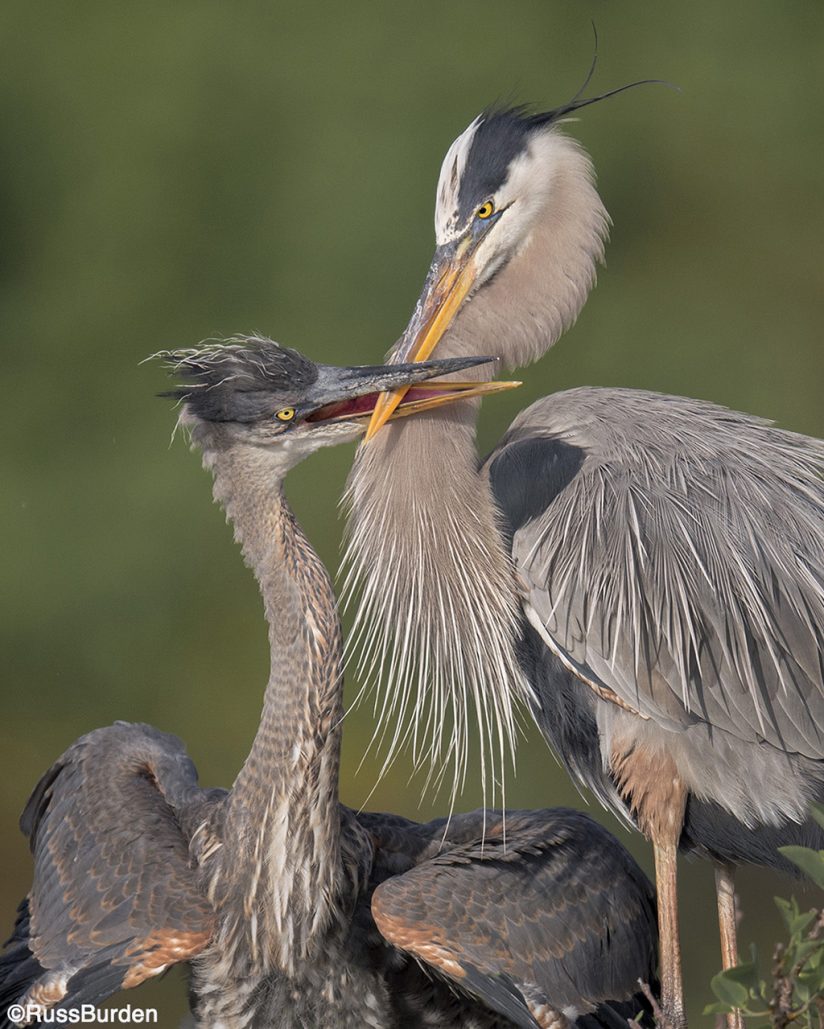
Background Importance
Where the bird perches or decides to stand makes or breaks the portrait. Branches or other natural elements can act as major distractions, especially if they’re across the front or growing out of the subject’s head. If these conditions exist, wait for the bird to move to a cleaner location or fly to a perch that’s free of distractions. If it’s content to remain in a distracting environment, move on to a different subject. The one aspect that doesn’t change is no matter how many times you press the shutter, if the bird is in an awful setting, the background isn’t going to magically change just because you wish it would!

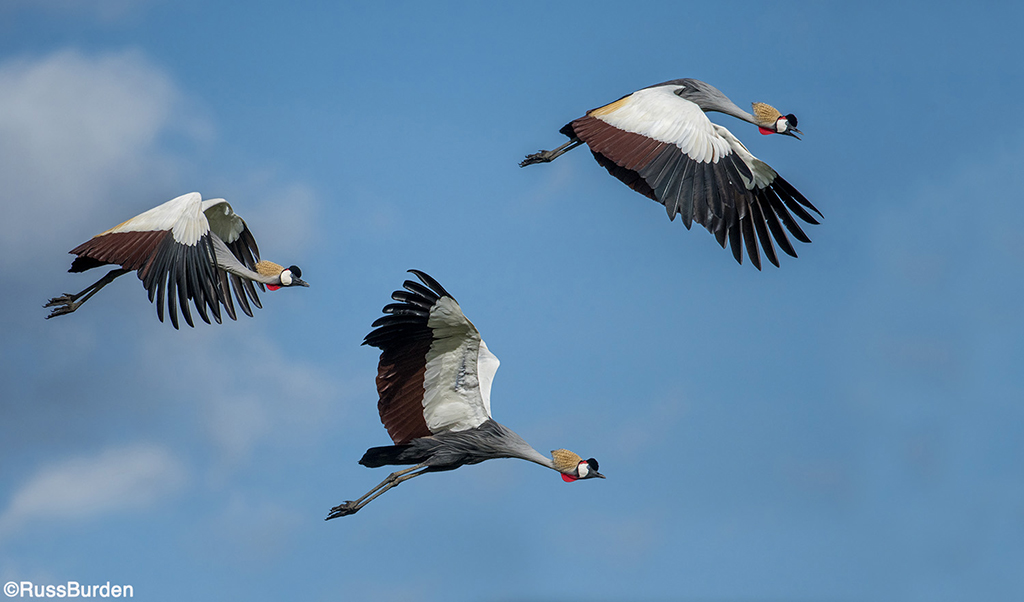
Flight Shots
The ideal scenario to make great flight shots is when the wind and sun are on your back—let me repeat that—the wind and sun should BOTH be ON YOUR BACK. If you feel the sun warming the back of your neck and a soft breeze cools it down, it’s perfect. The reason is birds take off and land into the wind. If the wind is on your back, that means it will fly toward you when it takes off. It also means it will land on its perch facing you. Combine this with direct sun falling on the subject and you have the perfect formula for flight shots.
Portrait Or Not To Portrait
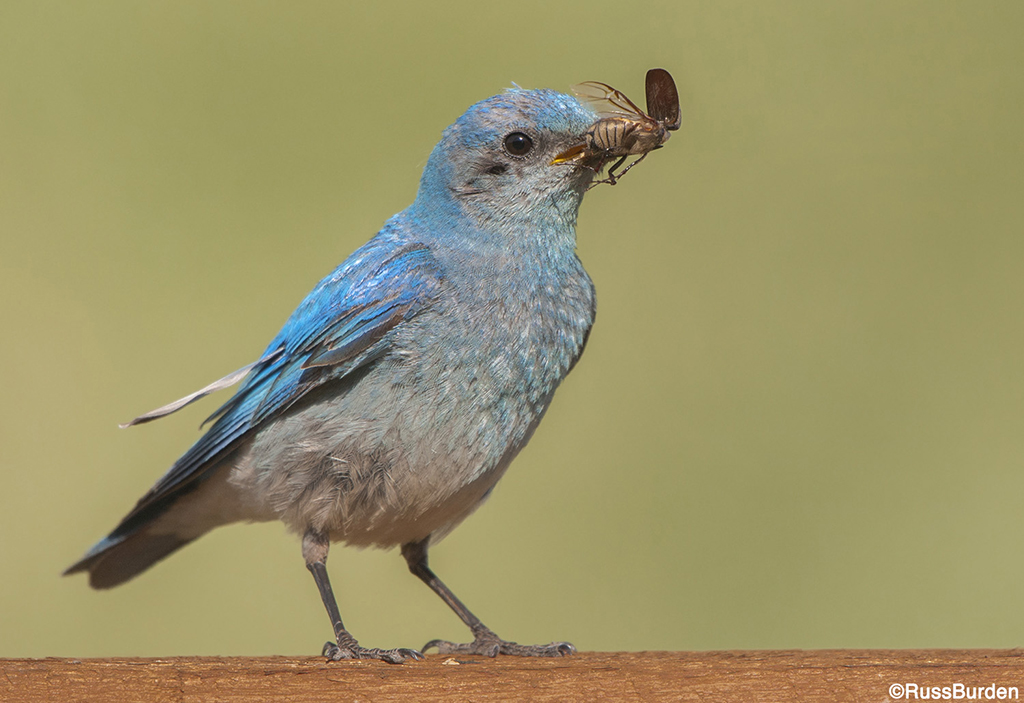
With regards to headshots or full-body shots, magnification is important. To obtain frame-filling images, it’s somewhat essential you have a powerful telephoto. The drawback is they’re very heavy and expensive. This is why beginning bird photographers start with larger species that are tolerant of people. Local duck ponds are good places to find cooperative birds. Subjects allow you to approach them, so shorter and slower telephotos may provide powerful images. If you’re restricted by the equipment you have and don’t intend to lay out big bucks for a super-telephoto, an option is to set up a feeder outside a window or in your backyard to attract local songbirds. Hang a cloth with a hole cut into it through which you can place the front element of your longest lens. This will act as a blind. Monitor what time the birds like to feed and fire away.
To learn more about this subject, join me on a photo safari to Tanzania. Visit www.russburdenphotography.com to get more information.
The post Tips For Better Bird Photos appeared first on Outdoor Photographer.