We have a life-long association of the sky and the color blue. On a clear day, the sky is always blue. The last color we see in the sky as we look toward the zenith at nightfall is blue; the first color we see when light returns at dawn is once again blue. Naturally, we assume that the sky is blue even on a moonless night at midnight. Digital cameras know better, however. If you use a daylight white balance, which records the actual color of the light reaching the camera, you may be startled to discover that a moonless night sky is usually some shade of green. All of this comes in to consideration when processing night photography,
Although your camera’s recording of this color is accurate, a green sky is wildly different from our expectations. That creates a dilemma, one you’ll encounter most often when photographing the Milky Way, which is most photogenic on moonless nights. Your eyes aren’t sensitive enough to detect the true color of the night sky, so you have to decide: “What color should it be?”
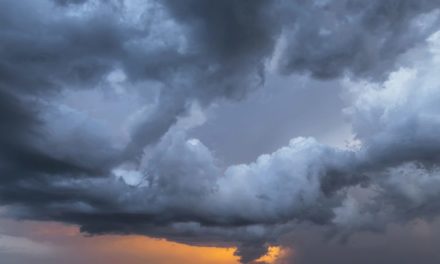
One approach is to show the colors actually present in the moonless night sky. The green color comes from airglow, an umbrella term that refers to a number of complex chemical reactions in the upper atmosphere that can actually produce a variety of colors, including red, yellow and blue. The dominant green color comes from excited oxygen atoms, which can lose their extra energy in the form of a photon of green light. This is the same “Wizard of Oz” green you commonly see in auroras, but the mechanism of excitation is different. Unlike auroras, airglow can be seen worldwide. This approach capitalizes on a modern digital camera’s ability to accurately reveal an unseen world at night. Such images are arguably “authentic,” but in my view fail to capture the emotions I felt when making the original images.
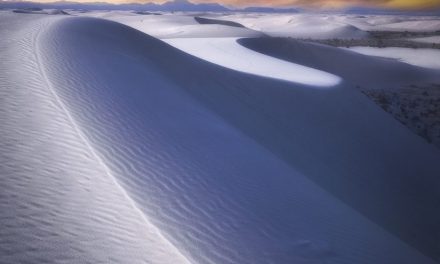
Our expectation that the moonless night sky should be blue is rooted in more than daytime experience. When you’re in a dark location on a night with a full moon, the landscape and sky often appear to have a bluish tint. The color-receptive cones in our retinas aren’t sensitive enough to detect any color in objects lit by the full moon unless the object itself emits light. At night we see with our rods, which are color-blind. So why do we think the world is bluish? Saad Masood Khan and Sumanta N. Pattanaik, two researchers at the University of Central Florida, have a theory. They cite other researchers’ work showing that stimulation of rods in low-light conditions can cause stimulation of nearby cones, even though those cones are too insensitive to respond directly to the light. Khan and Pattanaik then hypothesize that the cones that are stimulated are primarily the blue-sensitives ones, which gives us the false impression that moonlight is blue.
Hollywood has exploited this phenomenon for years when it uses “day for night” techniques to shoot “night” scenes during the day. By adding a blue filter and underexposing the footage, they can give a daytime scene a nighttime feel. Ironically, the color of moonlight is actually warmer than noon daylight. A digital camera set to a daylight white balance will record a moonlit landscape as more reddish than the same landscape shot at noon. To add to the confusion, the sky on a night with a full moon really is blue because moonlight is bright enough to cause Rayleigh scattering, the same phenomenon that makes the sky blue during the daytime.
Processing Night Photography In Lightroom
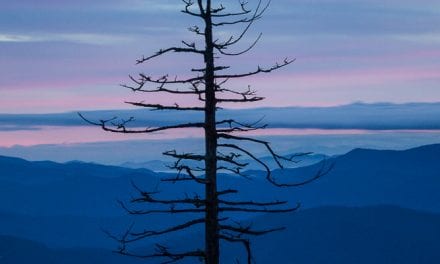
Given all these considerations, most photographers decide to shift the color of the night sky to some shade of blue. One way to do this is to pull the Temperature slider in Lightroom’s Basic panel down to about 3,200 Kelvin, which produces a lovely deep blue sky. Unfortunately, this simple solution to one problem creates another: everything in the picture is now some shade of blue, including the stars, Milky Way, planets and, of course, the land. Although you can’t see color in the night sky, you can see color in bright stars and planets if you’re in a dark-sky location. Antares, Aldebaran, Arcturus and Betelgeuse have an orange tint; Rigel and Sirius are blue-white; Mars is red.
My solution to this dilemma is to shift the color of the sky toward blue while preserving the natural colors of the stars and Milky Way. The best way I’ve found to do this is to manipulate the individual red, green and blue channels in Lightroom’s Tone Curve panel.
First, be sure to shoot the original images in RAW format. My standard Milky Way exposure in a dark location is 30 secs., ƒ/2.8, ISO 6400 if I’m using my Canon EF 16-35mm f/2.8L III USM, or 10 secs., ƒ/1.4, ISO 6400 if I’m using my Canon EF 35mm f/1.4L II USM. The peak of the histogram should be roughly one-third to one-half of the way in from the left side of the graph. Overexposure will destroy star colors. Use a daylight white balance (preferable) or change the white balance to daylight in the Basic panel in Lightroom.
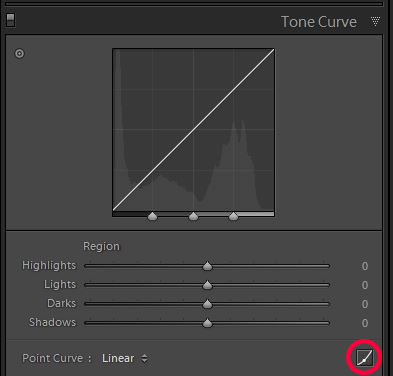
Next, open Lightroom’s Tone Curve panel, which has two modes. If you see the word Region underneath the graph, with four sliders below that, click the small icon in the bottom-right corner of the dialog box to switch to the Edit Point Curve mode, as shown in Figure 1.
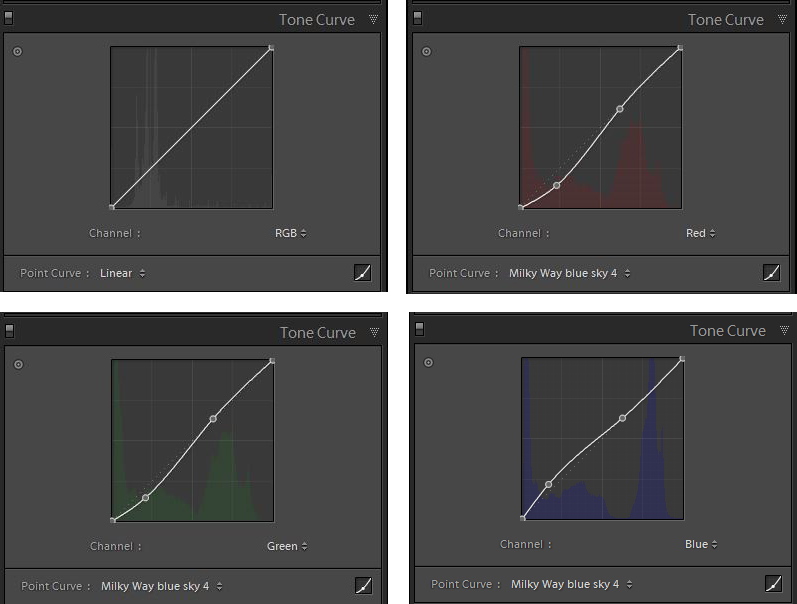
Set the Point Curve preset to Linear. Next, click the disclosure triangle next to Channel: RGB and choose the red channel. Click to place a point on the curve about two-thirds of the way up, but don’t move the point in any direction. This point serves to anchor the top part of the red curve, preserving the color of the highlights (the stars and Milky Way) as captured in the original file.
Next, click to place a point about one-quarter of the way up the curve and drag downward a bit. Switch to the green channel and place the same two points. Again, drag the lower point down a bit.
Finally, switch to the blue channel, place the same two points, but this time drag the lower point upward a bit. If you find it difficult to make small, precise adjustments to the curve, hold down the ALT key while you drag the point. The point will now move a smaller distance for a given mouse movement, giving you better control.
Figure 2 shows screenshots of the three channels. The goal is to shift the color of the sky to a pleasing blue while preserving the original colors of the stars and the Milky Way. It can take a lot of trial and error to get this right. Once you have a group of settings you like, click the disclosure triangle next to Point Curve: Custom and click Save to create a preset. You’ll probably find you need different settings for different images, so you may want to create a series of presets you can click through to see which one gets you closest. You can then perfect your settings if necessary.
You may find it impossible to completely eliminate the green cast without shifting some portions of the sky purple. Your best compromise may be to shift the upper regions of the sky blue while allowing the sky near the horizon to retain its greenish cast.
I find it very difficult with my Canon EOS 5D Mark III to capture adequate detail in both the sky and the land in a single frame. Almost always I shoot two frames, one exposed for the sky and one exposed for the land. That makes it easy to adjust the color of the sky and land separately. The settings in the Tone Curve panel that shift the sky color to blue make the land too blue for my taste. I normally use the Temperature slider in the Basic panel to slightly shift the color of the land. For snow scenes, I’ll often use a setting of 4200 to 4400 Kelvin; for other scenes, I usually select a temperature between 4600 and 4800. This gives the land a slightly cool tone that mimics the bluish tint we think we see under moonlit conditions without turning every color in the land some shade of blue. Once I’ve edited the land and sky images separately, I combine them in Photoshop.
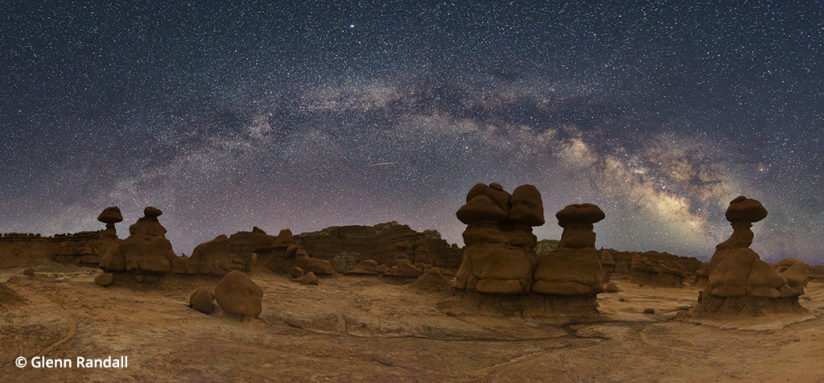
Photographing in color at night is like shooting in black and white during the day. It’s inherently subjective. The approach I’ve outlined here gives the sky the color that we expect it to have, while preserving the colors of the stars that we can actually see. My hope is that this approach will evoke the awestruck feeling of standing under a moonless starry sky, marveling at the immensity of the universe.
YOU MIGHT ALSO LIKE

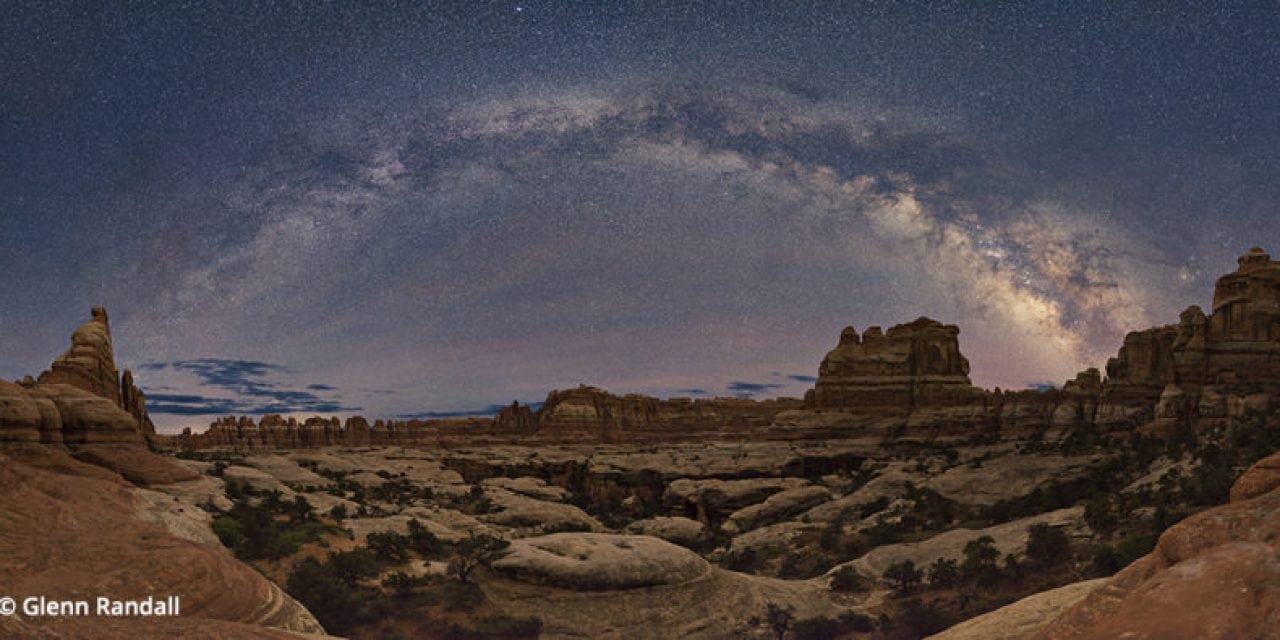
How To Photograph the Milky Way
Gear, techniques and timing to create panoramic images of our home galaxy. Read now.
The post Processing Night Photography appeared first on Outdoor Photographer.