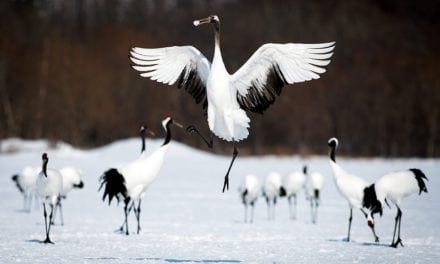
The beach is an amazing place to take photographs, and especially for photographing shorebirds. No matter the time of day, the beautiful and ever-changing scene is full of life, energy and motion. For those of us who have fallen in love with the winged beings who live the greater portion of their lives along the shore, it is easy to understand why the allure of capturing wings in motion, multitudes of bodies dressed in beautifully unique shapes, colors and sizes is such a strong call, set against the backdrop of dramatic skies and seascapes.
So how does one go about creating and capturing strong shore and wading bird portraits, beyond the rote headshot? In the following, I hope to share with you not the technical details of what camera settings you should be using but, rather, an ethos on how to approach your environment, become a part of it, immerse yourself into the experience of your scene—translating and transplanting that very experience into passionate, compelling images that resonate deeply with your viewers.
Go Slow When Photographing Shorebirds
Approaching any creature with wings is always an unknown—will they spook and fly off immediately or will they let you get closer? Photographing shorebirds is no different. Many shorebird and wader species tend to be flighty, and, depending on your location, may or may not be comfortable with human presence. I have found that location greatly determines the tolerance of local residents. For instance, it is far easier to approach shorebirds in places such as the beaches of Florida and New York, where they are quite conditioned to human activity, than in less-populated places such as Maine or Nova Scotia. Bearing this in mind, I have found a few methods of approaching your soon-to-be subjects helpful.
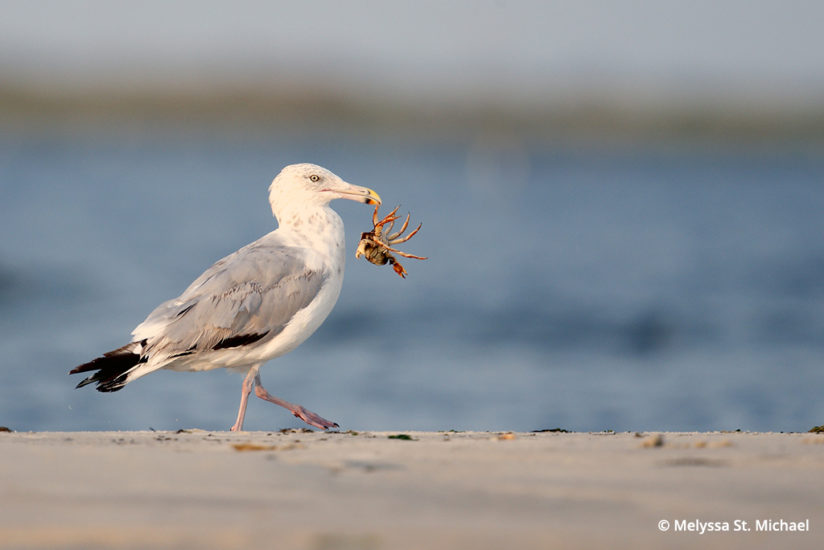
Spend a few moments observing before approaching. Hang back a bit and take notice of the activity in which your subject is currently engaged. Are they foraging, hunting or preening? If your subject is active, watch how they are going about it—every bird has unique behavioral patterns that they will repeat, based on their current task at hand. By watching, you will be able to see and understand their pattern, identifying opportunities to approach that will be least disruptive to your subject as well as provide you with a greater understanding of moments to look for when you are behind your camera.
Take the long, slow way around. A head-on, direct-approach path, more often than not, will put your subject on alert. Birds have exceptional vision and a radar-like sense that allows them to evaluate whether oncoming beings are a danger to them or not. Taking a slow, wide arc or an indirect path to put yourself into position gives both you and your subject time to get used to the presence of one another, signaling to your subject that you are not a danger to them.
Oftentimes as I approach, I will stop every 10 feet or so, slowly drop to my knees and fire a few shots of my subject that I want to get closer to. If my subject looks distressed or changes what they are doing, I will stay where I am and give my subject time to get used to me and the sound of my shutter. As they get more comfortable, I gently make my way to where I want to position myself, repeating the process of stopping, dropping to my knees and shooting every 10 feet or so until I am about 90 percent of the way there. If my subject hasn’t flushed by this time, I will carefully get prone and very methodically inch my way to my final shooting position.
This works for me about 70 percent of the time. If I do happen to flush my subject, I will casually (and, again, slowly) approach the area that I had wanted to be originally, assume my shooting position, and wait for the birds to get used to me being there. It usually takes a flushed bird about 20 minutes or so to come back to where they were. I will lay low and be very still, as it helps to not scare them off once they come back.
Don’t Be Afraid To Get Low, Sandy Or Wet
When it comes to photographing shorebirds—or birds of any kind—putting yourself in a position where you can shoot at eye level with your subject is paramount to being able to draw your viewer into your photograph. While this is much easier to do in places where you don’t have to combat the difficult combination of salt, sand, wind and water, the extra effort to get down to ground level in these not-always-optimal conditions will pay off in spades for your final result. It’s not just about being eye-level though; shooting low has other impactful benefits.
Shooting low helps you to be less threatening to your subject. As we discussed previously, being able to capture next-level portraits means being able to approach and be close to your subjects. Shooting from a prone position reduces your towering stature down to a much-less threatening 12 inches-or-less tall (albeit very long) shore creature.
Shooting low creates intimacy. Shooting from the ground creates an intimate perspective, allowing you the opportunity to capture subtle behaviors not captured when shooting from above, providing a unique point of view within your frame.
Shooting low allows you to include, or exclude, elements that can alter the tone and feel of your image. Due to the camera position and the angle of the sensor in relationship to your subject, shooting from the ground gives you a greater berth to utilize foreground and background elements in a way that you simply can’t if you are shooting at 10 inches or higher above the ground.
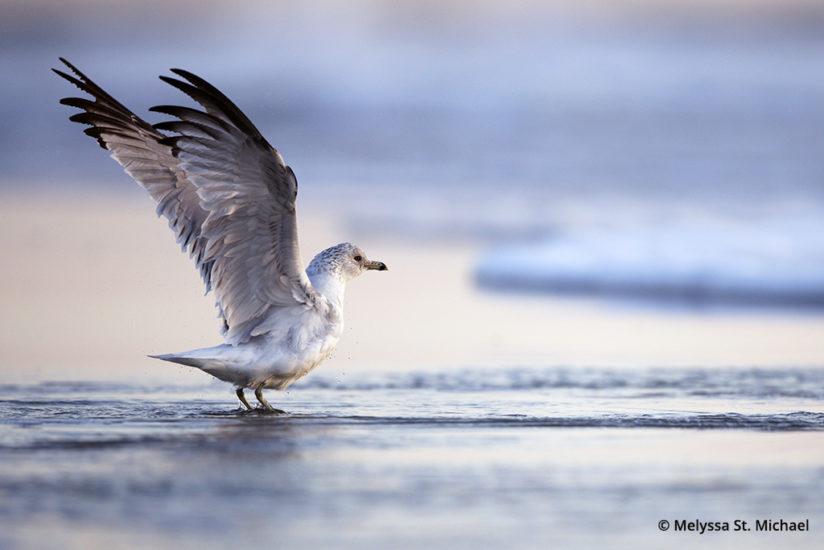
Shooting low enables you to harness light in ways that a higher perspective won’t allow. When shooting low on the shore, water and sand will reflect light back onto your subjects, providing beautiful, under-lit images that you are only able leverage if you are in a low position to take advantage of the ground-up light bounce.
Resist The Urge To Chase Shots
Photographing shorebirds and waders was such a learning curve for me. It was so radically different than photographing other bird species. I learned early on that while there seems to be an overabundance of activity engulfing you when you are at shore’s edge, it is best to remain in situ. You have worked so hard to get to this spot, gain acceptance from your subject and get yourself into a position that will guarantee you produce outstanding images; to get up and start the process all over again takes a fair amount of time, and often by the time you get there, the action will be over, and you will have disrupted your former subject.
I have found that by staying in my original spot and letting the birds acclimate to me, they will soon go about their normal, everyday business, and that is when I am able to capture the best images of my time with them. Granted, this most often takes up to an hour to occur but is well worth the time in terms of the quality and context of the images I am able to capture.
Embrace Your Subject’s Behavior
To go beyond the traditional portrait-style image, learning what to look for in the species you are photographing prior to arriving on scene will give you a greater ability to predict the decisive moments you will want to capture. As you research prior to getting to your destination, take into consideration the time of year. Is it breeding season? Spring or fall migration? Also consider the time of day to understand what “mode” your subjects will be in, based on your location.
When researching, look for online videos of your intended subject. Watching how they move ahead of time helps me to adapt very quickly when they are in front of my lens. The Cornell Lab of Ornithology’s channel on YouTube is an incredible reference for just about any bird species.
Whenever on the shore, I map my time in front of the computer back to the scene in front of me, always watching for interesting, repetitive behavior that allows me to identify the pattern of my subject’s particular activity, such as preening, foraging, hunting or feeding. Each of these activities are repeated frequently over a long period of time, and most often over the same range, allowing for multiple attempts at composition and motion capture.
I find that the more I shoot a behavior, the stronger my hand-eye coordination and reflexes become at recognizing the behavioral signals that happen seconds before the moment I want to portray. Over time and with awareness of your subject’s behavioral patterns, you will be able to anticipate specific movements, focusing ahead of that preemptive hunting strike or wing flap, and thereby greatly increasing the number of dynamic moments you are able to capture.
Embrace Your Environmental Elements
How lucky are we that the shore provides such a plethora of background and foreground opportunities? From leading lines in ocean waves, to abstract patterns formed by sea foam, to softly colored wet sand at first light, there are no limits to how we can utilize the shore’s environmental elements to create captivating images. A few details to consider including in your compositions:
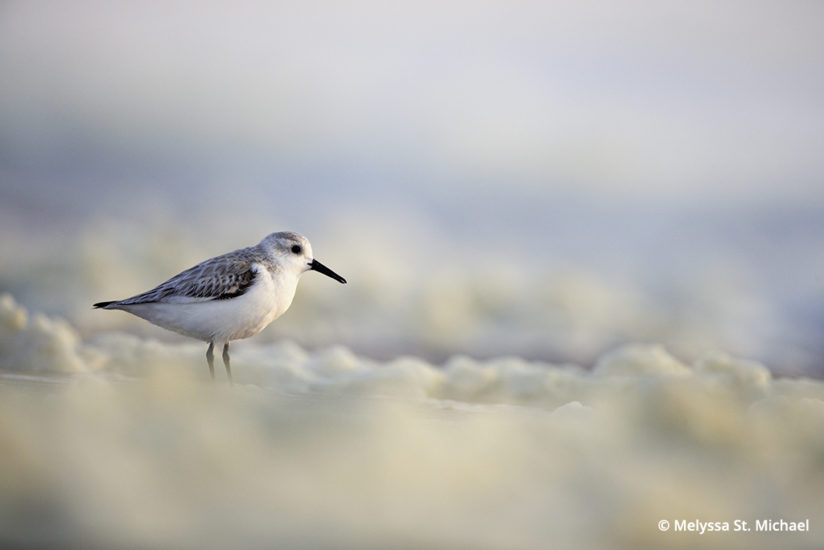
The surf. The shore’s edge provides a dynamic and transformative property to images. Rolling waves create abstract background patterns when your subject is in front of them and shot with shallow depth of field. When shooting perpendicular to the water’s edge, gently receding waves provide leading lines to and from your subject. At first light, last light, golden hour and blue hour, the wet sand saturated with the last of the tide mirrors the sky, creating intense pink, purple and blue hues you aren’t able to capture at other hours of the day. Pair the incredible reflectivity of the water with low-angle shooting, and you have a painterly like backdrop against which to frame up your subjects.
The sand. Though the sand is everywhere, utilizing its unique properties can provide a fresh perspective with new compositions. Leveraging the hard lines of the sand near the edge of the shore can provide different and interesting horizons for your background. Getting lower on the sand shooting up can provide uniquely angled shots. Using sand as a foreground compositional element when shooting shallow will create a very soft, out-of-focus foreground that can distinctly help your subject stand out.
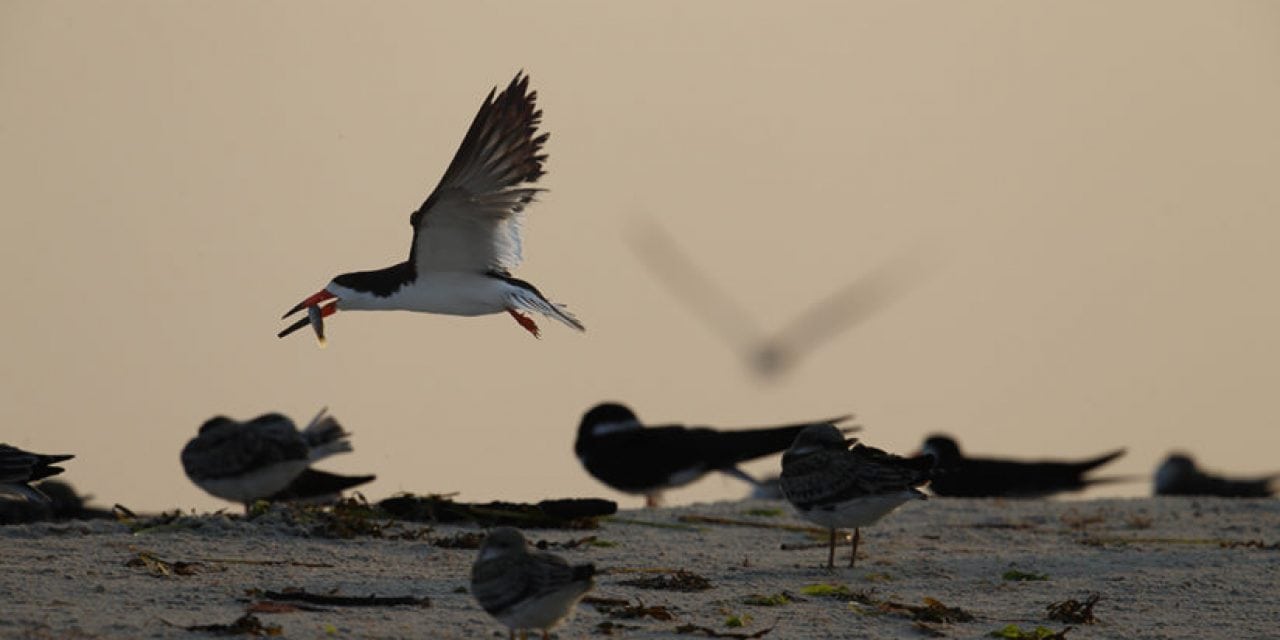
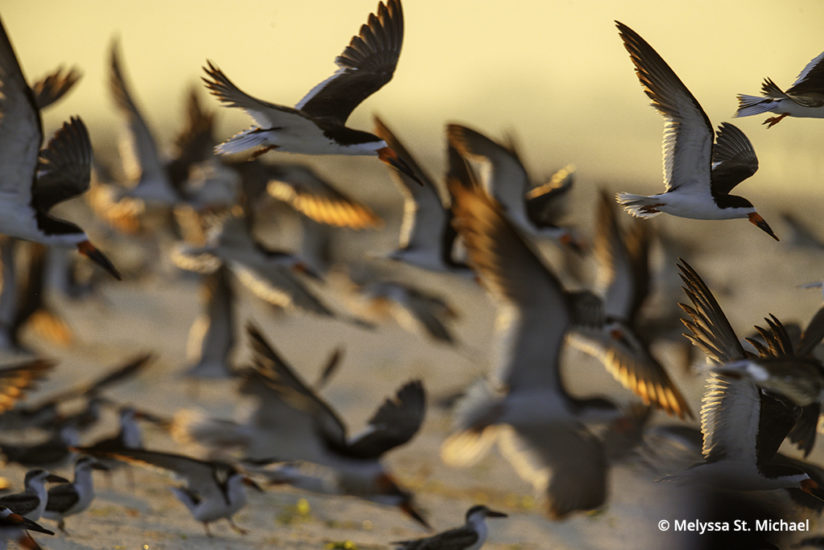
The flocks. A wonderful opportunity to practice motion blurs and abstracts, flock photography may seem intimidating at first, until you realize that you don’t have to capture the whole flock in one image. Look for frame-filling opportunities as flocks move en masse, either alighting or landing together. Oftentimes, the flock will disperse as one unit, lifting off, then circling wide to come back to where they just took off from. They will do this at periodic intervals, allowing you to practice your shot repeatedly.
No matter whether you are at the shoreline of the ocean, water’s edge of a tidal pool or along a lake line, by practicing these tips, you’ll start developing not only a keen eye for intimate bird behaviors but also a keen sense of when these behaviors will happen.
Gear That Helps You Get The Shot
For most photographers, the first concern with getting low on the beach is, “Won’t my camera get full of sand or, worse yet, wet?” The answer to that question lies in your awareness of your surroundings (is there a wave coming up higher than expected while you are laying near water’s edge?) and also in the type of support gear you are using.
You don’t necessarily need a specialized support to shoot low. When lying on your stomach, your elbows being on the ground naturally brace your camera, which can work very well for short periods of time. If you are planning on spending long sessions in the prone position, however, I recommend utilizing some sort of support mechanism, such as a skimmer pod or tripod with legs that are capable of extending out flat. Not having to hold your camera for long periods of time will help you focus on what you came to do: Create strong images. An excellent added benefit of having your camera on support? It greatly lessens the chance of sand and water getting on it.
Other critical pieces of gear to carry with you: A very soft, clean microfiber sham, a very soft, fine-bristled small paintbrush and a bottle of water. Having these on hand will help you mitigate any elements that you do attract to your camera, so you can gently brush off any salt, sand or water immediately as it happens or once you get back to your vehicle.
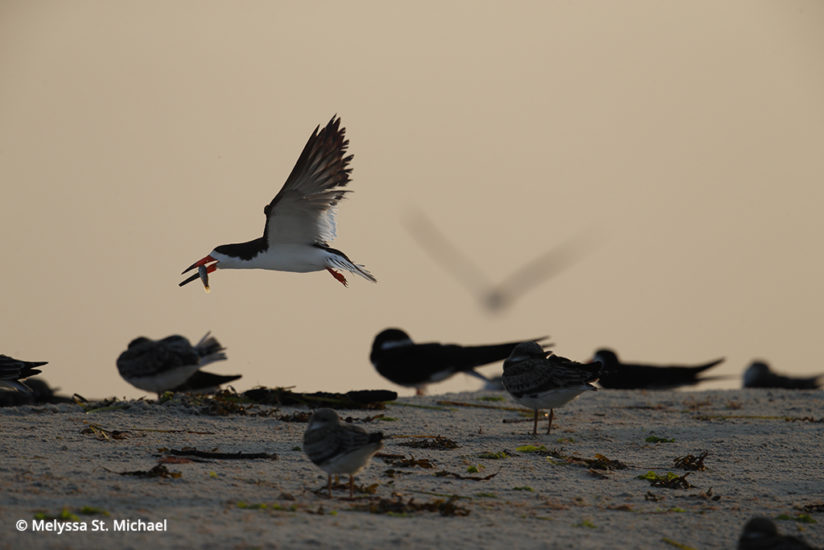
Melyssa St. Michael is a wildlife and conservation photographer with a passion for shedding light on local issues and initiatives. See more of her work at melyssastmichael.com.
YOU MIGHT ALSO LIKE
In Search Of The Great Gray Owl
Lessons learned in my quest to photograph the great gray, one of nature’s most rare and elusive owls. Read now.
The post Photographing Shorebirds appeared first on Outdoor Photographer.