Not long ago, we first heard of a great way to give new life to your antler sheds (or any of your antler sets collecting dust). This method includes moose, elk, mule deer, and whitetail deer antlers that can be mounted or displayed around your home or office to share that memorable hunt-even if the hunt was a shed hunt.
Thad Eads, the owner and director of design and manufacturing for Rack Hub, gave us an inside look at his five-year-old company. Founded by Eads and his cousin T.J., Rack Hub began with the love of holding antlers as much as displaying them. That admiration is universal for outdoorspeople, regardless of their ability.
“[I understand] full well that many well-rounded, outdoor-loving folks don’t come from the ranks of hunters but may still want to display a found shed like everyone else,” Eads said.
That is an excellent attitude since even non-hunters are well-rounded outdoorspeople and love to share in the pursuit of antlers. But what does an outdoor-loving person do with a shed or an antler that seems stuck in a box?
Mount it with the Rack Hub RH2 system, that’s what.
A Closer Look at the RH2 System
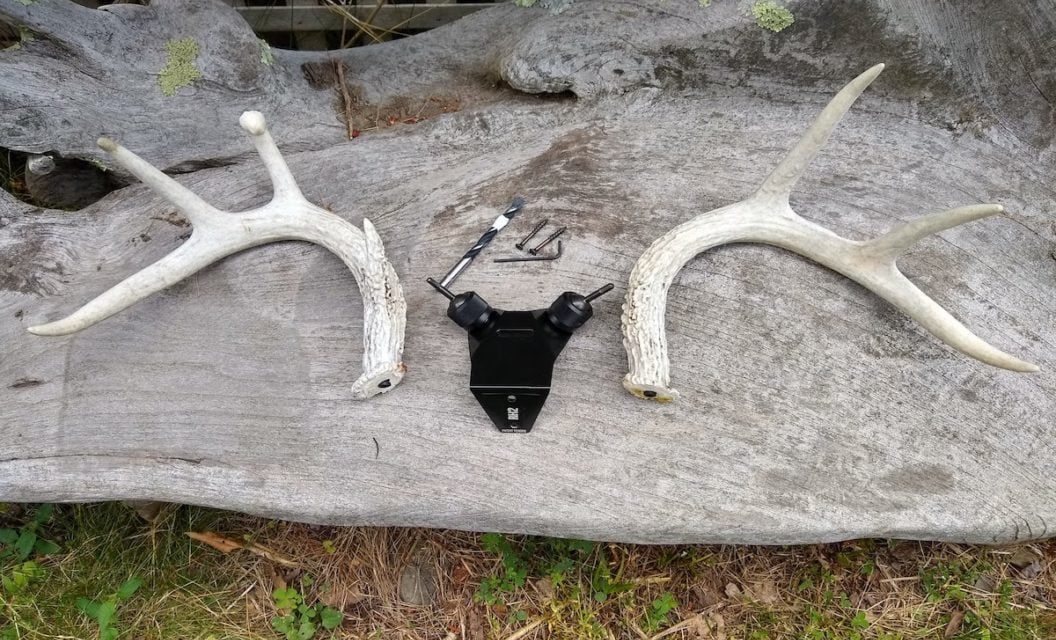
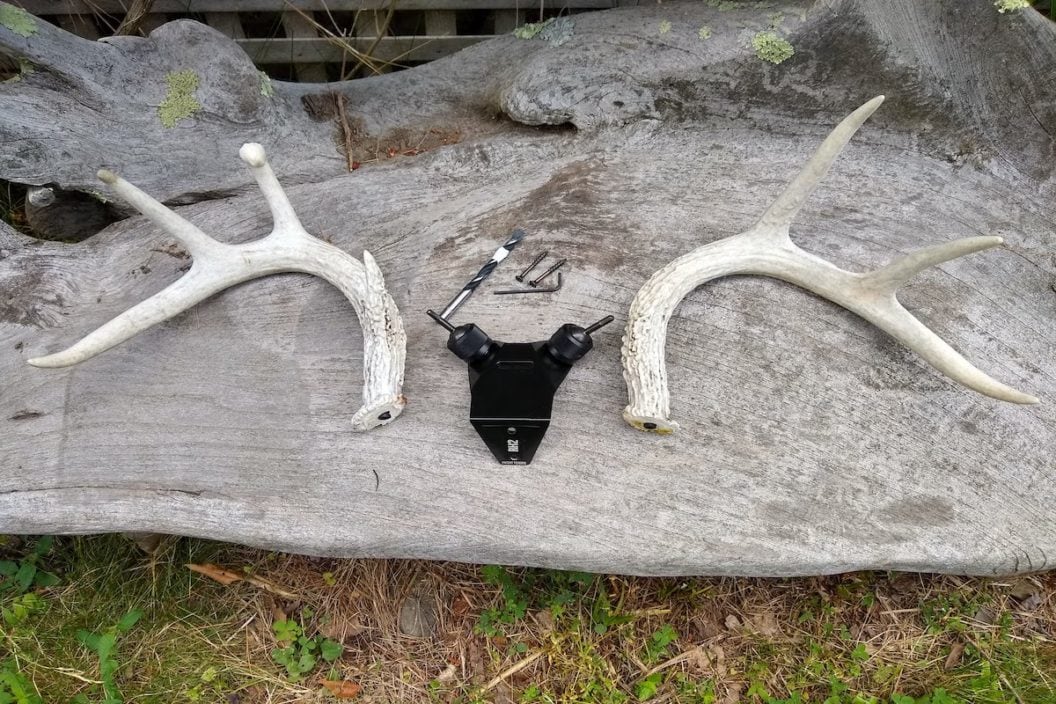
Smaller may often be better, but not when discussing antlers. When you first receive the box with the RH2 inside, you might think that it wouldn’t be enough to display a substantial set of antlers, especially moose or elk, but Rack Hub built this thing well, and they used suitable materials to build it.
It is made entirely of aluminum, except for the machined steel used to make the ball and stem and employed to carry the antlers. They are set apart in the most natural way to afford the user a great mount in a small space.
If you have something with some more actual size, such as a beautiful set of moose antlers, the RH2 XL will still mount them easily. Some folks have devised remarkable ways of displaying their antlers using the Rack Hub system, which you can see right here.
Using the Rack Hub RH2 System
Let me just quickly say that I thoroughly enjoyed the ease of use and look of the RH2 system, and I definitely recommend it, but a little personal background first will help put things in perspective.
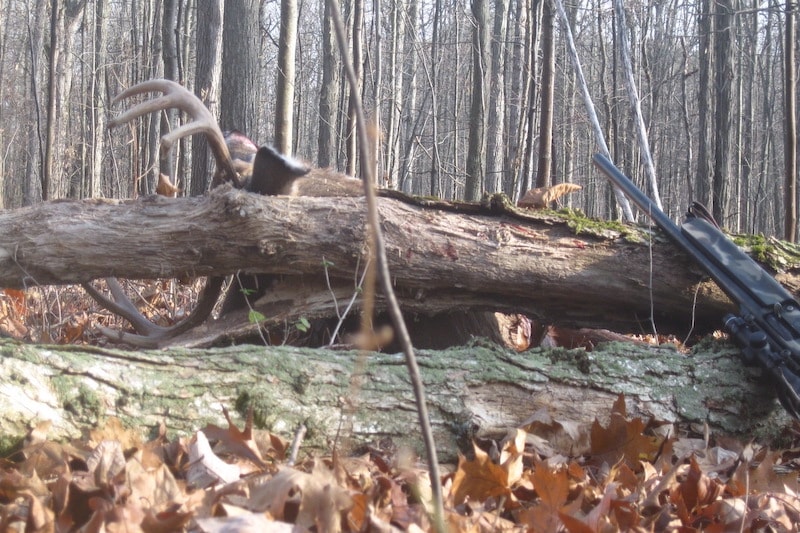
I have one big 10-point buck on the wall – a full shoulder mount – but have taken three different whitetail bucks in my life that probably would’ve been suitable head mounts. For one reason or another, I didn’t spend the money on mount taxidermy. One was an old fighter 10-point that I took in 1993, one month before my son was born, but as luck would have it, he broke off one side right at the G2 sometime before the season started.
The other two are excellent deer: one eight-point buck and another beautiful seven. Both would have looked just fine as shoulder mounts, but instead, they have been sadly stored in a box, one since 2012 (pictured here, which I fondly refer to as the ‘dog-ear’ buck) and the other since 2016. Rack Hub was born with hunters like me in mind, and now I can do something about it.
When you order the Rack Hub RH2 System, the box that comes in the mail is relatively tiny. Nonetheless, it includes everything you need to mount your antlers. They even have a 5/16″ Brad point drill bit for drilling a hole in the base of the antler, which really comes in handy.
The instructions are easy to understand, and it’s a simple matter of getting the antlers lined up to drill them properly. Make sure to use a vice or some other implement to hold the antlers while you drill.
The included drill bit went through the antler with ease, and seconds later, I placed the antler-clutching inserts on each side of the rack. Rack Hub suggests you mark the drill bit with tape or use a marker that will display precisely one inch of drilling distance to ensure that the hole doesn’t get drilled too deep.
At this point, you can mount your antlers by sliding them onto the ball and stem feature via the antler inserts (included in the kit) that you lightly tap in with a soft mallet. It is straightforward to orient the antlers with the ball and stem into any desired position, tighten them, and even lock them all into place with an included 3/32″ hex wrench for safekeeping.
One note: the antler mounting inserts are made to let the bone slide on and off after placing them onto the ball and stem, so they should be kept out of the reach of kids or clumsy pets, just in case. They cannot fall off by themselves, but it’s something to consider.
After mounting the entire system in minutes, the dog-ear buck finally has a home.
The Finished Product

Craig Raleigh
Mounting the RH2 system should be done into a wall stud or other solid part of a wall where you intend to hang it. They even include those screws as well.
Eads told me that you can even hang them outside, saying, “The only piece that may rust is the ball/stem that’s made out of solid steel and finished in black oxide.” He noted that many folks using the RH2 systems are hanging antlers outdoors. The choice is yours. Since you’re able to easily remove the antlers, you can switch the rack you used for a different one to change things up if you purchase another RH2 system.
The RH1, RH2, and RH XL systems all come with a lifetime guarantee for a worry-free method to get those old antlers out of storage and into sight where you and your family can enjoy them to the fullest.
Please check out my book “The Hunter’s Way” from HarperCollins. Be sure to follow my webpage or on Facebook and YouTube.
READ MORE: THESE MIGHT BE THE 33 WORST TAXIDERMY JOBS OF ALL TIME
The post Get Those Antlers Up: Reviewing the Rack Hub RH2 System appeared first on Wide Open Spaces.