In the preceding two articles of this three-part series, we began by exploring the “vocabulary” of composition in landscape photography and considered the key elements of composition from basic ideas like shape and line, to more abstract concepts such as the “viewer’s path” and negative space.
In this final article, we’ll talk about using contrast and color effectively, as well as approaches to locations, capturing the “reality” of a moment versus taking artistic license to interpret the scene, and the importance of timing.
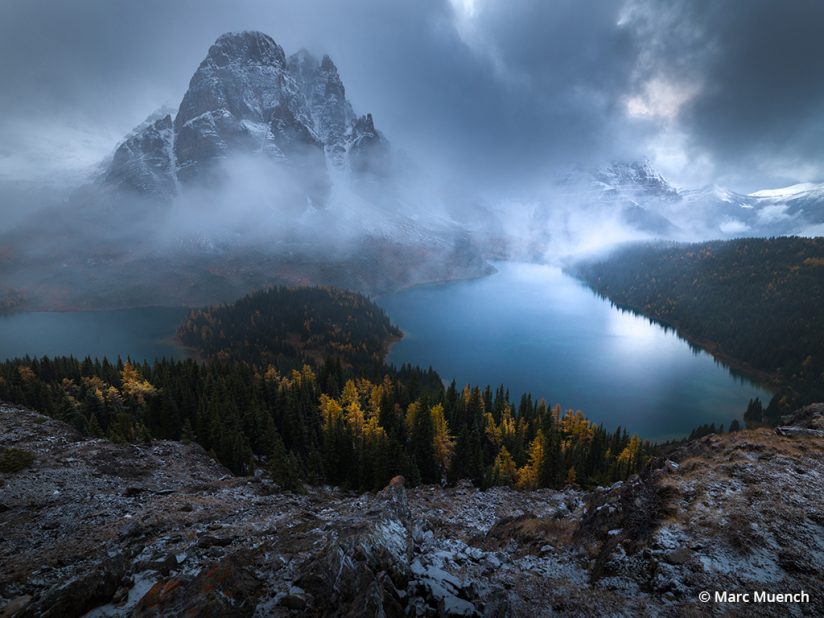
Contrast & Color
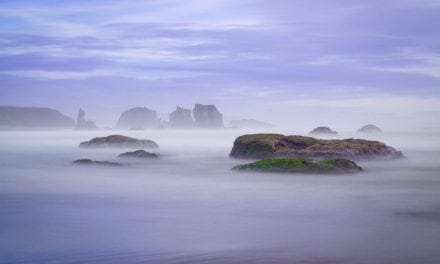
Landscape photographers have little control over the color and contrast of nature, with the exception of a few filters and the time of day. Almost all contrast and color is modified on the computer while in the post-processing stage. This is the part of image-making that offers the most power and control of the entire process, and contrast and color are usually significantly modified before the final image is complete. A photographer’s experience in post-processing significantly affects and improves their ability to see and create landscape images. I refer to this in a section below, “Reality Versus Artistic License.”
Here are a few helpful rules about contrast and color to be used in composition:
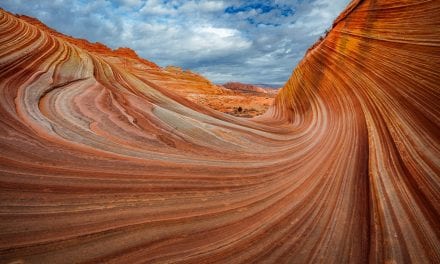
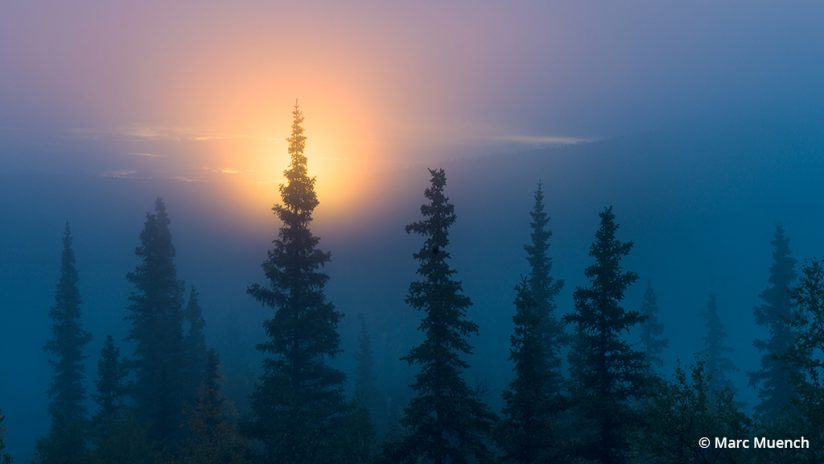
- Contrasting colors help separate regions of an image; yellow to blue primary colors and green to magenta secondary colors.
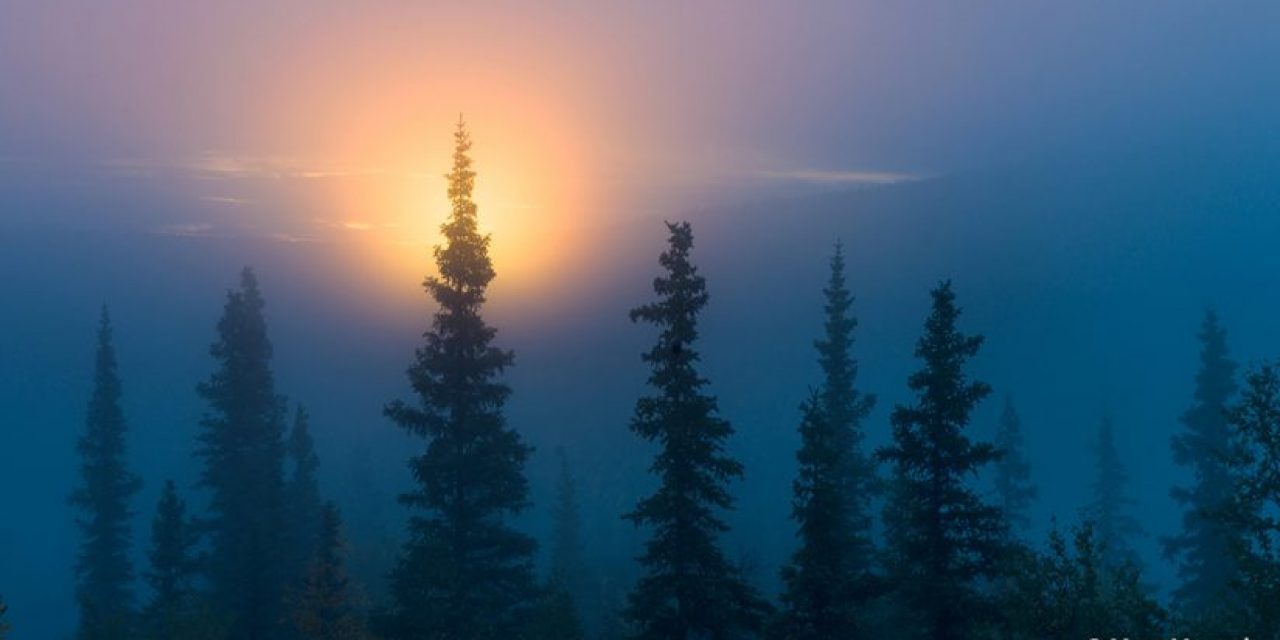
- Soft, low-contrast light reveals all colors.
- Bright, high-contrast light saturates primary colors.
- There are some colors that can never be accurately captured and presented, and are referred to as “out of gamut.”
- The human eye is attracted to both high-contrast and saturated colors.
- White balance is required by a camera to produce accurate colors.
- We all see colors differently.
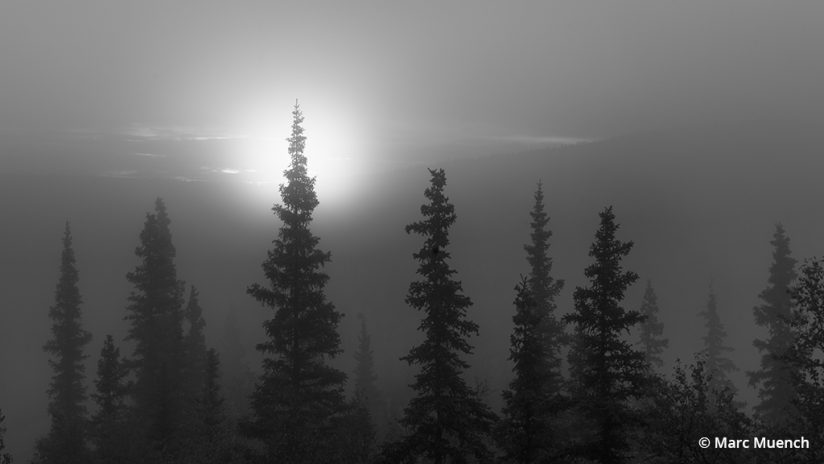
- Contrast is the most important aspect of photography to understand.
When composing a landscape image, it is very helpful to know how your camera will respond to the light, contrast and color in a scene. Once you understand how your camera captures light, you will then begin to train your eye to recognize that particular light. I used Fujichrome Velvia film for over 10 years of my career, and during that time I developed a keen eye for what would be the best situations and lighting when I wanted to capture the very best image. Now, 15 years and numerous types of digital cameras later, my eye has adapted once again. The basic difference between Velvia film and today’s digital cameras is the dynamic range. Velvia had a very narrow range of only 4.5 stops of light, as compared to a modern Hasselblad digital medium format camera that has over 14 stops. Increased dynamic range does not make the actual light better but rather allows the photographer to take advantage of much higher-contrast light. Understanding dynamic range and acquiring the ability to recognize it is something that comes with experience and spending time post-processing images.
Using color in landscape photography is fairly simple. First, be sure you know what colors you don’t see. A free online test is available at enchroma.com/pages/test. If you are fortunate enough to see a full spectrum of color, then you will be better able to make decisions about colorful subjects in your composition. If you do not see all the colors, then you will be relying more on contrast. This is why contrast is critical in a landscape image. Your ability to identify the right colors is not as critical as seeing contrast between them.
Looking For The Image: Scouting Versus Shooting
There are two ways to look for images: scouting or simply on the fly. When I’m in a location for the first time and there is no way to scout, I am working on the fly. In all other instances, I am either returning to a location I previously photographed or scouted.
When I worked as a commercial photographer for advertising clients, everything was scouted. I had to guarantee that I could produce the image the art director wanted, in a proper time frame.
When I produced articles for editorial in magazines, it was just the opposite. I was not able to scout the location, nor did the editor want me to. There were occasional exceptions where we did some minimal planning, but most editorial stories were more journalistic than scripted.
I found editorial shoots to be extremely rewarding, especially when the light was good. I called this combat photography, where all my senses were alert and my camera technique was mostly second nature from years of practice. My reactions to the subject, light and environment were from my own personal experience, and it was the ultimate test of my ability to perform in a dynamic situation, requiring all of my skills.
Know Your Subject & Environment
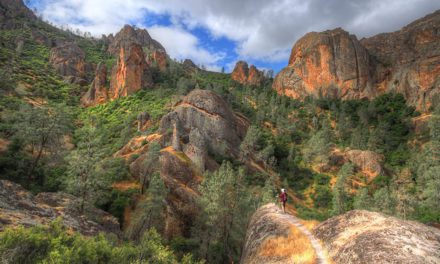
Learning as many specific details about the location prior to a shoot will help you immensely when out in the field, even when visiting a location for the first time. All of the challenges you face—logistics, weather, personal considerations, as well as the technical aspects of photography—compound on each other, especially in remote areas.
Before I begin creating images, I must feel fairly safe and comfortable. I’m not suggesting that the temperature has to be 75 degrees Fahrenheit and a cold smoothie be within my reach. Rather, my situation must not be dire, and I can’t feel the need to leave the location as quickly as possible. Achieving such comfort in unusual places during challenging conditions takes experience and demands effort. If you are not able to get to this mental place, then finding images and working your camera will be too difficult.
There’s a name for the feeling one has in a new place with unknown challenges—it’s called “novel space.” It’s all new to you, you haven’t experienced it before. But there is a difference between unknown and unexpected challenges. For example, if you have experience camping, then you’ll be able to adapt anywhere in the world fairly quickly to the requirements and issues associated with being outdoors in an environment without a hotel or restaurant.
This is not because you know what is going to happen but because you have the experience to deal with the expected. You may not know it’s going to rain, but you do expect for the weather to be changeable, and you are prepared. If you didn’t understand the concept of rain, then what? If you have never camped before, then you’ll be faced with all those challenges in addition to the technical and creative issues of landscape photography.
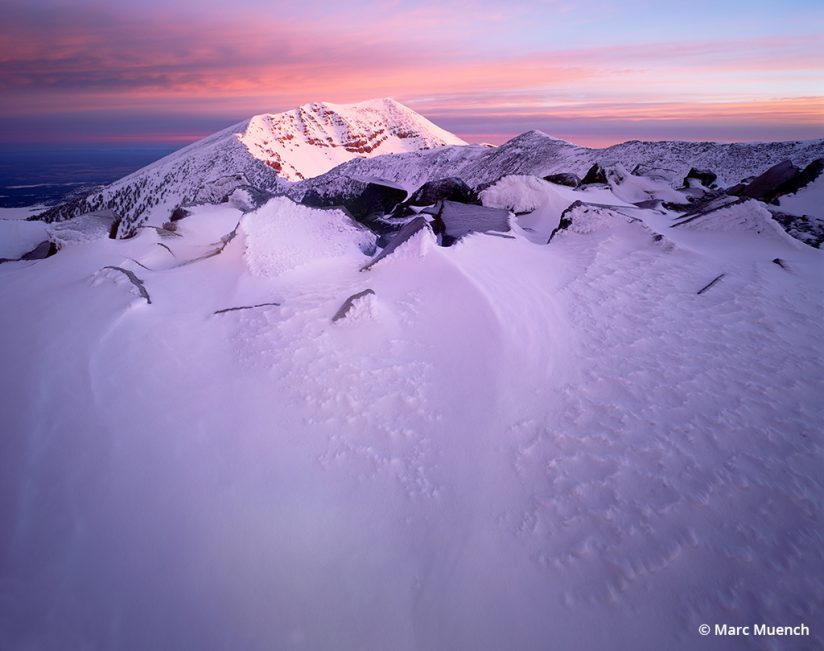
When I captured an image at the summit of Agassiz Peak, I had a hunch that there would be drifting snow based on the howling wind the night before. I also knew the high ridge would give views of the distant peak. This came from a knowledge of the winter snow, mountains and predominant wind direction of the area. I was told about a hut in which I could spend the night during a friendly conversation with the ski patrol the day before. All this led up to my experience at the summit and the capture of the final image. My success was based on many factors, including my comfort with being in a new environment during extreme weather.
When we feel comfortable, we become confident and are therefore in a better frame of mind to think creatively in the field. Then we are able to consider the vocabulary of composition.
Reality Versus Artistic License
From the moment an image is captured, reality (as represented in the photograph) is altered. There’s a series of unavoidable changes being made to the image: lens distortion is added, and sharpness, contrast and color are affected. And then there’s the viewing of the image, where the calibration and limitations of the digital sensor and the computer screen used to project the digital file add even more changes. As if those weren’t enough reality-altering steps, there’s also the viewer’s perception, which varies dramatically.
After all that, there’s even more reality altering, as the photographic rendering of the scene (in software such as Adobe Lightroom or Photoshop) changes the image even more during post-processing. Sometimes those changes are extreme, leaving a Grand Canyon-sized chasm between some of today’s landscape images and reality. This is neither good nor bad but simply a style of work.
This final step in the creative process—post-processing—is what has changed at warp speed in the past decade. I have found my own limits in this respect, and I encourage everyone to do the same. As you discover your limits, it will be helpful to study and understand various styles (even the ones you don’t care for), so that you are able to learn and modify your own style with experience.
Because of the impact digital post-processing has made on my personal vision, my understanding of post-processing is directly related to the way I see landscapes. Take a moment to think about how your own post-processing skill and style affect the photographs you take. Or maybe it doesn’t, and it’s something you could pay more attention to.
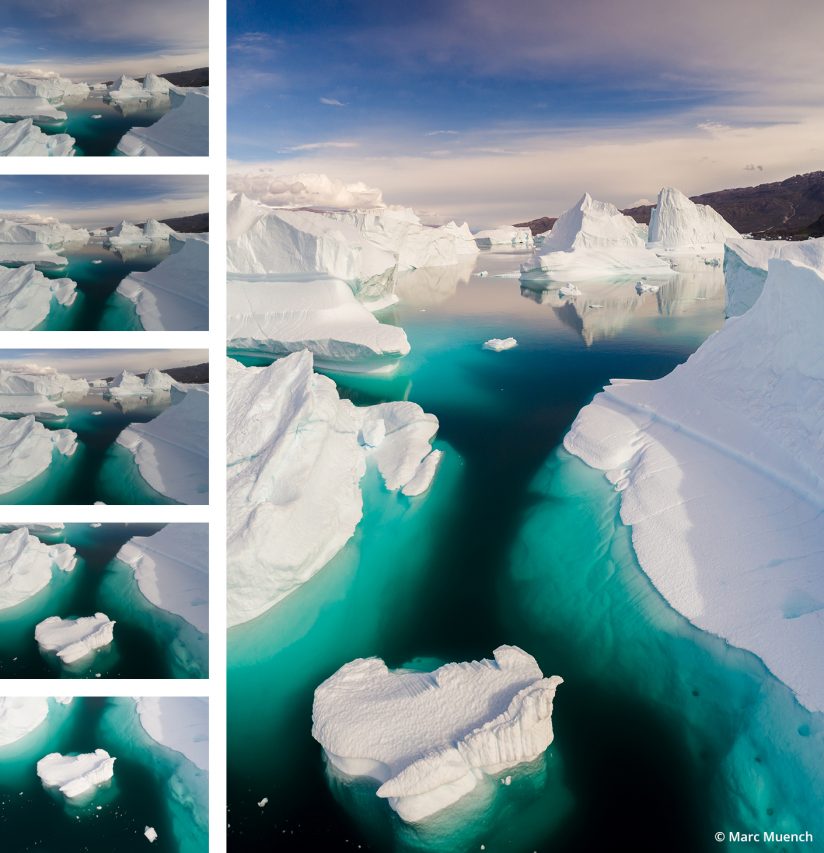
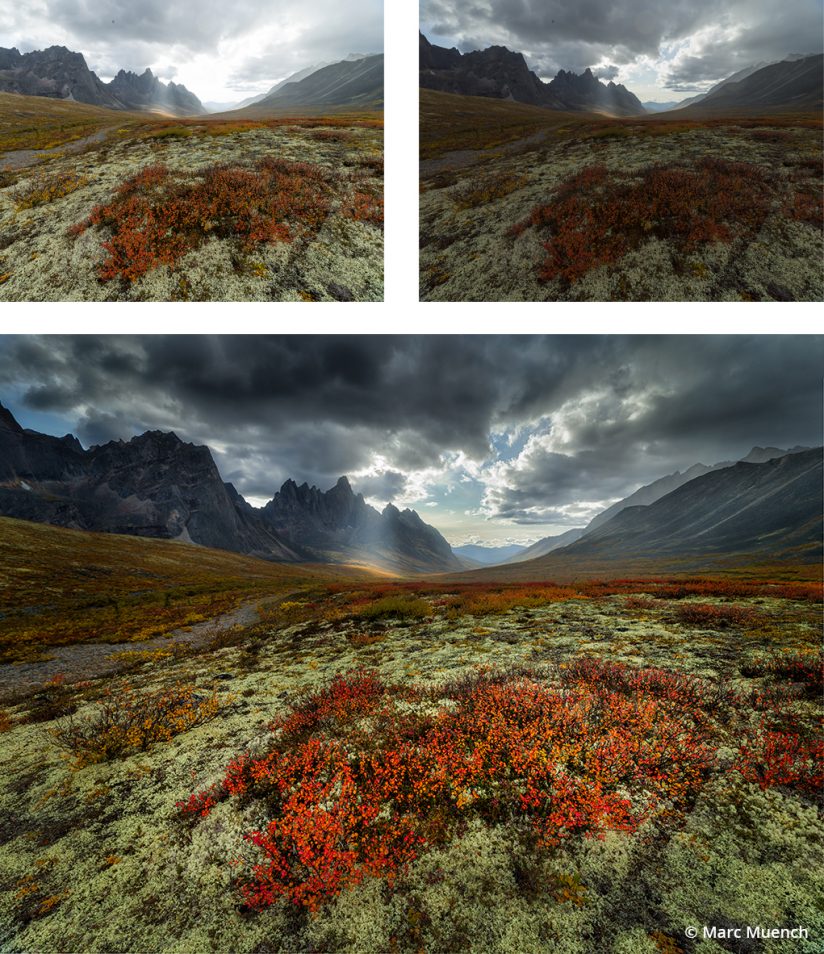
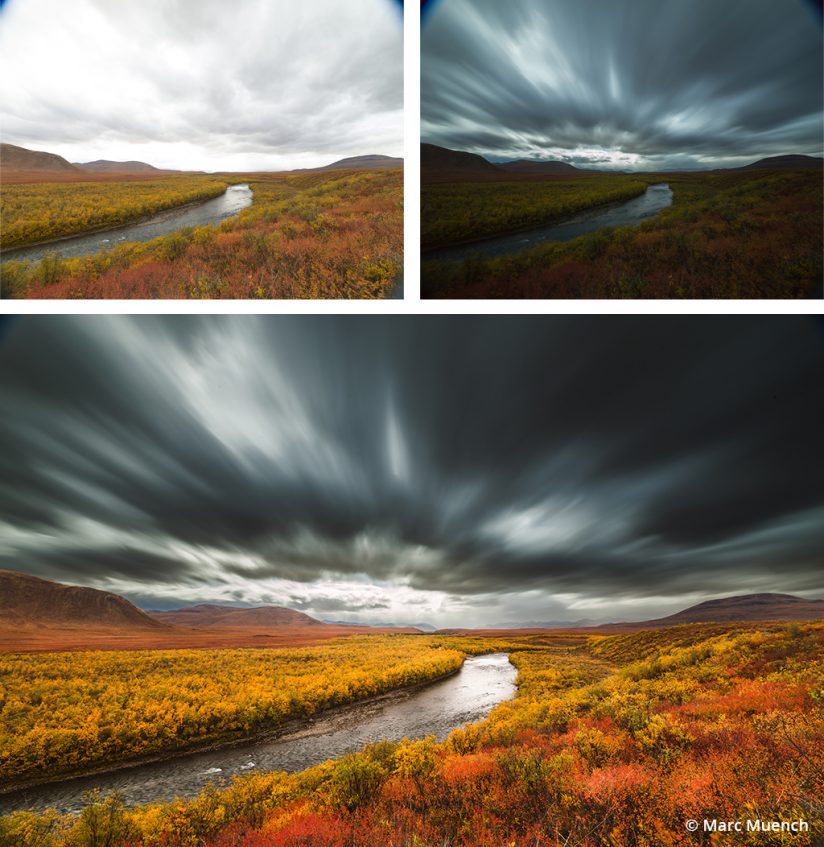
Here are a few examples of techniques I use in post-processing that have altered the way I see landscapes. All these techniques were not possible or practical with film and therefore never explored. By becoming comfortable stitching images together, I was able to see compositions I was never able to capture prior, for example.
Stitching: Capture a scene in segments using multiple frames that are stitched together in post-processing.
Merging: Capture a scene using multiple frames over the course of extended time.
Blending: Capture a scene with more than one exposure for dynamic range, using manual HDR technique.
Low Light: Capture a scene using a very high ISO.

Timing
The most famous photographer whose work exemplifies critical timing is that of Henri Cartier-Bresson. His book The Decisive Moment shows how the use of timing, along with point of view, reveals an amazing reality that normally goes unseen.
We all understand that timing is critical for capturing the best light, but when you consider the motion of a subject in sync with the light captured from a unique perspective, the complexity compounds. The culmination of these four factors—composition, subject, light and timing—becomes something unexpected and, as Cartier-Bresson realized, unusual. His work showed two interesting aspects of timing. First is that of freezing the moment in time when the subject appears perched in a state of maximum motion. The second is that the point of view creates a composition that reveals something unusual in the scene. This second aspect is more important in landscape photography.
If we only had unlimited time, think of all the images we could create. The beauty of our predicament is that we don’t and must work with schedules and limited resources. These constraints are what forces us to improvise and stretch our imagination and creativity. All the hard work and ingenuity pays off and in the end makes the difference between something interesting and something truly beautiful.
This three-part article series is excerpted from The Art of Seeing, an ebook by Marc Muench, available as a free download at muenchworkshops.com/ebook.
The post The Art Of Seeing, Part 3 appeared first on Outdoor Photographer.