As far back as I can remember, I had a camera in my hand. It started with my sister’s Kodak Brownie and evolved into the whole system I carry to Tanzania today to lead my photo safaris in the Serengeti. My first 35mm camera was an old Konica T through which I ran many rolls of slide film. I continued to upgrade my Konica bodies, simultaneously broadening my horizons of film types. When I reached the apex looking like a total photo geek, I had three Konica bodies strung around my neck. Each body contained a different type of film.
I donned a photo vest with many pockets while wandering the streets of Manhattan looking for black-and-white shots, images made with color negatives, and finally, I repeated all compositions on slide file. I’ll always smile thinking about those days, but the biggest takeaway I learned from them is to cover all bases in photography, especially when I made a slide. The piece of film was the end result and I had to get it right in the camera. Using Photoshop today, I wonder how I ever got by, but through persistence and determination, I worked my way up the ranks.
In this two-part series, I’ll share ways that you can cover all bases in photography to increase your chances of coming home with winning images.
Vary the Aperture
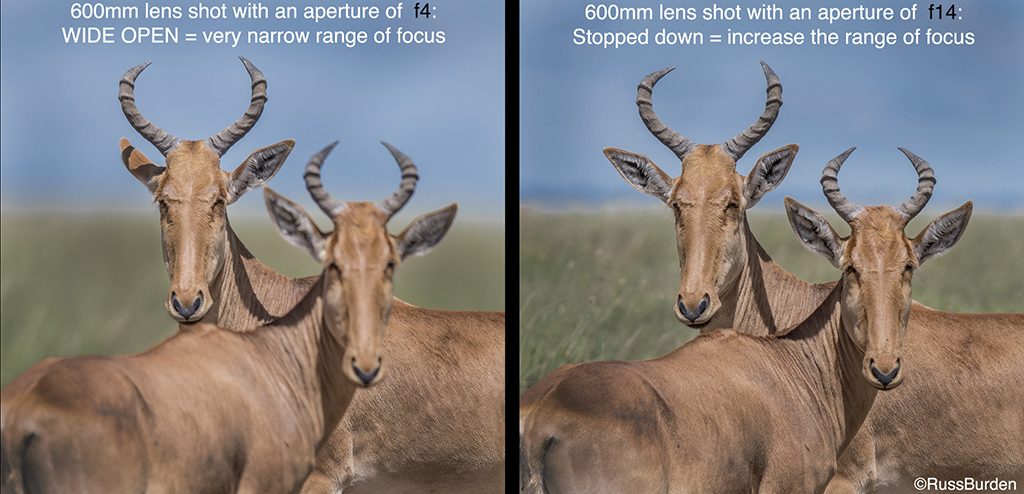
Depth of field is critical to the success of a photo. It controls how much focus depth is created when the shutter is pressed. Wide-open apertures provide very limited depth of field, while stopped-down apertures increase the “Range Of Sharpness.” Wide-open apertures vary from ƒ/1.4 to ƒ/4 depending on the lens, while stopped-down apertures vary from ƒ/11 to ƒ/22, again depending on the lens. Most 35mm digital cameras have a Depth Of Field Preview button that shows the depth of field through the viewfinder. Unfortunately, it’s somewhat hard to discern and I know very few photographers who use it.
With this in mind, “Bracket” the depth of field range and determine what aperture is best when you view your images on a desktop monitor. Use your widest aperture, a mid-range aperture and a stopped-down aperture to bracket the depth of field. For each aperture, place the focus point approximately one-third into the frame to maximize the depth of field. If all the components in the composition demand attention, increase the depth of field. This is why scenics with foreground to background sharpness work well. On the other hand, to create a specific center of attention, decrease the depth of field. This allows a critically focused portion of the image to remain sharp against an out-of-focus background.
Different Day, Different Conditions
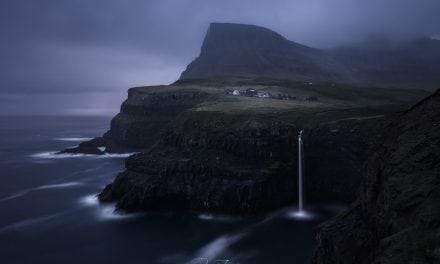
I’ve heard photographers say, “I never go to the same place twice—I already have that shot.” I understand their thinking, but I still turn to them to share that they could be depriving themselves of a great image if it’s an iconic location. As with snowflakes, no two days are ever the same. Clouds change, atmospheric conditions vary, your frame of mind is different, along with a number of other variables. You never can predict when a rainbow or dramatic sky may appear. Should a rainbow decide to make an appearance on a day after you’ve “been there,” you’re guaranteed to miss it.
Bracket Your Exposures
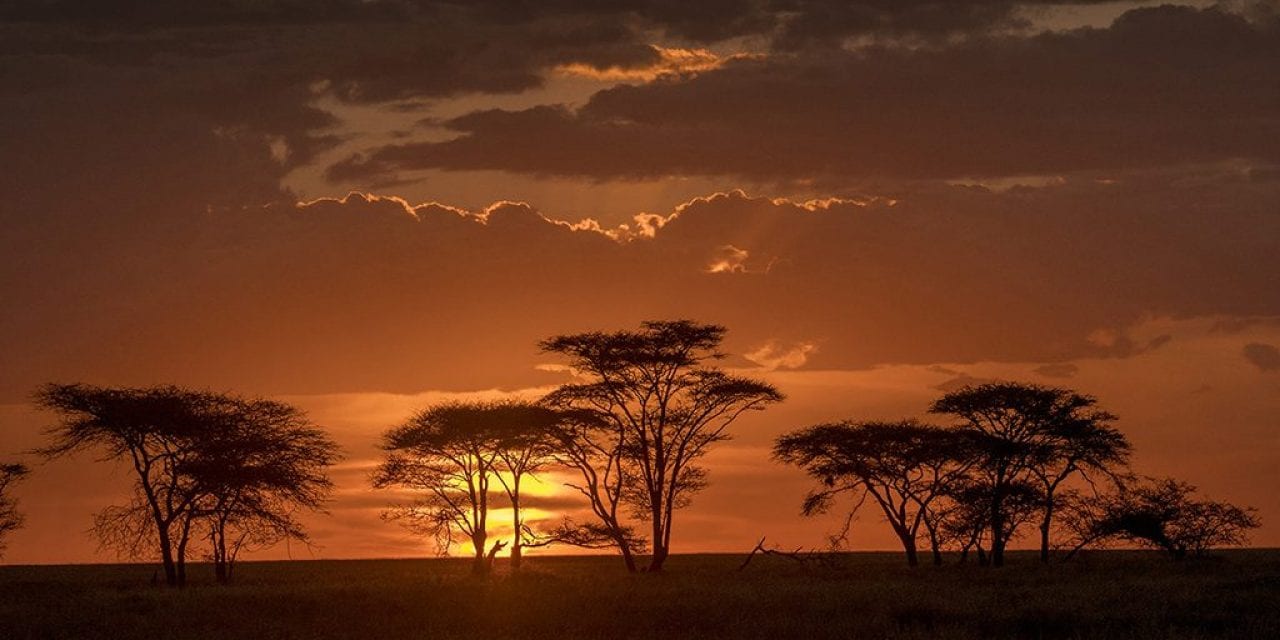
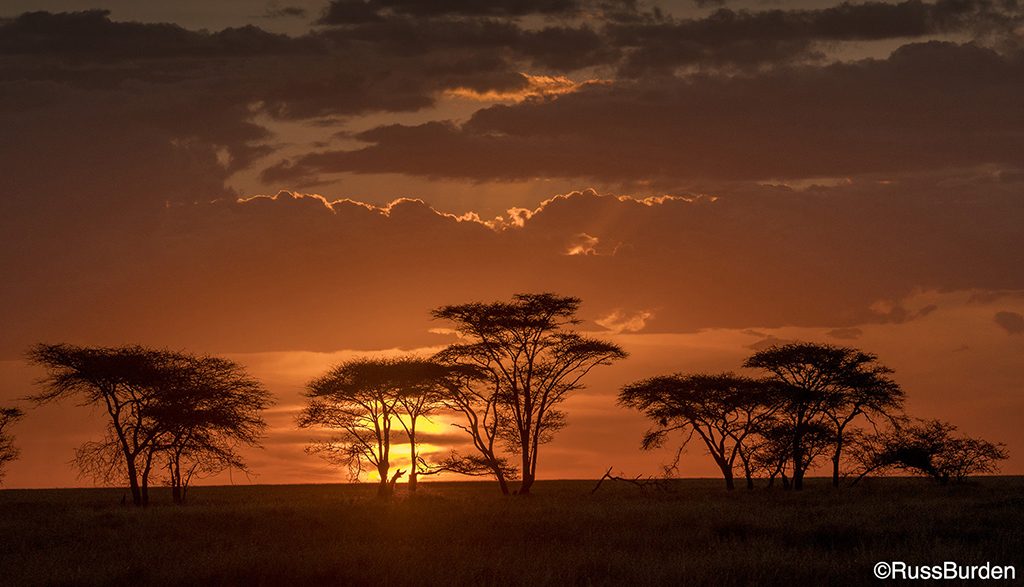
Errors in exposure can be compensated for when you optimize the RAW file, but if it’s too far off, there’s no recovery. An overexposed file will have no detail in the highlights and an underexposed file gets very noisy if you try to open up the shadows. I admit that the meters in today’s cameras are very sophisticated and the sensors have wider contrast ranges, but there are limitations. This is especially true with delicate warm tones of red, orange and yellow. I strongly urge you to activate your color histogram. Many cameras have it available but not as a default. Go to the custom settings and enable the setting that makes it visible in the PLAYBACK mode. I find that I need to go at least minus one stop when the skies go electric at sunrise and sunset. Base your exposure solely on the RED CHANNEL and ignore all the others. Bracketing ensures you get the proper exposure. The more familiar you become with your camera and how it reacts to any given lighting situation, the less you’ll need to bracket.
Vary The Background
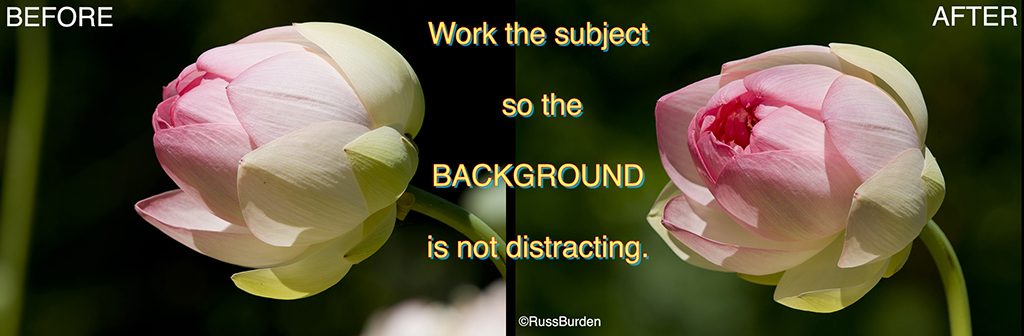
When I make photographs, I place as much importance on the background as I do on the subject. Regardless of how spectacular the primary focal point is, a busy background results in a busy image. A background shouldn’t compete with the subject, its color should be in harmony with it and it should be as unobtrusive as possible. If the subject allows, try to shoot it against as many backgrounds as possible. Each will net a different result. Even a slight alteration in your camera position may have a radical effect on the image. Be cognizant about what appears in the entire viewfinder to fine-tune your images and produce better pictures.
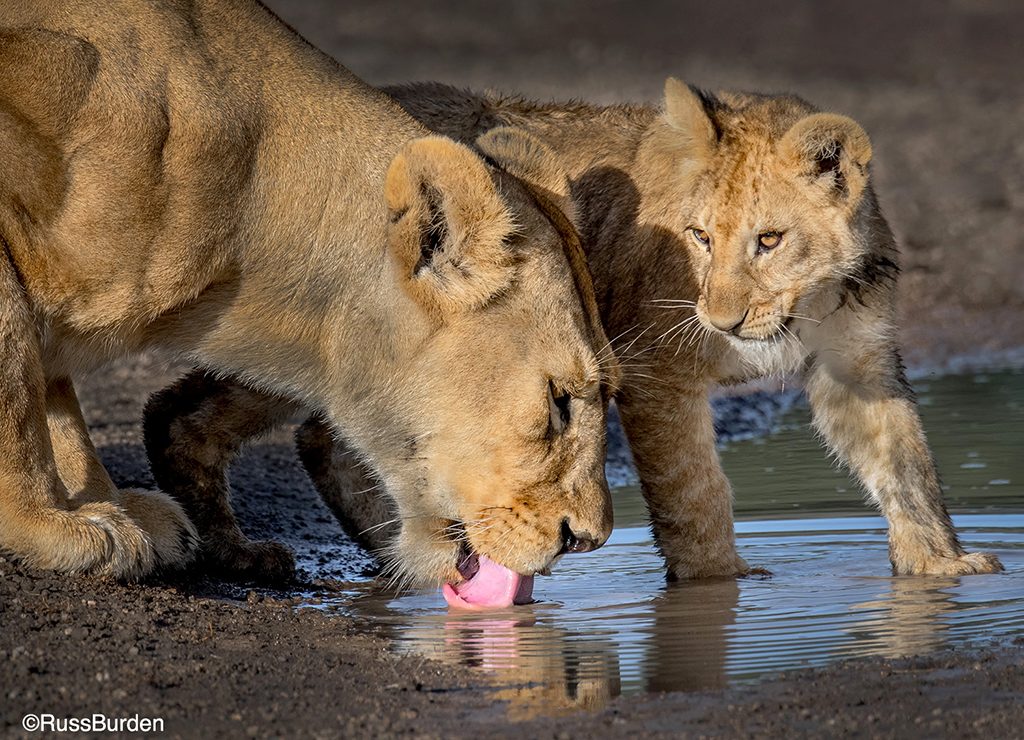
Take More Than One
Whether it’s an animal, person, sunset or sunrise, the decisive moment has a huge impact in determining the success of an image. It can be a great expression, a glance, a fleeting look, the turn of the head or another key aspect. If you shoot more than one image, you vastly increase the chance of capturing a once-in-a-lifetime moment. With people, when there’s strategic interaction between the photographer and subject, it helps create better opportunities. With animals, patience, knowledge of the species, a quick shutter finger and a bit of luck all work to your advantage.
Be sure to catch next week’s Tip to learn more ways to cover all bases in photography in Part 2.
Visit www.russburdenphotography.com for information about his nature photo safaris to Tanzania.
The post Cover All Bases In Photography, Part 1 appeared first on Outdoor Photographer.