I have been drawn to macro photography almost from the first time I picked up a camera. Macro photography allows us to photograph the details in nature—which are endless. As we come in closer and closer to our subjects, it is a new world that we are seeing and photographing, sometimes for the first time.
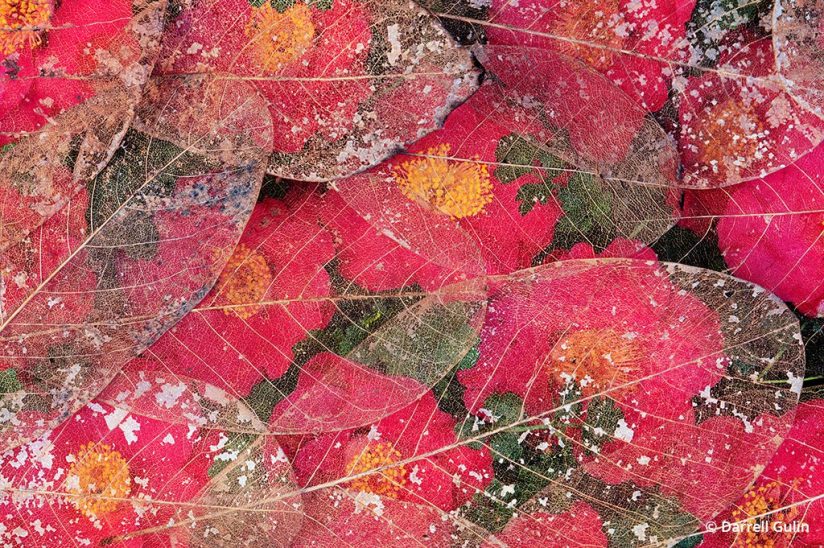
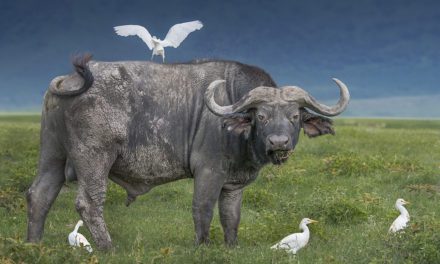
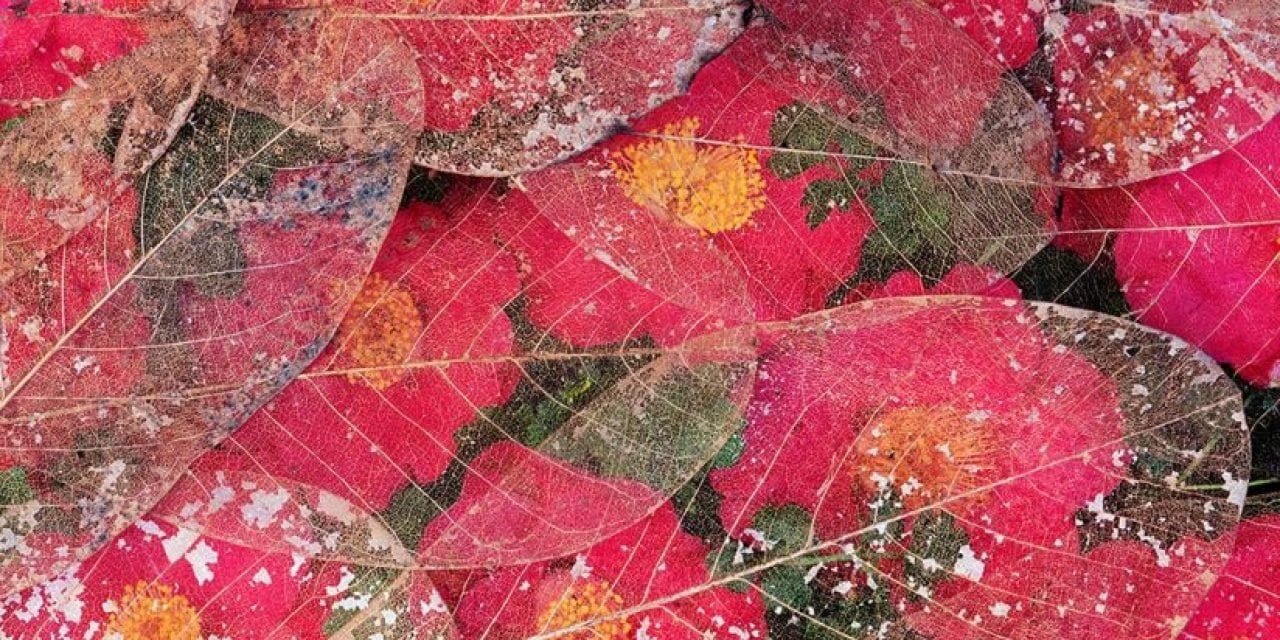
Camellia blooms fallen onto the ground and covered with skeletonized leaves. Taken on tripod with cable release using the Canon EF 180mm f/3.5L Macro USM on Fujichrome Velvia 100 film. Exposure: 1/4 sec., ƒ/22.
At one-to-one or 1x magnification, the physical size and the image size are the same. I consider macro photography to mean anything rendered at one-half life size (0.5x) or greater within the frame.
It may be that you would love to do some macro photography but don’t know where to begin. I am here to say that with some time and effort—along with using the macro photo tips that follow—you will become a successful close-up photographer.
Basic Equipment For Macro Photography
In my camera bag for taking macro photographs are lenses and accessories that allow me to get close and focused on small details. If you’re just getting started, check out the macro lenses available for your system. These will typically be in the 80mm to 100mm range. Lenses designated as “macro” lenses are the surest bet, but you can do close-up photography with a variety of lenses if they provide suitable magnification and close-focusing ability.
As you become more experienced, you might find yourself choosing among several lenses, depending on the subject. I use the following Canon lenses for macro work:
- EF 24-105mm f/4L IS USM
- EF 100-400mm f/4.5-5.6L IS II USM
- EF 100mm f/2.8L Macro IS USM
- EF 180mm f/3.5L Macro USM
- TS-E 90mm f/2.8 Tilt-Shift
At times, I also will use a more specialized lens, the Canon MP-E 65mm f/2.8 1-5x Macro Photo. This lens magnifies an image from life size to five times life size (5x).
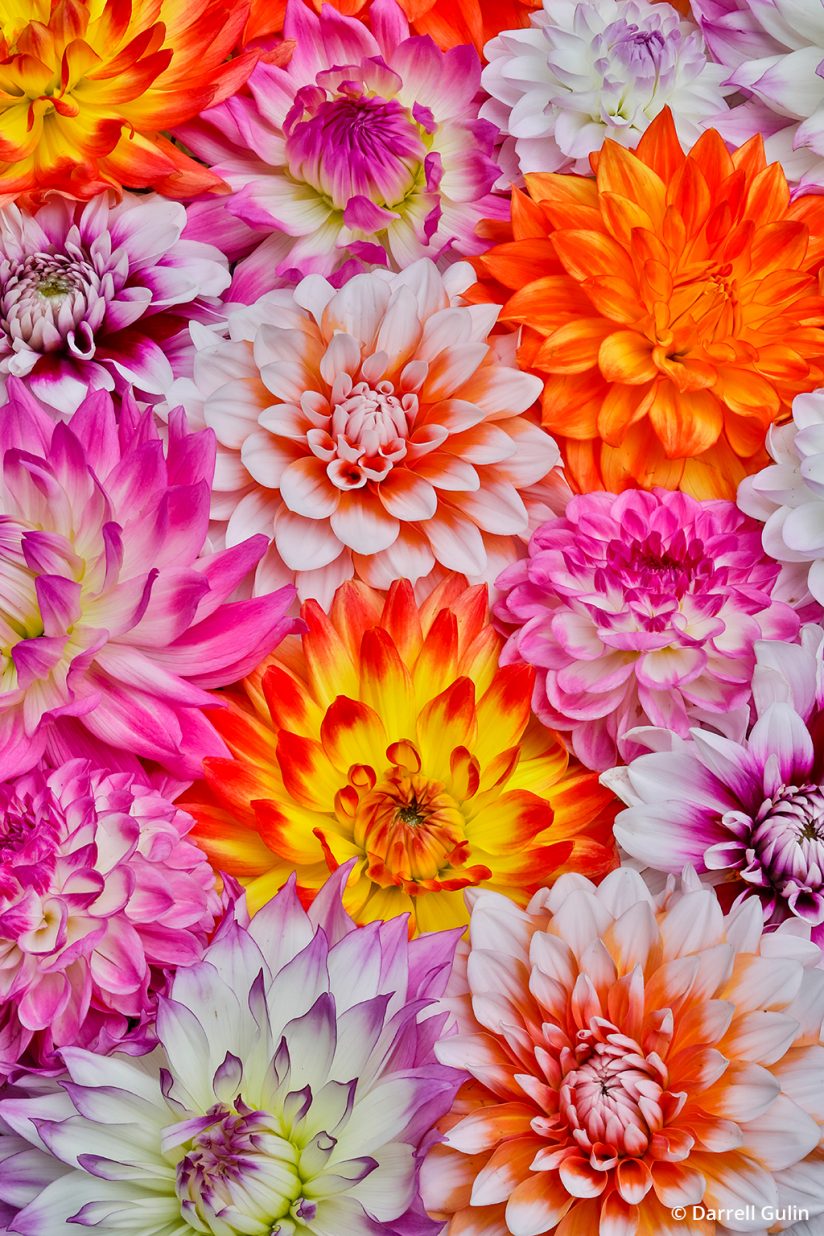
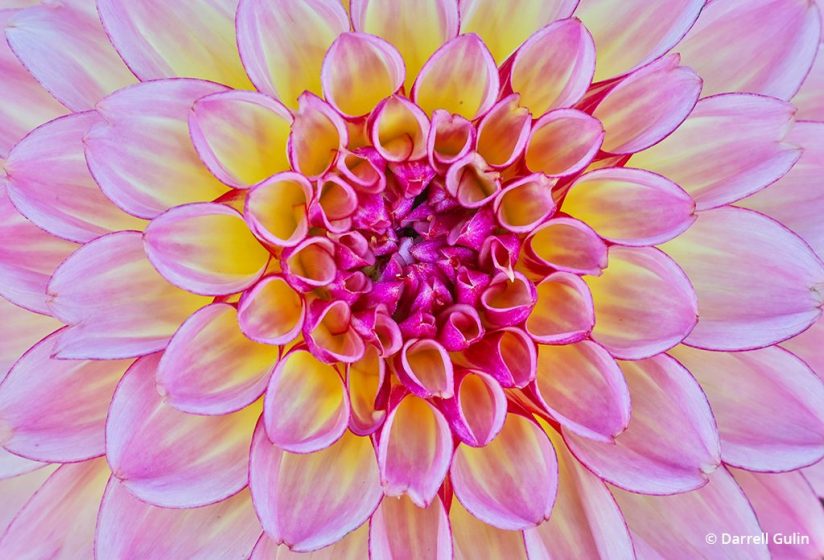
Dahlia flower design. Using my Canon TS-E 90mm f/2.8 Tilt-Shift lens tilted, I am able to work from an angle—not straight down—and still get everything in focus.
Canon EOS 5D Mark IV, Canon TS-E 90mm f/2.8 Tilt-Shift. Exposure: 0.5 sec., ƒ/32, ISO 320.
In addition to lenses, I highly recommend extension tubes, which allow you to focus on subjects closer than the lens can without this accessory (more on this below). I use the Canon Extension Tube EF 25 II with all of the lenses listed above. And for even greater magnification than the lenses are capable of by themselves, you can add a teleconverter such as the Canon Extender EF 1.4x III that I use. Most camera systems today have teleconverters available.
Top Macro Photo Tips
In no specific order, here are some of my best tips for making macro photos.
Extension Tubes
Extension tubes are an inexpensive way to enter the world of macro photography as they allow you to move in closer to the subject with any lens. The closer a camera can come to the subject, the greater the magnification. So, when I use an extension tube with my non-macro lenses like the 24-105mm or 100-400, it allows me to come in closer, thus magnifying the subject even more. I also use these extension tubes with my macro lenses and the 90mm Tilt-Shift lens. You can stack two or more together, giving you even greater close focusing.
[m-fm0003-99 copy]
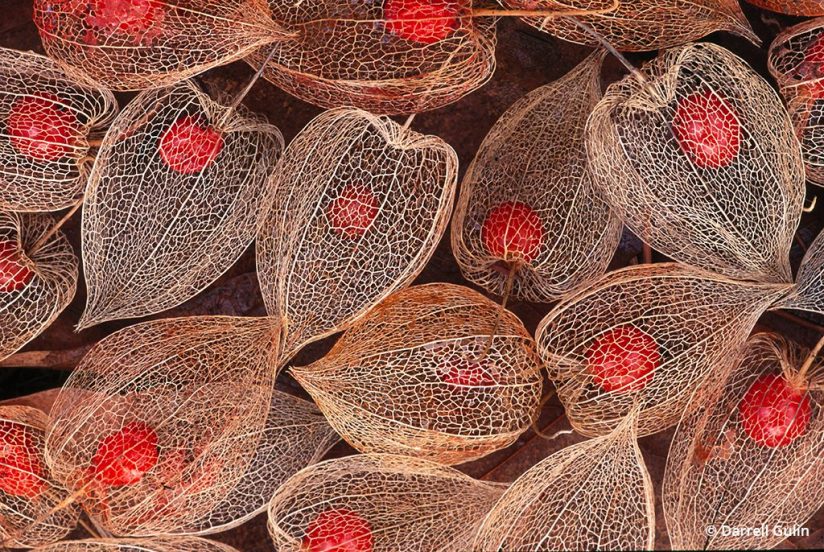
Skeletonized Chinese lantern seed pods placed together to make an interesting design. Taken outdoors on an overcast day using Kodak VS100 film with the Canon EF 24-105mm f/4L IS USM at ƒ/22 for greatest depth of field.
Invest In True Macro Lenses
If you decide to do a lot of macro work, I highly recommend that you invest in a true macro lens. Macro lenses have a flatter focus field than typical lenses, meaning they will be sharper edge-to-edge, which is especially important for close-up objects. They also allow you to get 1x magnification without using extenders or extension tubes, where most other lenses do not let you come in that close to the subject. I use the 180mm Macro lens in about 80 percent of my macro work. This is because it gives me more working distance from the subject and also a much narrower view, thus showing less of the background.
Use A Tripod Whenever Possible
A tripod really helps you to work the composition versus hand-holding. You can make adjustments to the composition, depth of field, focus, shutter speed and ISO much more easily while on the tripod. Also, as you get closer and closer to your subject, you lose light and depth of field, requiring slower shutter speeds that potentially you can’t handhold.
When on the tripod, I like to use my camera’s 2-second self-timer to release the shutter so that I am hands-free and not introducing movement by handling the camera. You can also use a cable release or remote control smartphone app if your camera has one.
If shooting with a DSLR, the mirror movement can also cause vibration; use the camera’s Mirror Lock-up mode with shutter speeds slower than 1/30 sec. to avoid camera shake.
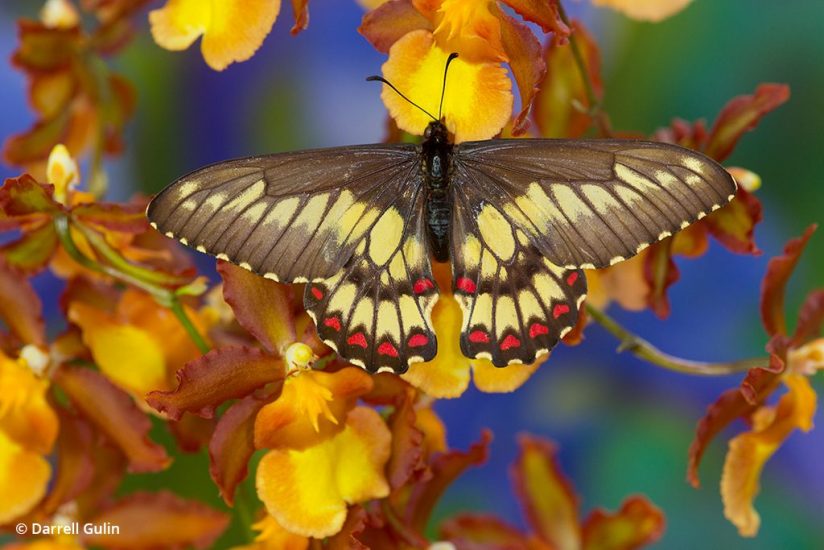
Tailless swallowtail butterfly from South America. Three light sources were used: natural light, Canon Macro Twin Lite MT-24EX flash and a light with a soft box at 45 degrees from the butterfly. The key to a composition like this is to watch your focus and make sure that the focal plane is parallel to the subject.
Canon EOS 5D Mark III, EF 180mm f/3.5L Macro USM, Canon Macro Twin Lite MT-24EX flash. Exposure: 1/20 sec., ƒ/8, ISO 400.
Work In Live View
While on the tripod, I recommend that you use Live View if shooting with a DSLR. I use it not as much for the composition of the image but to check for sharpness from edge to edge. I can magnify the image in Live View from 1x up to 10x to check for sharpness and toggle it around the image to make sure key elements are in focus.
Keep Your Camera Parallel
Make sure your subject is in focus and parallel to the back of the camera. Even being just ever-so-slightly off from parallel may cause some critical portion of your photograph to be out of focus.
Manual Focus
For macro photography, I always manually focus if at all possible. In close-up photography, the depth of field can be so shallow that the camera can’t autofocus properly or fails to focus on what you want to be in focus.
This dahlia close-up photograph was taken outdoors on an overcast day to give it that nice, even lighting.
Canon EOS 5D Mark IV, Canon EF 100-400mm f/4.5-5.6L IS II USM at 300mm. Exposure: 1.20 sec., ƒ/19, ISO 500.
Vary Your Focus Points
By moving in closer and closer to your subject, you are making it bigger in the frame. I like to take several photographs at different distances and focus points, then select which images I like the best in the editing process.
Check For Critical Focus
If you have two subjects in your image, make sure they are both sharp. If both are not in focus, I simply do not keep the image. An exception might be if the second subject is totally out of focus and in the background and does not draw too much attention away from the main subject.
Lighting Macro Subjects
We have not mentioned lighting to this point, but along with sharpness and simple backgrounds, lighting is a key in creating a successful macro image.
Lighting can come from natural light (I prefer overcast days), flash, a combination of flash and natural light (fill flash), soft boxes, diffusers and reflectors. I use all of these light sources, often in combination with each other.
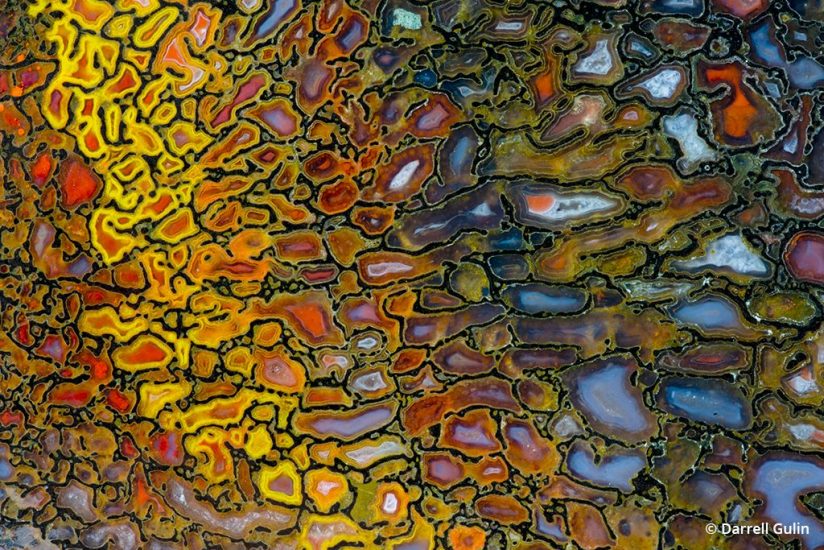
Petrified dinosaur bone close-up. Taken indoors using two daylight-corrected soft boxes for my lighting. Keeping the camera and dinosaur bone on the same focal plane allows for the image to be sharp from edge to edge.
Canon EOS 5D Mark III, Canon EF 180mm f/3.5L Macro USM. Exposure: 3 sec., ƒ/22, ISO 200.
My flash equipment is the Canon Speedlite 600EX II-RT and Canon Macro Twin Lite MT-24EX. The Twin Lite is especially good for macro photography, as the flash head unit is mounted onto the front of the lens. This allows the light to come in closer to the subject. Also, the Twin Lite flashes can be rotated and angled in or out from the subject. You can even adjust their output strength independently.
Ring lights are another option for macro work, though I am not personally a fan because of the flatter light that these typically produce—I like a little more contrast.

Rocks in a dish with water to give it the color punch. Taken outdoors in the shade to control the highlights. A polarizing filter was used to cut down on the glare.
Canon EOS 5D Mark II, Canon EF 24-105mm f/4L IS USM at 99mm. Exposure: 1/10 sec., ƒ/22, ISO 400.
Usually with my flash photography, I am dialing back the power from full flash to a -1 or -1.5 output setting and using both the natural light and flash. My goal is for the viewer not to know that it was a flash photograph. An example of this is the tailless swallowtail butterfly image shown in this article.
Full flash is sometimes necessary, like in the case of photographing the emerald-eyed tree frog, which was done at a workshop indoors. Using the Twin Lite MT-24EX flash, I got a 1/200 sec. shutter speed to stop any movement of the subject or camera shake and the needed depth of field at ƒ/27.
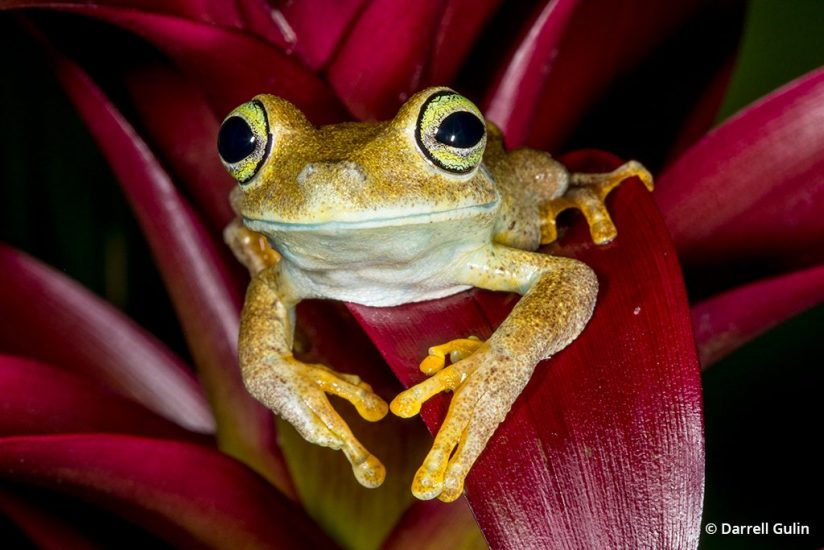
Emerald-eyed tree frog (Hypsiboas crepitans), South America. Use of a fill flash helped ensure I would freeze the frog’s movement and also allowed the use of a smaller aperture for the needed depth of field.
Canon EOS 5D Mark IV, Canon EF 100mm f/2.8L Macro IS USM, Canon Macro Twin Lite MT-24EX flash. Exposure: 1/200 sec., (the camera’s flash sync speed), ƒ/27, ISO 400.
I use one or two soft boxes for lighting at home with subjects like butterflies, rocks, flowers and feathers. I especially like the nice, even illumination when using soft boxes. Make sure the lights are daylight balanced.
Your Lens Affects Working Distance
Get close to the subject—but not too close, in some cases. Working distance is important when it comes to many of the live subjects you might want to photograph. When I did a Macro Frog workshop with Jim Zuckerman last year, I found that many of the participants were using 50mm macro lenses, and when they came closer to the subjects, they were bumping into them. I used the 100mm macro and did not have that problem.
Crop & Resize If Needed
Another way of coming in closer is to make sure to take a very sharp image and then crop in during your processing of the image. When we crop, we are losing resolution, so I find myself more and more using Topaz Gigapixel AI software, which lets you resize your image without losing detail.
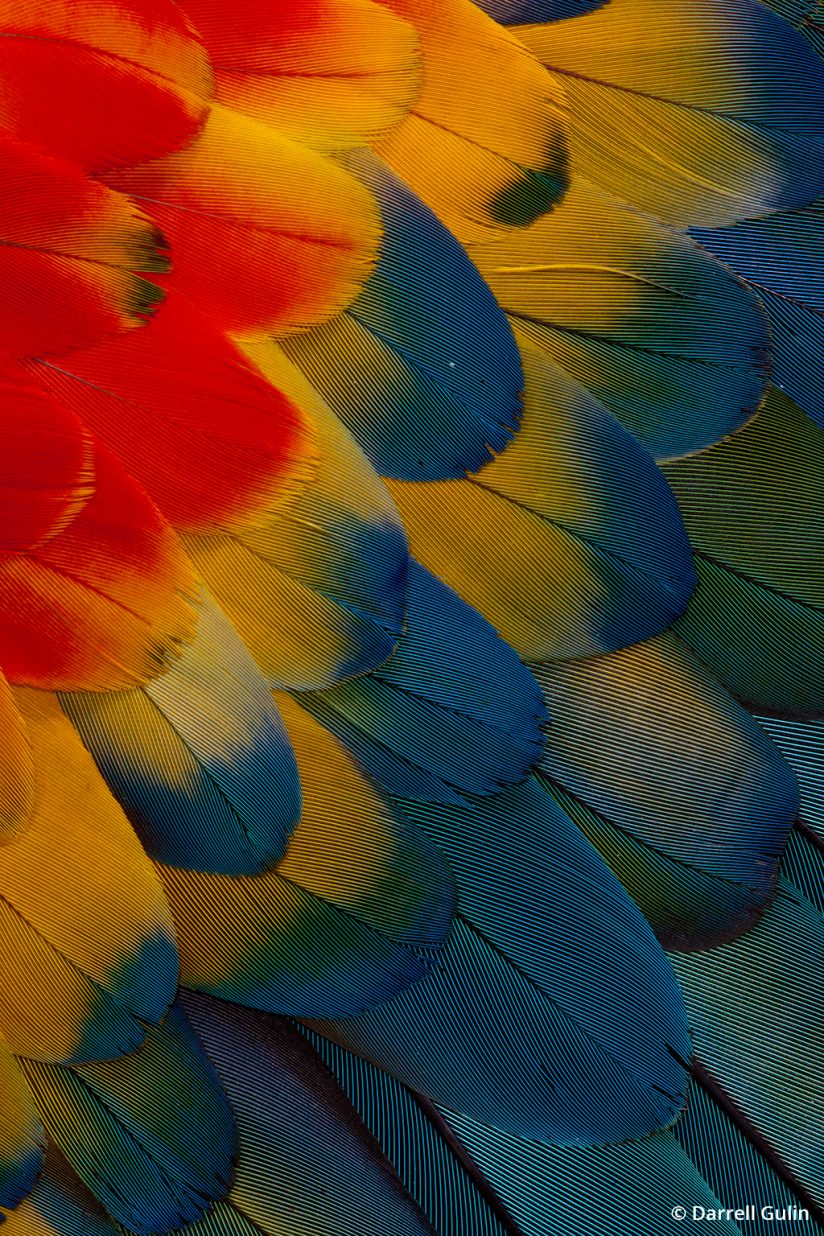
Scarlet macaw shoulder and wing feathers arranged in a pattern. When the macaw molts its feathers, you can purchase them and do layouts like this.
Canon EOS 5D Mark II, Canon EF 180mm f/3.5L Macro USM. Exposure: 0.5 sec., ƒ/22, ISO 320.
Use ISO Settings To Adjust Exposure
I photograph in aperture priority mode and use evaluative metering. I always want to control the depth of field with my macro work. I set the ISO to where it will give me a fast enough shutter speed for the subject I am photographing. If it is a rock, for example, I can set a lower ISO as the shutter speed is not as much a factor, especially when I am on a tripod. But with moving subject, like a butterfly, shutter speed becomes much more important. I will set a higher ISO, giving me both the needed shutter speed to stop the movement and the aperture necessary for my desired depth of field.
With these tips in mind, I encourage you to try photographing some close-up images. A great subject to start with is flowers, which can be photographed year-round. They can be in your garden, a friend’s or a public garden nearby. You can go to a nursery, florist, conservatory or your local grocery store. During the winter, I will buy my wife a bouquet of flowers—but I have to photograph them first.
See more of Darrell Gulin’s work at gulinphoto.com.
The post Focus On The Details appeared first on Outdoor Photographer.