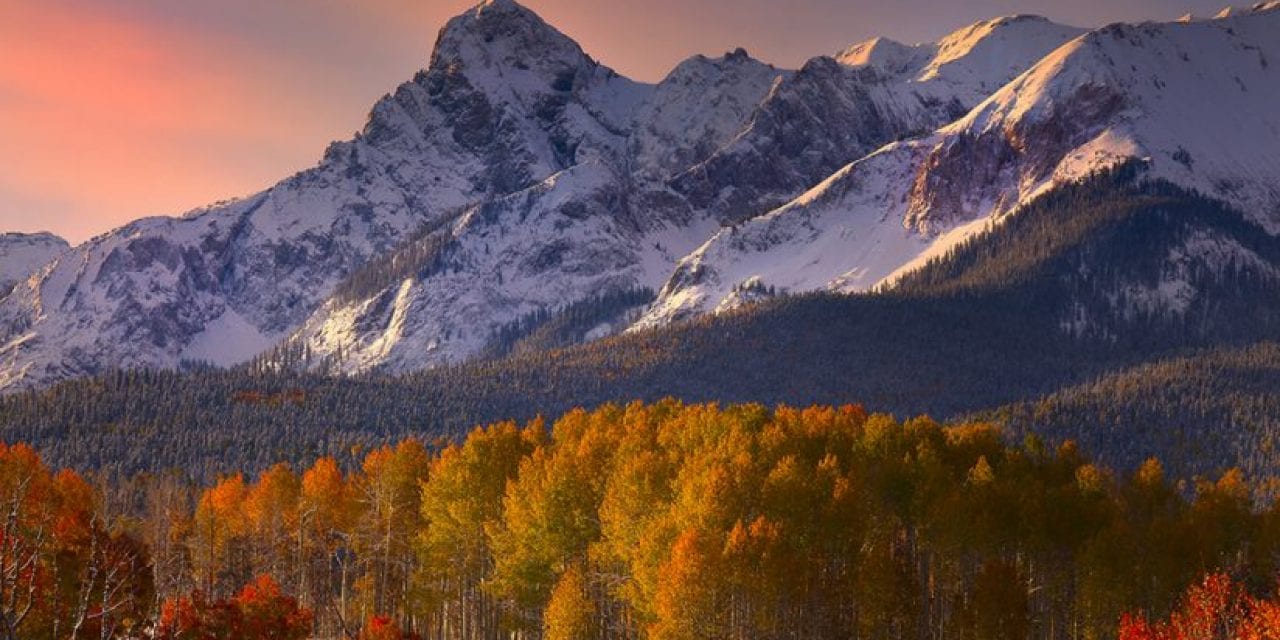
When it comes to color and impact, fall is full of opportunity. The season is an amazing time to create mood with color while capturing landscapes as they transform before one’s eyes. Trying to create an image I’m particularly passionate about, however—especially in autumn—can be challenging.
When shooting fall colors, there are filters that I never leave home without: a polarizer and neutral density (ND) filter. These filters overcome obstacles that otherwise would be impossible to correct without using a filter, even digitally. Polarizers and neutral density filters are indispensable in many of these photographic situations.
A third filter I recommend is the graduated neutral density (grad ND) filter. It’s basically a standard neutral density filter but only covers a portion of the frame. The darker portion is used to reduce light in the brighter part of a scene, preventing it from being overexposed. This allows the camera to expose properly for the area that is not darkened and to balance the overall exposure.
Filters For Fall Color: The Polarizer
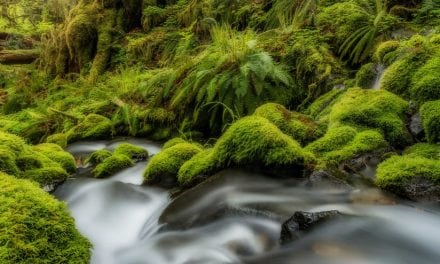
The most important of the filters for fall color is the polarizer. Useable in all facets of nature photography, this filter can make a significant improvement to your images. The polarizer deepens the color of blue skies, provides more saturated colors, and reduces glare and reflections in bright or sunny conditions. Concerning fall foliage, the polarizer eliminates glare on leaves and flowers. It intensifies and saturates color in wet foliage and adds color density to blue or hazy skies.
One additional benefit of using a polarizer is that it cuts through the haze in the atmosphere. This added clarity allows subjects to stand out more against the deeper tones of the sky, so that fall foliage looks even more pronounced.
When light reflects off a shiny surface, it becomes polarized. When we see this reflection, from the surface of water, for example, we call it glare. A polarizer rotated to the correct position will block or absorb most of the reflected glare while letting light polarized perpendicular to the reflection to pass through. This is achieved by using a specialized foil positioned between two sheets of glass. The front part of this filter can be rotated, altering the amount of polarized light that is blocked out by the filter. A simple rotation of the front glass allows the photographer to dial in the amount of effect desired in the image.
To do this properly, position the polarizer on the lens and rotate slowly while looking through the camera’s viewfinder. Choosing where to stop the rotation is a personal choice, but you want to maximize the effect up to the point where it begins to look unrealistic. For example, when the scene includes blue skies, rotate the polarizer only until you get deep, rich blues. If over rotated, the blues can turn into an unrealistic darker tone, especially in higher elevations. To maximize the potential of a polarizer, keep the sun at a right angle to the camera. Face the sun and hold your hands out to your sides; where your arms are pointing are the directions where the polarizer will work the best. A 90-degree angle to the sun is optimal because this is the location of the most polarized light in the sky.
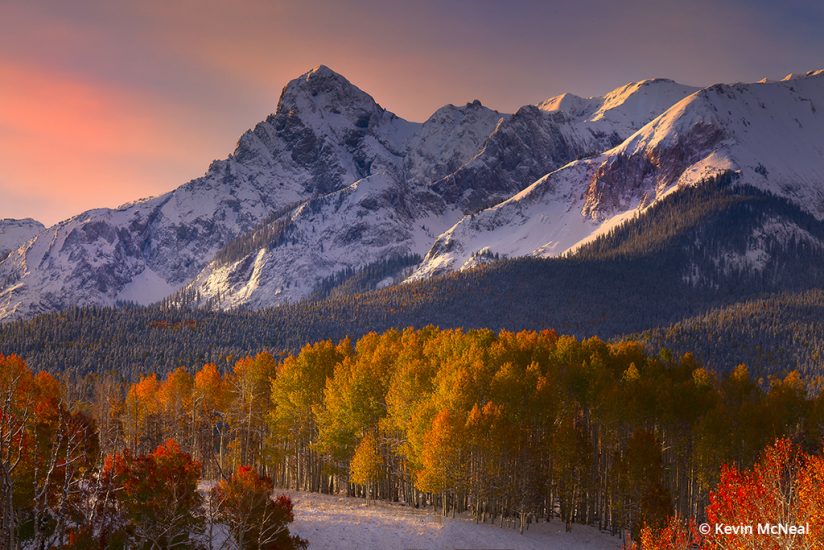
One challenge many photographers have is determining the best time to use a polarizer. It’s effective in many situations, but if you’re unsure when to use a polarizer, hold it up and look through it with your eye instead of screwing it onto the lens. This is a quick way to see if the polarizer is having any effect. In the fall, the polarizer is best utilized just before midday, when conditions are brighter. The increased brightness adds extra contrast to the scene and cuts through the haze, especially when shooting through a telephoto lens. Photographing fall color on sunny days can add additional depth in the image when including the sky in your compositions, especially when contrasted against the vibrant colors of fall.
In addition to deepening blue skies, the most understated reason for using the polarizer is to reduce glare and reflections. This is important because once glare is present in an image, no amount of post processing can undo the damage. That glare reduces the color saturation in images, giving them a flat, washed-out appearance. The polarizer alters this by blocking out the polarized light, enhancing color saturation.
Reflections can be an issue without a polarizer as well. This is evident in scenes that contain water. Nature photography in fall often includes elements such as creeks and lakes, which cause unwanted surface reflections. I like to take images of colorful foliage against the backdrop of the darker water. This would be impossible without a polarizer. This filter also reduces the glare off darker rocks, which allows the color of the foliage to stand out even more. Having the ability to dial in a certain amount of polarized light allows each photographer to create a sense of style that’s uniquely his or her own.
Over the last few years, polarizers have been really improving in terms of color rendition, build and size. They are now designed and built lighter than ever before. Options now include a slim mount with the ability to screw on a second filter such as an ND. They are also designed to allow more light into the camera. In the past, using a polarizer would block two stops of light. Changes to the design in new polarizers have reduced that down to one-stop of light. This means that more light reaches the camera sensor thus allowing increased shutter speeds or lower ISOs. Improvements to the optical glass and coatings within the filter have made them stronger and more resistant to scratching while the glass has become clearer, reducing glare. The result is a sharper image overall.
Features such as color enhancement and color balance can be combined into one filter to give the maximum benefit for fall color photos. Color-intensifying filters work by using a specialized optical glass known as “didymium” glass. The glass accentuates a portion of the color spectrum while suppressing others. An intensifier that enhances color saturation in the red-orange area of the color spectrum increases those colors without affecting the overall color balance of the image, making it ideal for autumn foliage. One of the key signatures to a stunning autumn image is having an image with strong colors in the warm tones without affecting the neutral and white colors.
The ND Filter
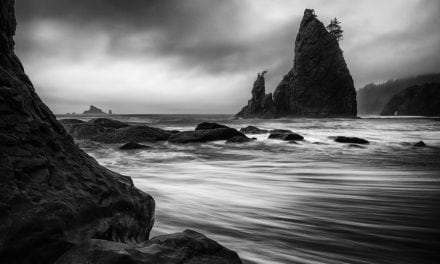
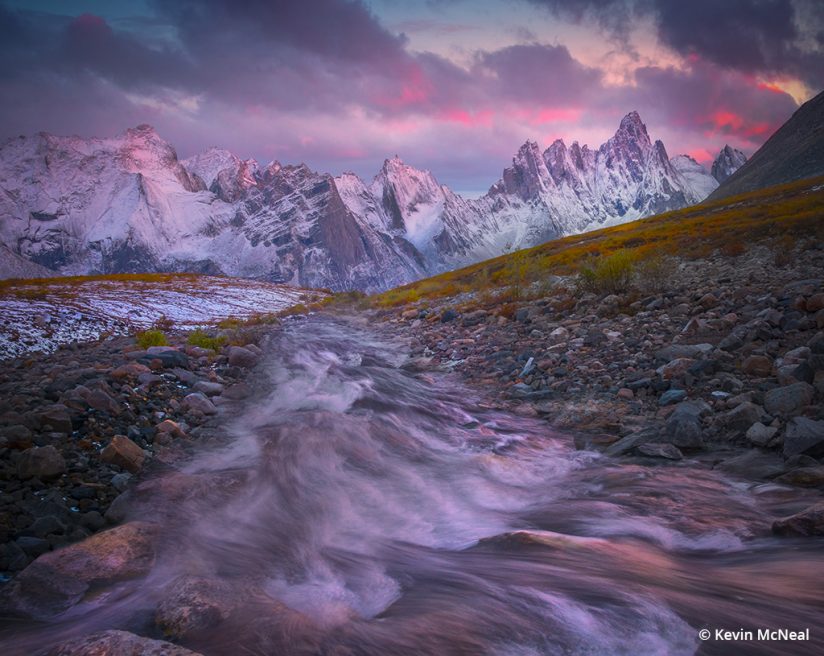
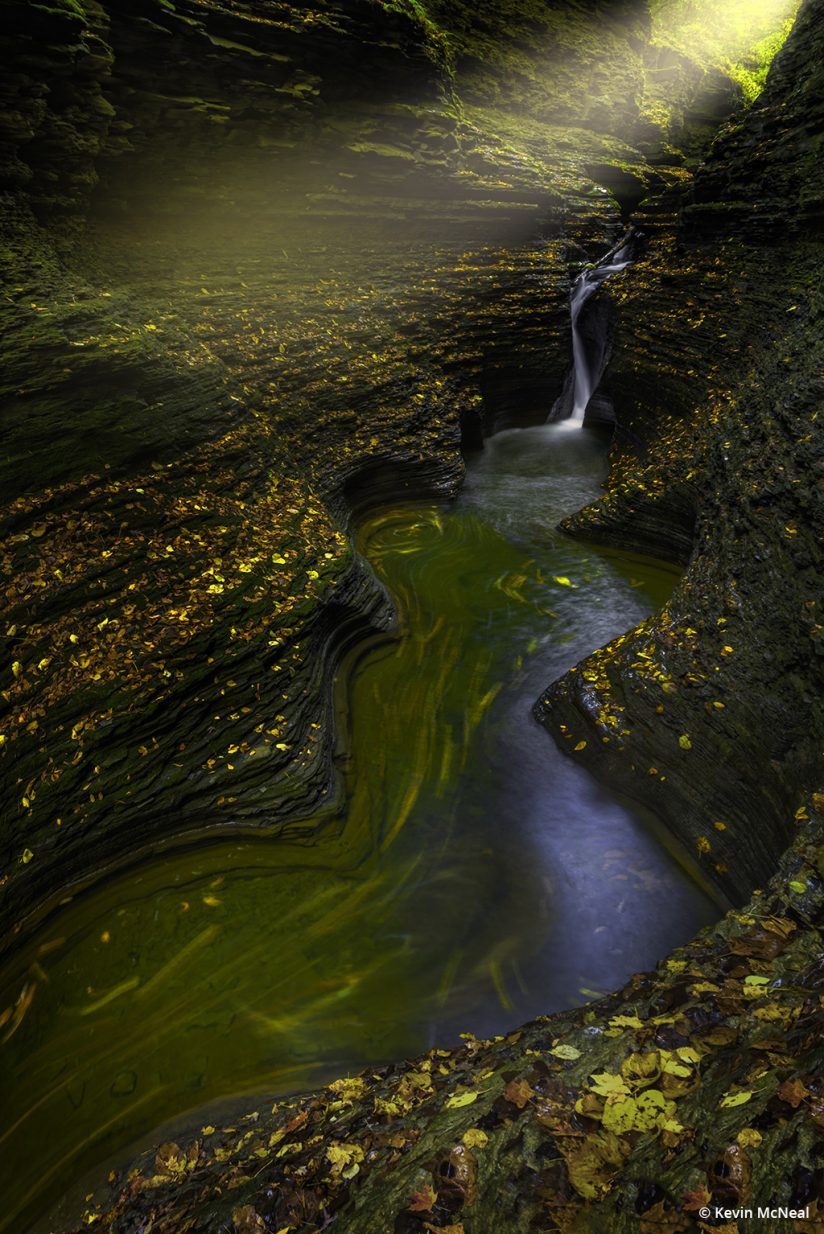
The use of an ND filter allows for exposure creativity. It encourages the photographer to think outside the box and develop fresh concepts of viewing nature. A neutral density filter is made to reduce the amount of light that reaches the camera’s sensor so that a longer exposure is required to achieve an equivalent exposure. The longer exposures enabled by ND filters provide photographers the ability to add a dynamic feel of movement, especially noticeable with subjects like flowing water, which can be a great complement to the brisk colors of fall foliage when contrasted with the blurred effect of moving streams, rapids and water banks. Ideally, to capture this blur, you need to expose the image for at least half a second, but often available ambient light will require a faster shutter speed, even when using the lowest ISO and smallest aperture. This is when it’s advisable to use an ND filter to block light from reaching the camera sensor and thus increase the exposure time. Be careful not to increase the exposure too much, though, as this can blow out highlights in the water.
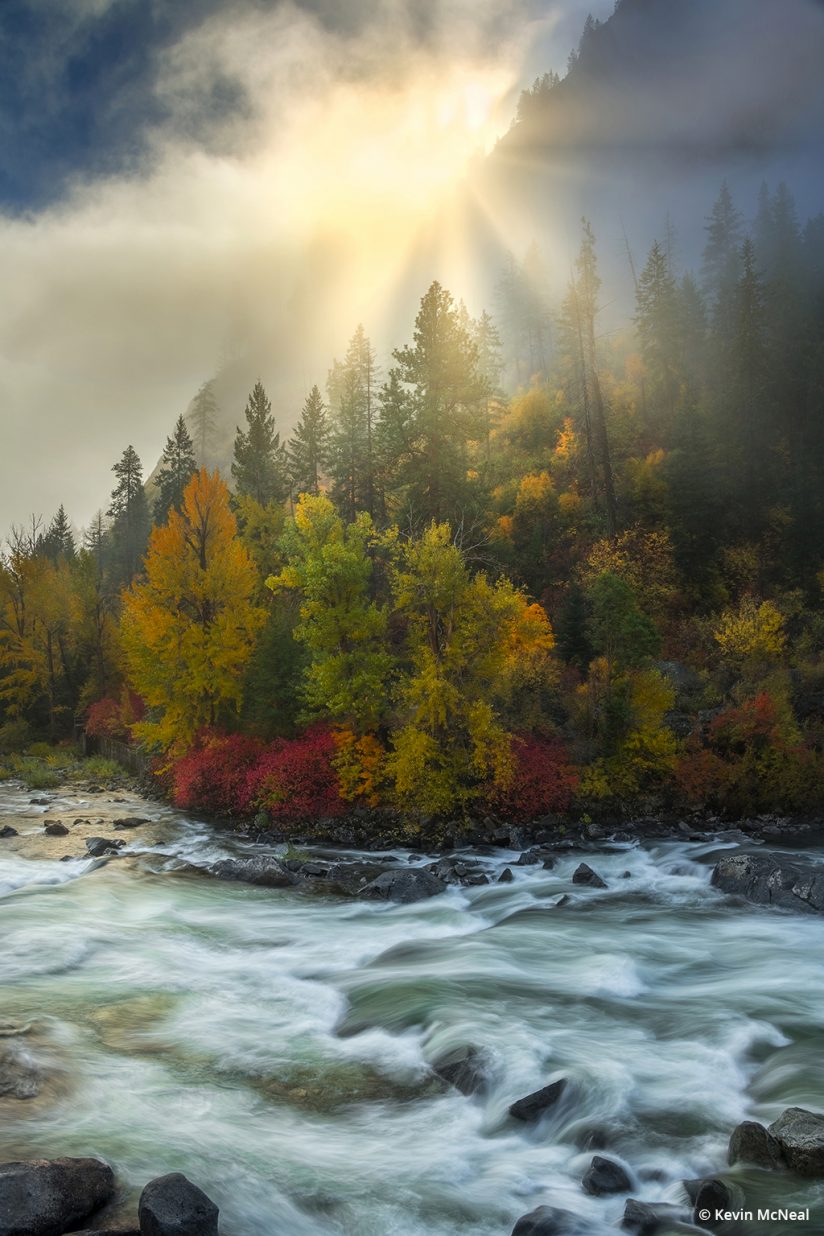
When using an ND filter, I like to use bracketed shots. Taking multiple images with different shutter speeds gives the water a different mood. The longer the shutter speed, the calmer and more tranquil the water will appear. Shorter shutter speeds project movement and action. The overall mood and impact are more dynamic. Textures in the water are defined and create patterns that lead the eye through the image. The use of longer or shorter shutter speeds with ND Filters is a creative choice that defines the impact of your image, depending on the mood you are trying to create.
Because the ND filter is dark, it becomes more difficult to see what you are photographing once the filter is on the lens. It’s advisable to compose your image and check that everything is sharp before putting on the ND filter. This is particularly true when using higher stop (denser) ND filters, or when stacking filters. For example, ND filters can even be combined with polarizers—the polarizer reduces the glare and reflection while the ND filter increases exposure time.
When buying ND filters, make sure they’re threaded, which means that other filters can be stacked on. Note that vignetting can occur with very wide-angle lenses when stacking two or more filters. A trick to avoid this is to zoom in a short distance or purchase a larger filter with a step-up ring. This can be very effective, especially during midday when the light would otherwise be too strong to capture a long exposure. The result of these filters combined transforms the mood of an image. The longer shutter speed allows the photographer to use wider apertures like ƒ/16 to capture sharpness throughout the image while still using a long exposure.
Like polarizers over the last several years, ND filters have become much better. ND filters are available in various strengths, meaning the number of stops of light that can be blocked from entering the camera. A few years ago, the darkest ND available was 10 stops. At that time, results with a typical 10-stop filter were very inconsistent. If shutter speeds were long it was not uncommon to see a magenta color cast in the overall image. ND filters have come a long way in the last few years, especially when it comes to avoiding colorcasts. ND filters now reach 20 stops of light with excellent results. This allows us to use even longer exposure times and thus more movement and mood in the image. Even in the brightest daylight, a 20-stop ND filter can allow very long shutter speeds.
When trying to determine correct exposures with ND filters, it can be difficult to get it precisely without the process of trial and error. I suggest using a smartphone app that calculates neutral density exposures to determine exactly the amount of time needed based on the filter being used. When shooting longer exposures, it’s also necessary to have a sturdy tripod and ballhead to prevent any movement of the camera itself.
The Grad ND
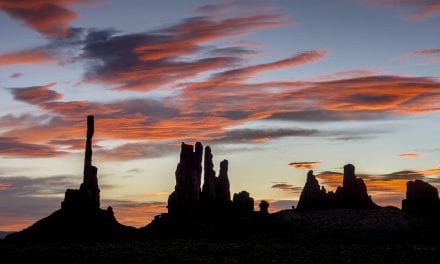
The last filter that’s used for photographing fall colors is the graduated neutral density filter, which compensates for an uneven light source. Often in landscape images, the sky is brighter than the ground; if you meter the exposure for the ground, the sky is overexposed. Alternatively, if you expose for the sky, the ground becomes underexposed. Sunrises and sunsets are common times where the skies are bright, but the foreground is in shadow. Graduated filters were designed to allow us to balance the light in the sky with the light in the landscape so that everything will be properly exposed.
Grad ND filters are designed so that the top part of the filter is dark and the bottom is clear. Like standard NDs, grad NDs come in various strengths. The best for a particular scene depends on the number of stops needed to balance the sky and foreground, so having a few different strengths on hand is ideal. The trick to using them is to place the graduation in the right position. Inaccuracy will cause unnatural shadows in the image to be placed too high or low. You want to align the filter’s transition as closely as possible to the light in the scene.
In addition to the strength or density of these filters, there are also “hard” and “soft” grads, which refers to how abrupt the filter’s transition from light to dark is. When evaluating a scene, the transition between exposures isn’t always clearly defined, and a hard grad will create a noticeable line. In this situation, use a soft grad so that the transition is smoother. Conversely, when the transition from bright to shadow areas in the scene is abrupt, like the horizon of an ocean, a hard grad will work best.
To line up your grad ND correctly, use the depth-of-field preview button while looking through the viewfinder or use live view on your camera’s LCD. Fine-tune by moving the filter up or down and rotating it to position it just right. In a pinch, the simplest way to do this is to manually hold the filter in front of your lens. Rectangular filters like LEE Filter’s 100mm System are a great choice as they can be handheld or—even better—dropped into the filter holder and then rotated for precise alignment, hands-free.
Warming & Cooling Filters For Fall Color
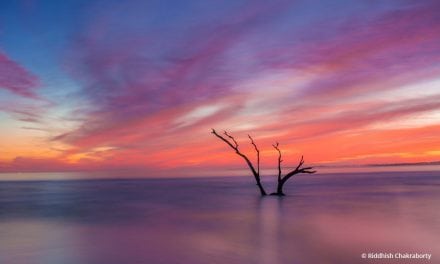
When photographing fall colors, it’s important to capture the mood of the season. When you think of autumn colors, warm tones such as red, yellow and orange come to mind. You want to capture the whole color spectrum of warm tones while keeping the neutral tones natural. A warming filter, which often can be used in combination with a polarizer or as an all-in-one filter, can be very beneficial. The filter adds subtle warmth to the overall color of the image without looking unnatural. It improves shadow detail that can be lost with a neutral polarizer. The warm tones of an image pop out more against the cooler tones; this contrast in color tones adds more impact and color balance to the image. For autumn colors, the foliage is more pronounced against the cooler tones in the image. Another added benefit of a warming polarizer is its ability to cut through haze, resulting in a clearer and more natural-appearing image.

Recommended Filters: Buy Quality Glass
When purchasing a filter, quality is important. Chances are, you spent good money investing in your lens, so why put a poor-quality filter in front? The performance of your lens and filters is only as good as the lowest-quality glass used, and not all filters are created equal.
For example, you’ll likely use your polarizer frequently, so it doesn’t make sense to choose a bargain polarizer that might compromise your lens’ image quality. I use the Singh-Ray LB ColorCombo, which is a combination of a warming polarizer and a color intensifier. I use this polarizer when I want to capture the best of the warmer tones in my images, especially the reds. It works by leaving the neutral colors and only saturating the vibrant colors.
Manufacturers such as B+W, Heliopan, Hoya, Lee and others also make high-quality circular and linear polarizers, with numerous models to best match your camera and lens.
When choosing an ND filter, it’s important to make sure that it doesn’t have any colorcast. Blender ND filters from Formatt-Hitech use a transition that’s very gradual over the length of the filter, rather than just in the middle, ideal for situations where the light transition is subtle. For ND grads, I recommend buying large, rectangular filters that are comfortable to hold and are large enough to cover all your lenses.
Falling Into Place
I try to create a story with my images as well as a sense of place, and shooting fall colors is an event I look forward to all year. Capturing the vibrancy of changing seasons has always meant something special to me. Even with the advances in digital photography and processing, it’s advantageous when shooting autumn landscapes to use optical filters to capture the beautiful colors, tones and hues that abound in the fall.
See more of Kevin McNeal’s work at kevinmcnealphotography.com.
The post Filters For Fall Color Photos appeared first on Outdoor Photographer.