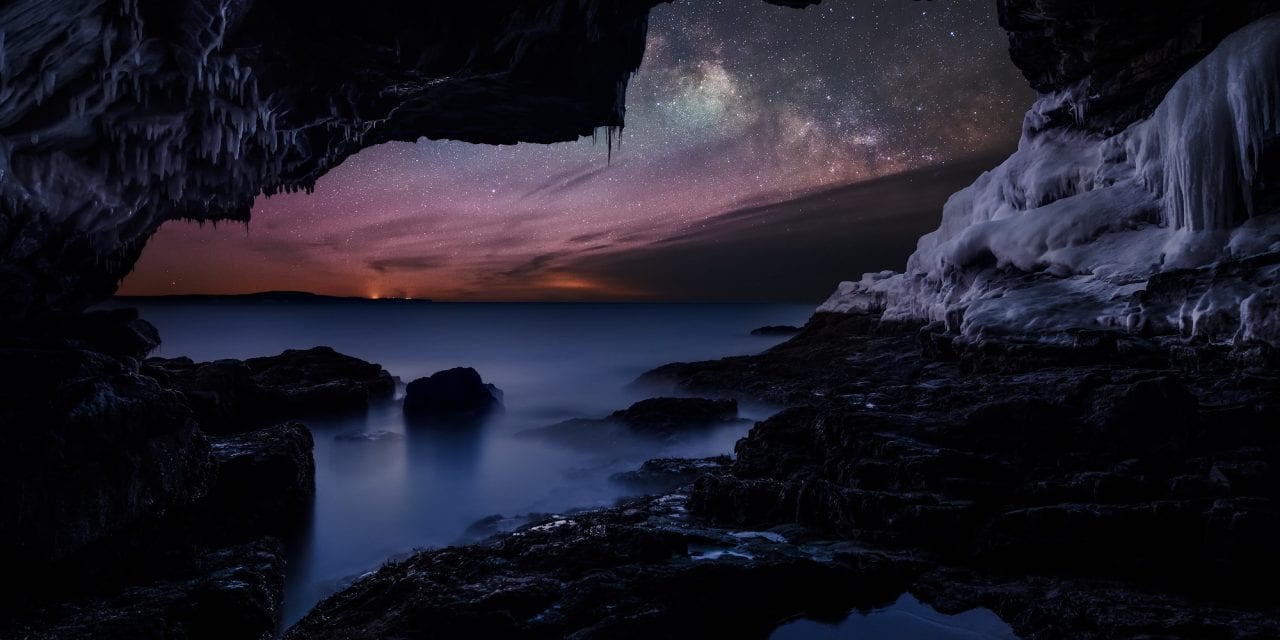
I photographed this view of the Milky Way from a sea cave back in February of 2015, but it had been in the planning for about 2 years.
A lot of things needed to come together for this to work. It had to be early in the year (at the start of “Milky Way season” where I live in Maine) in order to even see the Milky Way from inside the cave, and I needed clear skies during the new moon when the tide was low enough to get in and out of the cave and still have enough time to try various angles and take all the shots I would need.
All those things came together on this frigid night in February, except for some clouds that obscured the lower part of the Galactic Center of the Milky Way. It was bitterly cold and very windy, but of course there was no wind once I was inside the cave. I think the ambient temp was somewhere around 0F, but much colder with the windchill while I was making my way down to the cave.
But before I could take the photo I needed to scout the cave first in daylight, to make sure it would be safe getting there through the deep snow and ice covered rocks, and to see if the view from the cave would even look in the right direction to see the Milky Way.
To get to this location I had to snowshoe through knee and waist deep snow down the hillside through the woods to the shore, slide down what was essentially a frozen waterfall of a drainage stream from the woods down to the rocks next to the ocean, then put on traction spikes to cross the ice covered rocks and carefully make my way over to and inside the cave. Then I would have to do it all again, alone in the dark at 3am, when it was roughly 0F degrees and windy.
Normally I plan my Milky Shots (or any landscape shot) using PhotoPills, an app available for iOS and Android devices. But on the 2D planning map it was hard to know where the cave was, let alone the exact direction it faced. So to really know if it would work I needed to be inside the cave. Standing at the opening to the cave I could use the augmented reality feature of PhotoPills, which let’s me see the position of the Milky Way overlaid on the live view through the iPhone camera. I also double checked with a compass, knowing the heading that the Milky Way would start at once the Galactic Center was up above the horizon.
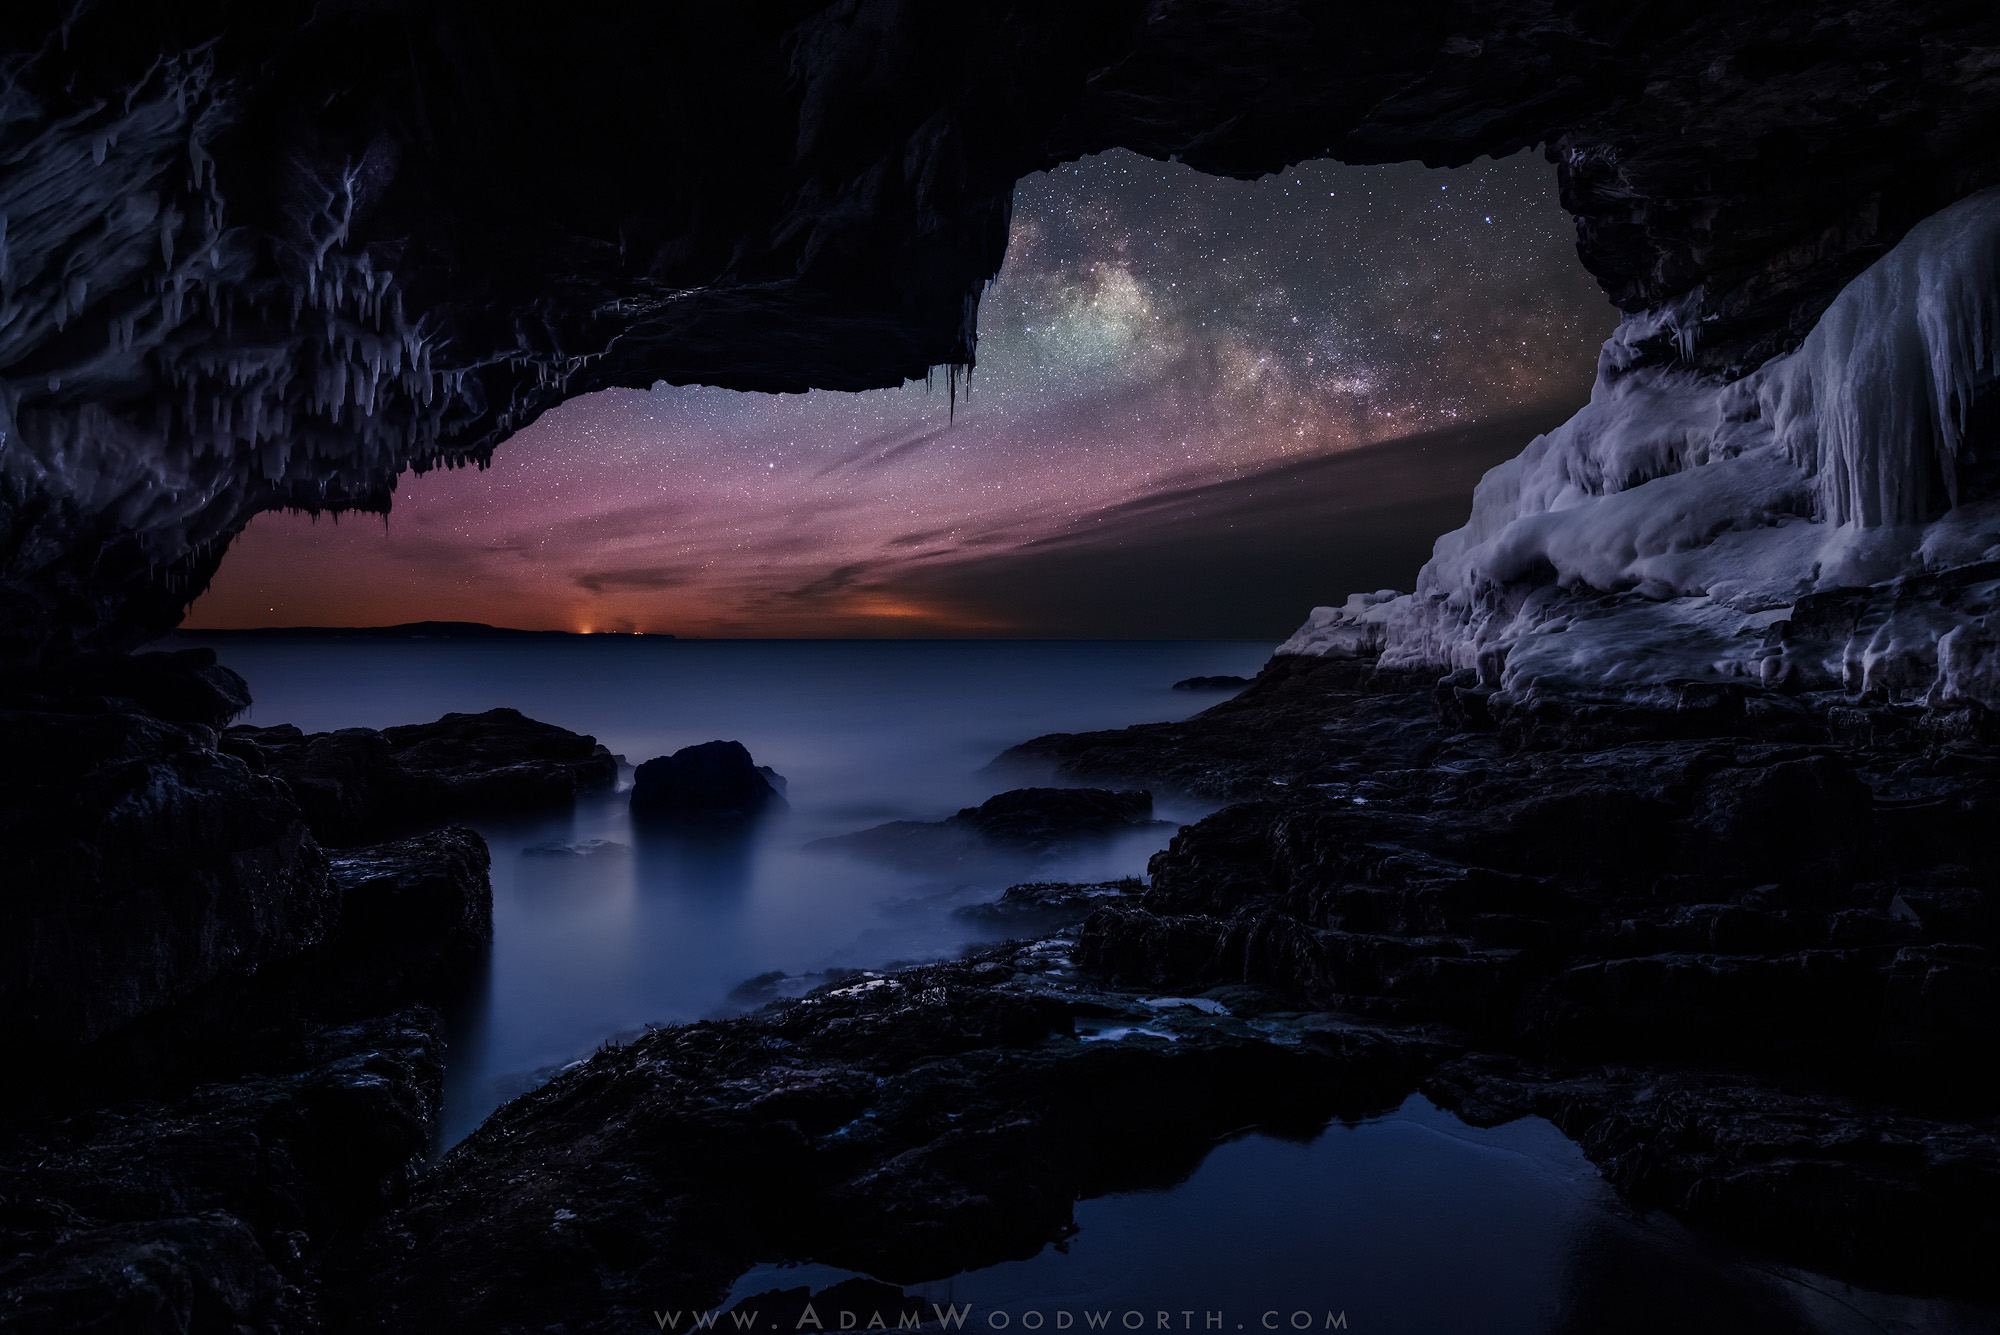
You’ll notice that there’s a lot of color in the sky, there’s orange light from light pollution from towns up the coast, there’s some green from airglow, and the reddish color might also be airglow.
Nikon D800E with Nikon 14-24mm f/2.8 lens @ 17mm. Like most of my night photos, this is a blend of multiple exposures to get the scene in focus and well exposed from the foreground to the stars. Technically 13 exposures were used to create this final image. 10 exposures of 10 seconds each at ISO 6400 were used for star stacking of the sky. Those exposures were stacked using Starry Landscape Stacker for Mac that aligns the images and averages out the noise, and with 10 second exposures the result is pinpoint stars with low noise. You can also do this in Sequator on Windows, or try it in Photoshop but it’s a very tedious pain and doesn’t always work well in Photoshop. You can learn more about this in my Star Stacking article.
Then 3 other exposures were used for the foreground at ISO 1600 and at different focus distances, f-stops, and exposures lengths to capture a low noise and in focus foreground, all shot in the same place on the same night without moving the tripod. The image that results from the star stacking is then blended with all the foreground images to create the final image that has low noise and is in focus from the foreground to the stars.
Learn more about Milky Way shooting & editing techniques through tutorials available at Adam’s website, www.adamwoodworth.com, and follow him on Instagram as @awoodworthphoto.
The post The Story Behind: Galactic Cave appeared first on Outdoor Photographer.