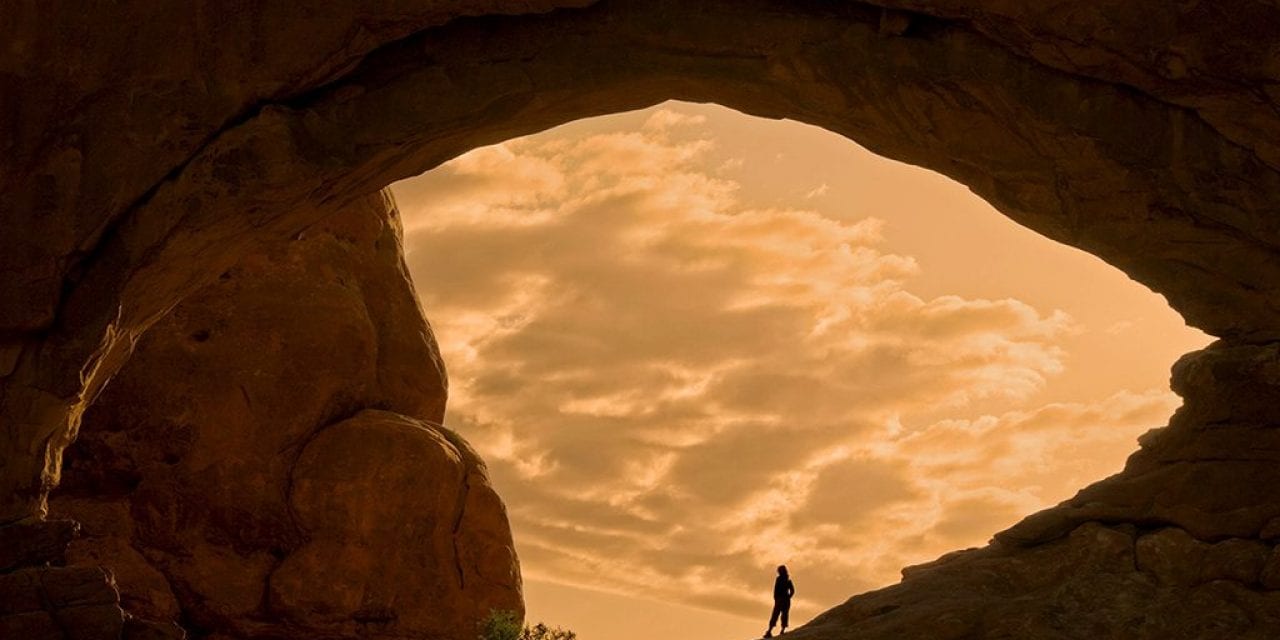
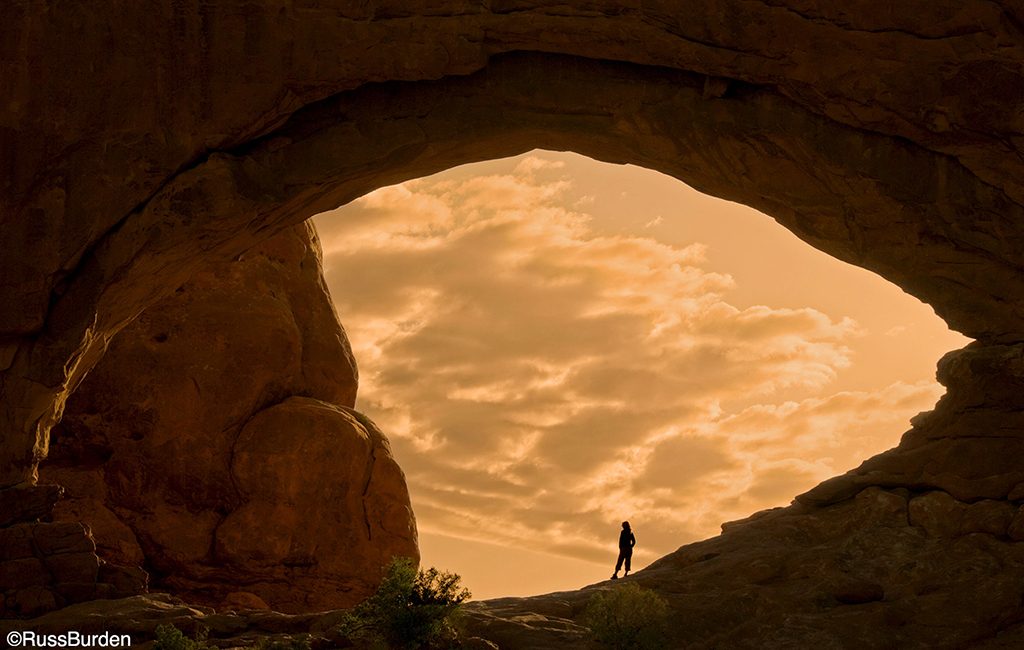
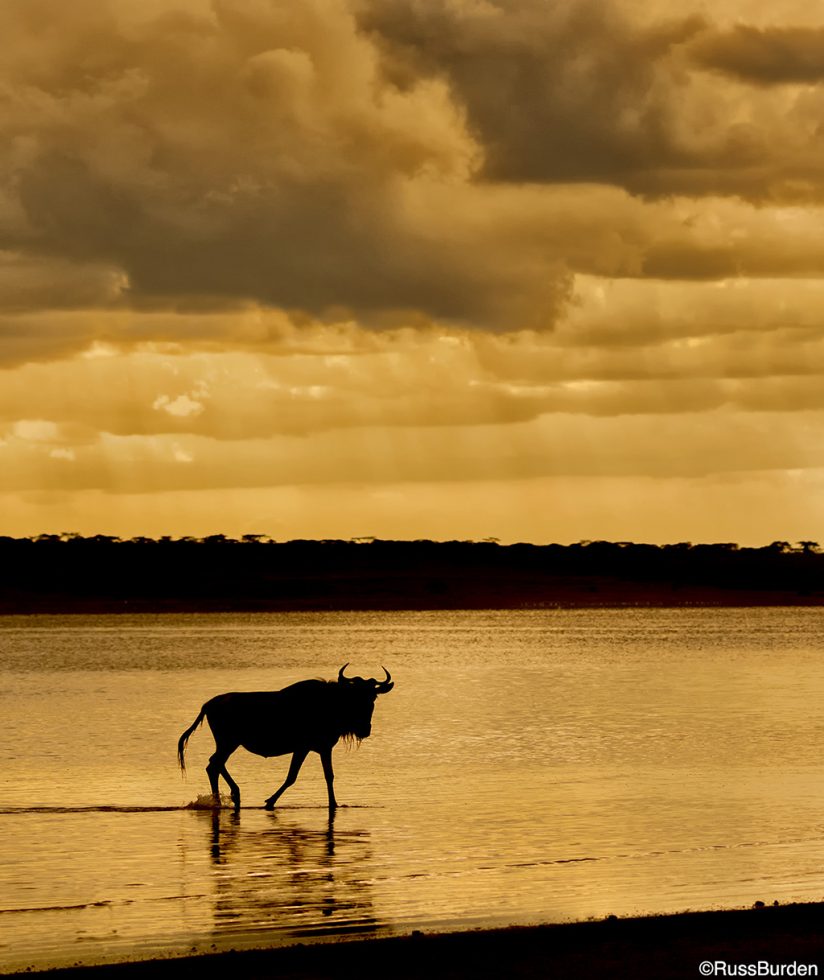
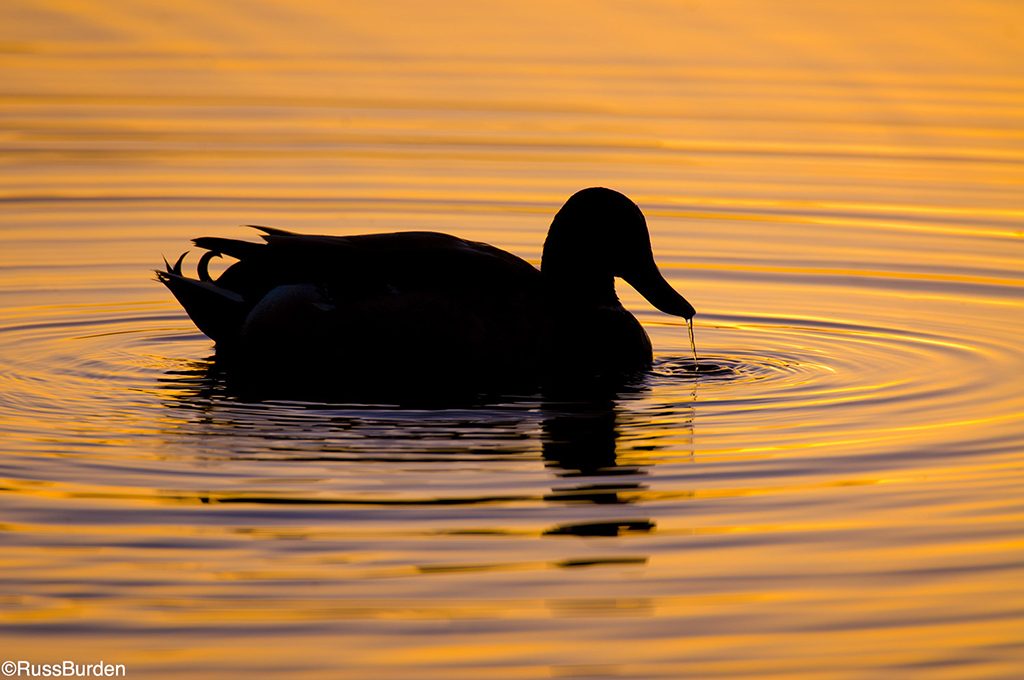
Silhouetted images that pop off the page are graphic in quality, have instantly recognizable subjects and are bold and dominant. Think about the outline of the Grand Teton Range at sunset. The shapes of their peaks are one of the most identifiable ranges in the United States. However, silhouettes don’t have to have bold qualities that show the dominance and stature of a mountain range. A mature weeping willow that stands by a lake’s edge is easily discernible by its form and structure. The feeling it provides is one of softness, tranquility and peace. On the other hand, an outline of a small handgun can instill fear into the viewer. When photographing silhouettes, the size of the subject has nothing to do with how powerful the silhouette can impact the senses.
Quite often, a subject photographed as a silhouette can leave a much heavier impression on a viewer than if the same subject was front or side lit. If you are close to my age group, I’m sure you remember the opening scene to the Alfred Hitchcock show. His profiled face walks into a silhouette of his body. It’s one of the most iconic openings of a television program all done in silhouette (“Goooooddd eeeveennning…”—I can still hear his words). Think about classic outlined items—all are easily identifiable by their shape: the Apple logo, ET in front of the moon on a bicycle, a skylined giraffe at sunset and the Eiffel Tower for example. For something that contains no color, a silhouette is very powerful.
When you create an outdoor silhouette, the light behind the subject has to be significantly brighter than the light that falls upon it. Because of this restriction, time of day, weather, subject placement and the angle of the sun all impact whether or not a silhouette will be successful. For me, the best time of day to make them is within the first 15 minutes of sunrise or the 15 minutes right before the sun sets. The subject has to be on the same horizon as the rising or setting sun. The sky is bright and often contains rich and vibrant color.
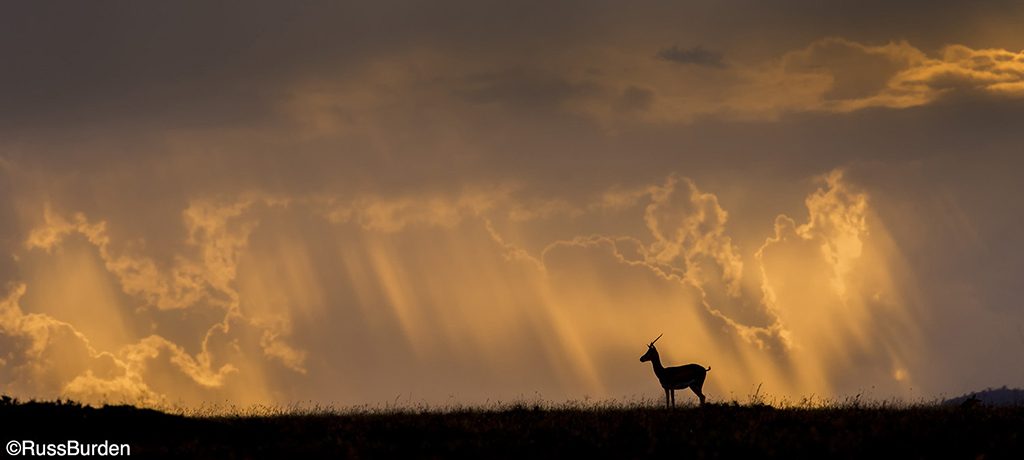
Dawn and dusk also work, but shutter speeds can be too slow to sharply record a mobile animal. The sky at these four times of day often has a graduated effect, which produces different densities of light as the distance between the horizon and sky increases. Clouds can add vibrant color but it’s absolutely essential you note the density of the cloud. If a thick part of the sky merges with any part of your silhouetted subject, a density merger is created. When this is the case, the contrast between the sky and the black silhouette is severely narrowed. When this occurs, the silhouette and the sky can reflect the same amount of light, which doesn’t provide separation.
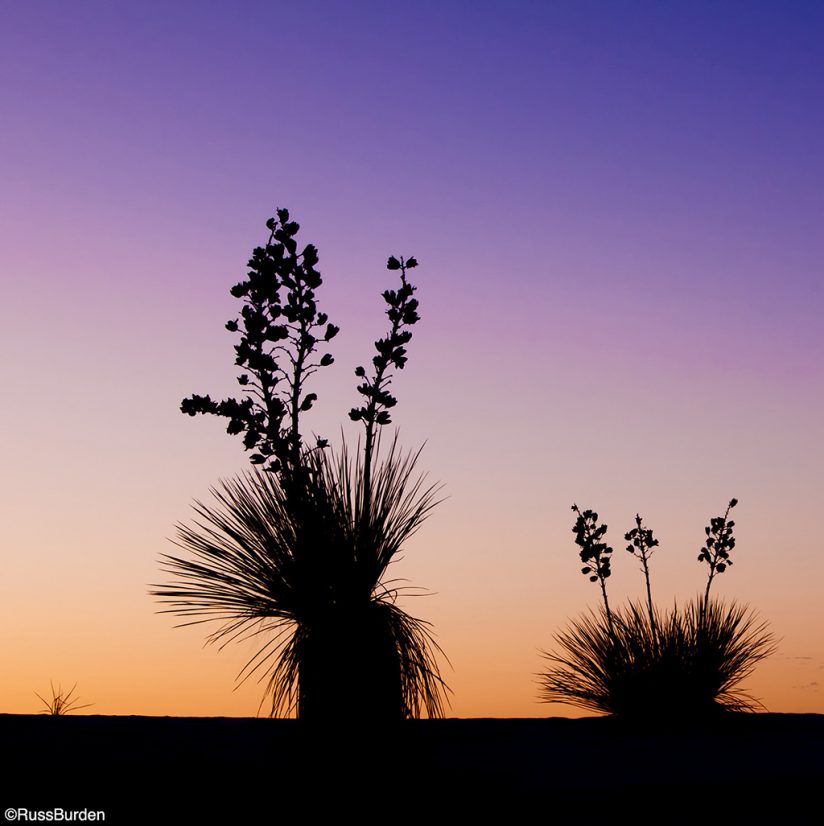
I encourage you to experiment with your color balance when you make silhouettes. Yes, it can be altered in post processing, but by doing it in-camera, it can be very powerful. I often set my white balance to cloudy, but my go-to is shade. If the subject is large enough, hide the sun behind the silhouette to add impact. Let it slightly peek out from behind the subject and stop your lens down to ƒ/22. This is how a sun star is created. When looking at the sun through a camera, be very aware of potential eye damage and take caution if you try this technique. Rim light can be positive if the sun is placed directly behind the subject. Whenever possible, I incorporate this effect in a way to make sure “I Exhaust All Possibilities”—another one of my business slogans.
With regards to exposure, it behooves you to bracket. I shoot a triple burst of images, each at either 1 or 2 stop increments. If needed, I merge all three exposures into HDR software to tame the contrast. If your color balance is set to shade or if mother nature provides warm light and a dramatic sky, ignore the luminosity channel and base the exposure on the RED histogram found in the Playback menu. When I take an exposure reading, I do so on an area of blank sky adjacent to the subject or sun. Silhouettes can be made in midday light if the subject is in deep shadow and the sky is bright.
Be sure to review part 1 and stay tuned for part 3 in next week’s Tip of the Week.
Visit www.russburdenphotography.com for information about his nature photo safaris to Tanzania.
The post Photographing Silhouettes, Part 2 appeared first on Outdoor Photographer.