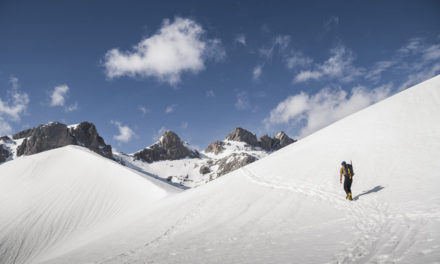
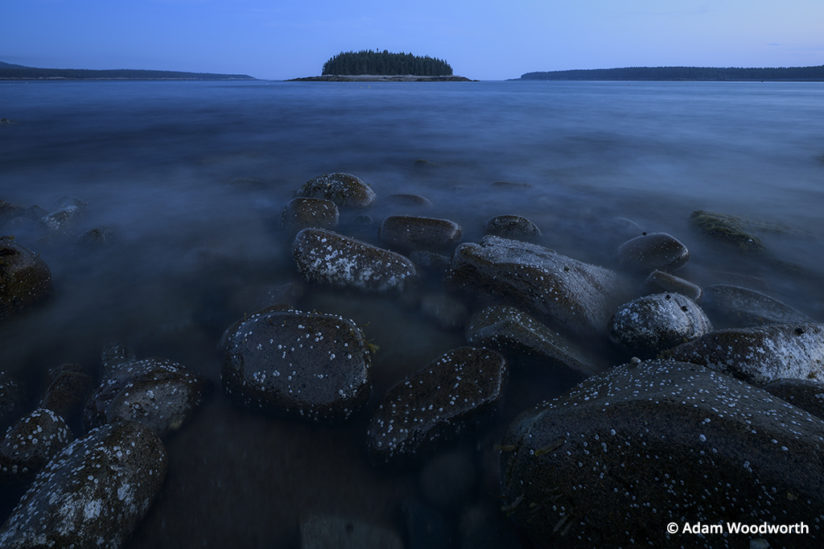
Nikon D850, PC NIKKOR 19mm f/4E ED. Exposure: 30 secs., ƒ/13, ISO 100.
Last summer, I had the opportunity to run around with a pair of pre-production Nikon D850 cameras on loan from Nikon, my mission being to provide some landscape photography images—and particularly landscape astrophotography images—using this new camera. When I heard the details of the D850, I was excited to get my hands on one. It has several new features and upgrades over the D810, but the ones that caught my attention in particular were the back-side illuminated (BSI) 45.7-megapixel sensor, flip-out screen, focus peaking in Live View and built-in focus stacking feature that Nikon calls Focus Shift. The maximum ISO has also been increased to 25,600, one stop higher than the 12,800 max on the D810, so naturally I wanted to know how this very high-resolution sensor would perform at such high ISOs.
I had just returned from a long road trip across the country, starting in my home state of Maine and going all the way to Alaska and back, being on the road for about four months. While I saw many amazing places on my journey, I had really missed the coast of Maine and the surrounding areas, and I was excited that my first photo adventure back home would be with a new camera.
Before I get into the details of my high ISO testing, I should explain how I shoot landscapes with the Milky Way. I typically shoot multiple images at different ISOs and focus points to get everything in focus, with low noise from the foreground to the stars. I almost always use the AF-S NIKKOR 14-24mm F2.8G ED lens for these shots, and I frequently shoot at 14mm for super-wide views of the Milky Way above the landscape. With this setup, I will shoot either a single 20-second shot for the sky that produces minimal star trails, or I will shoot a 10-shot series of 10-second exposures that produces pinpoint stars but with more noise per shot since there is less light per shot. Those 10 exposures are then stacked in software to align and average the images, producing a result with very low noise and pinpoint stars. This can easily be done with Starry Landscape Stacker (macOS only), or you can do it manually in Photoshop, though it doesn’t often work as well. The foreground images are usually shot at ISO 1600 with exposures of several minutes, up to 20 or 30 minutes in some cases, and usually at different focus points so I can blend them in software to get everything in focus. I’m usually shooting foreground images at ƒ/2.8; you could shoot at smaller apertures to get more depth of field, but then you’re shooting for much longer exposure times, so if you make a mistake, you’ve wasted an enormous amount of time. I then take all the foreground images and the sky image and manually blend them in Photoshop.
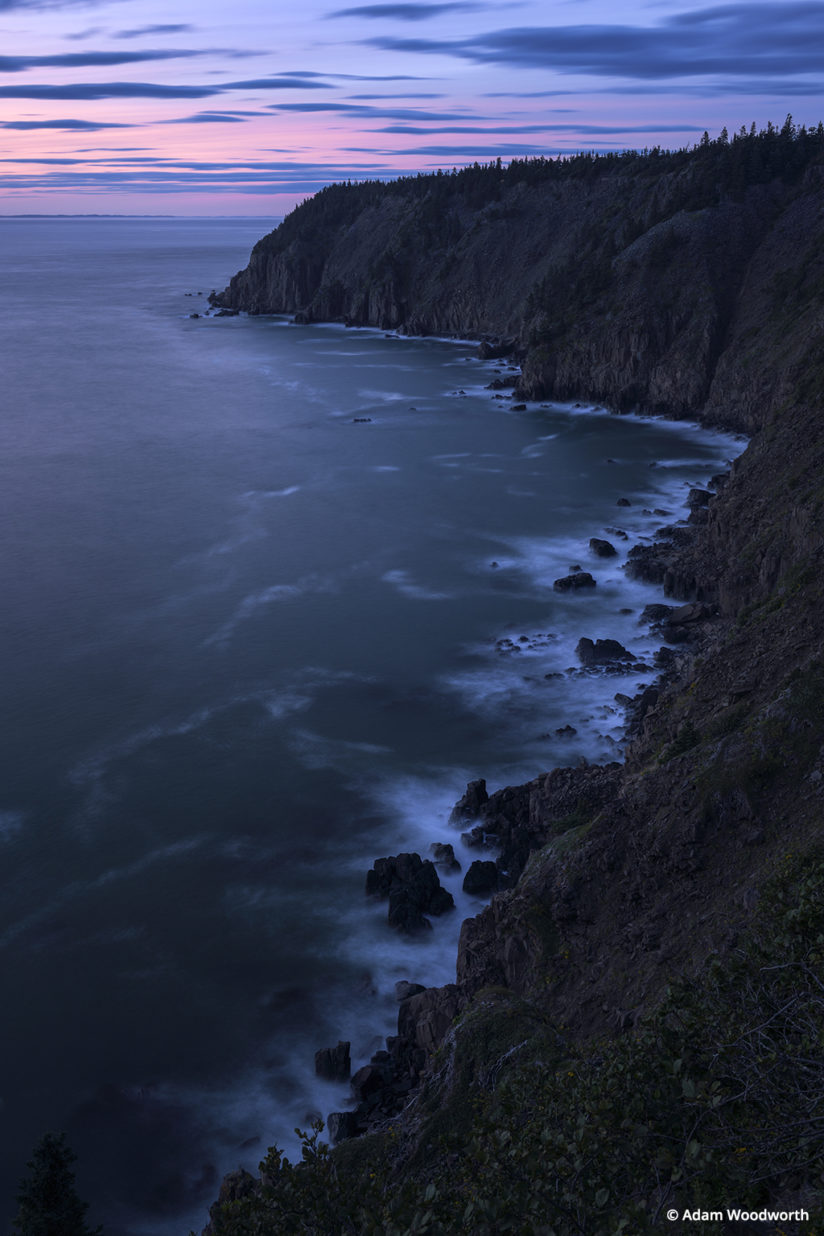
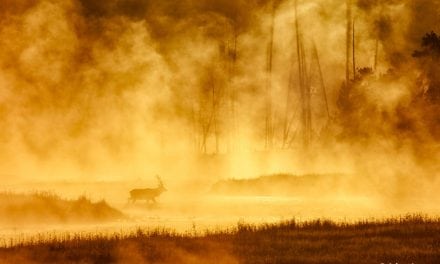
Nikon D850, AF-S NIKKOR 24-70mm F2.8G ED at 35mm. Exposure: 30 secs., ƒ/11, ISO 32.
When it comes to shooting in the dark of night, every ounce of performance out of your camera matters. I put the D850 to the test on a number of clear nights to see how this new 45.7-megapixel backlit sensor and processor would handle long exposures at high ISOs with very little light. The challenge here is usually with the noise introduced in the amplification of the signal from the sensor. In a very dark area, a 10- or 20-second exposure at ƒ/2.8 doesn’t capture a whole lot of light, so you need to use a high ISO (high amplification) to boost the signal into a usable image. If you don’t use a high enough ISO, then the signal is too muddy before it is digitized, and if you use too high of an ISO, the result can be too much noise from the amplification process. The amplification noise often shows up as heavy magenta discoloring along the edges of the frame or excessive color noise across the entire image. So in some cameras you have to find the sweet spot of a high enough yet not too high ISO for night photography.
With the D850, much like the D810A and D5, I find that shooting the night sky at ISO 12,800 is no problem, and on the D850 I didn’t see any issues with ISO 25,600 either—I didn’t end up with excessive color noise along the edges of the frame. When star stacking, the sky is cleaned up nicely anyway in software, but with a 20-second shot at ISO 12,800 or even 25,600, I found that the noise is quite manageable. Usually a modest amount of noise reduction in Lightroom made a huge difference, just enough to smooth out the empty sky but not to lose the stars in the process. As a general rule of thumb, go easy on the noise reduction—too much will make the image look “plasticky.” It’s better to have some visual “bite” in the image than to make the image look like it was smeared into being smooth.
The D850 feature that surprised me the most was Focus Shift. This is Nikon’s automatic focus stacking mode—at least in terms of making the exposures, as you still need to stack (blend) the images in software. This is something I had wished could be done in-camera for a long time, and I was very excited when I saw it was in the D850. Focus stacking is a technique for capturing greater depth of field by taking multiple exposures at different focus points and blending the result in software.
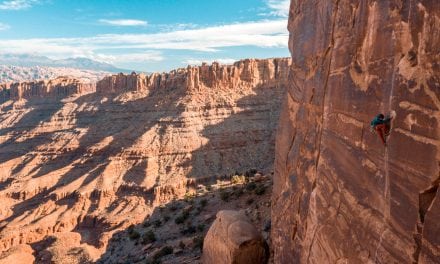
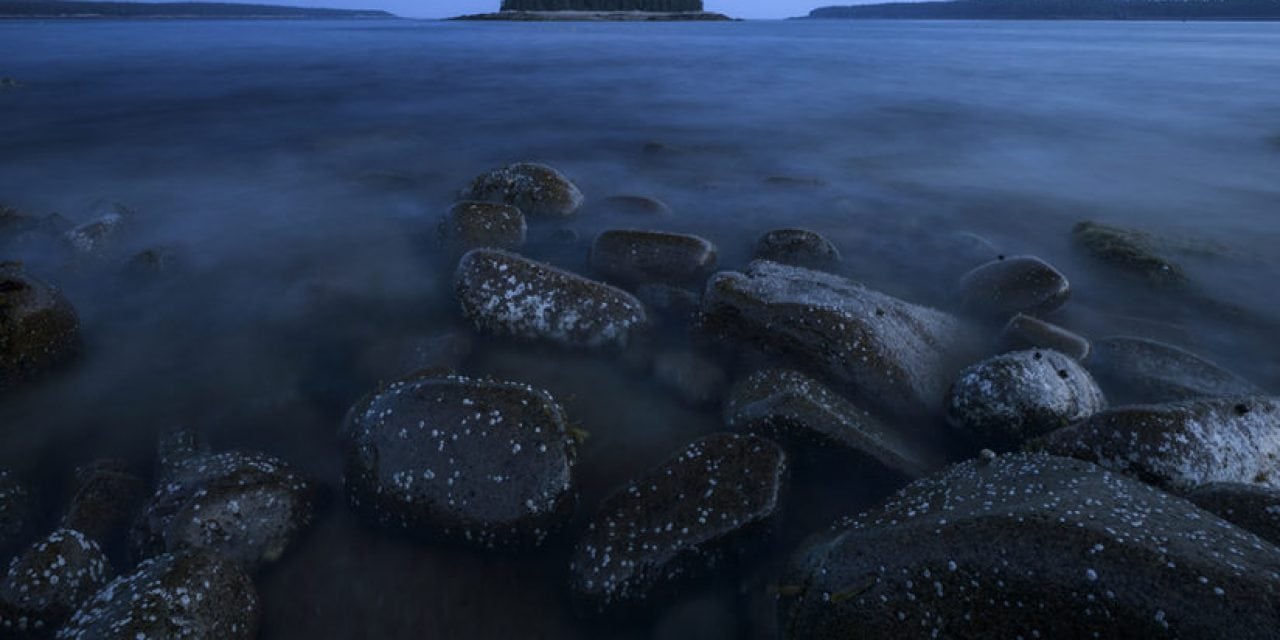
Nikon D850, AF-S NIKKOR 14-24mm F2.8G ED at 19mm. Exposure: 0.5 sec., ƒ/13, ISO 100.
In landscape photography, this is a very common practice. You may shoot a scene at 24mm and be able to get everything in acceptable focus at ƒ/16 or ƒ/22, but the diffraction is often so high at those apertures that the sharpness of the image suffers dramatically. Instead, you can shoot multiple exposures at ƒ/11 or even larger apertures and move the focus further and further away (or closer and closer) between each shot, then blend them to create a final image with everything in focus from the very close foreground to infinity. Sometimes you only need a couple shots at different focus points, or you may need as many as six or more—it depends on the lens focal length and the distance from the lens to the closest foreground subject and the furthest background subject.
Using the Focus Shift mode on the D850, the camera takes a series of shots and automatically moves the focus from near to infinity gradually between each shot, resulting in a series of images that can then be focus stacked in software for depth of field. This means you need to start with the focus at the closest point you want in focus, and then let Focus Shift go toward infinity. It takes some trial and error to learn what settings work for a certain situation, how many shots to take, and how big of a change in focus is needed between each shot, but after some experience, this comes more easily. The mode is completely automatic and can only be used with the available shutter speeds, meaning it is not possible in Bulb exposure mode. Combined with the tilting screen on the D850, Focus Shift makes focus stacking low angle shots quite a bit easier. What used to involve lots of awkward bending to see the screen and changing focus in Live View can now be done in a more comfortable position, and the shots are taken automatically.
Speaking of the tilting screen, I found it to be handy in many situations, particularly when the camera was higher than eye-level on the tripod. Sometimes even when the camera was at eye-level, pulling out the tilt screen toward me meant I could relax my neck a bit more while looking at the screen and using the controls. When you’re shooting for an extended period, little comforts like this can make a big difference, and when shooting down very low to the ground, you don’t have to get yourself quite so dirty lying on the ground—a nice bonus.
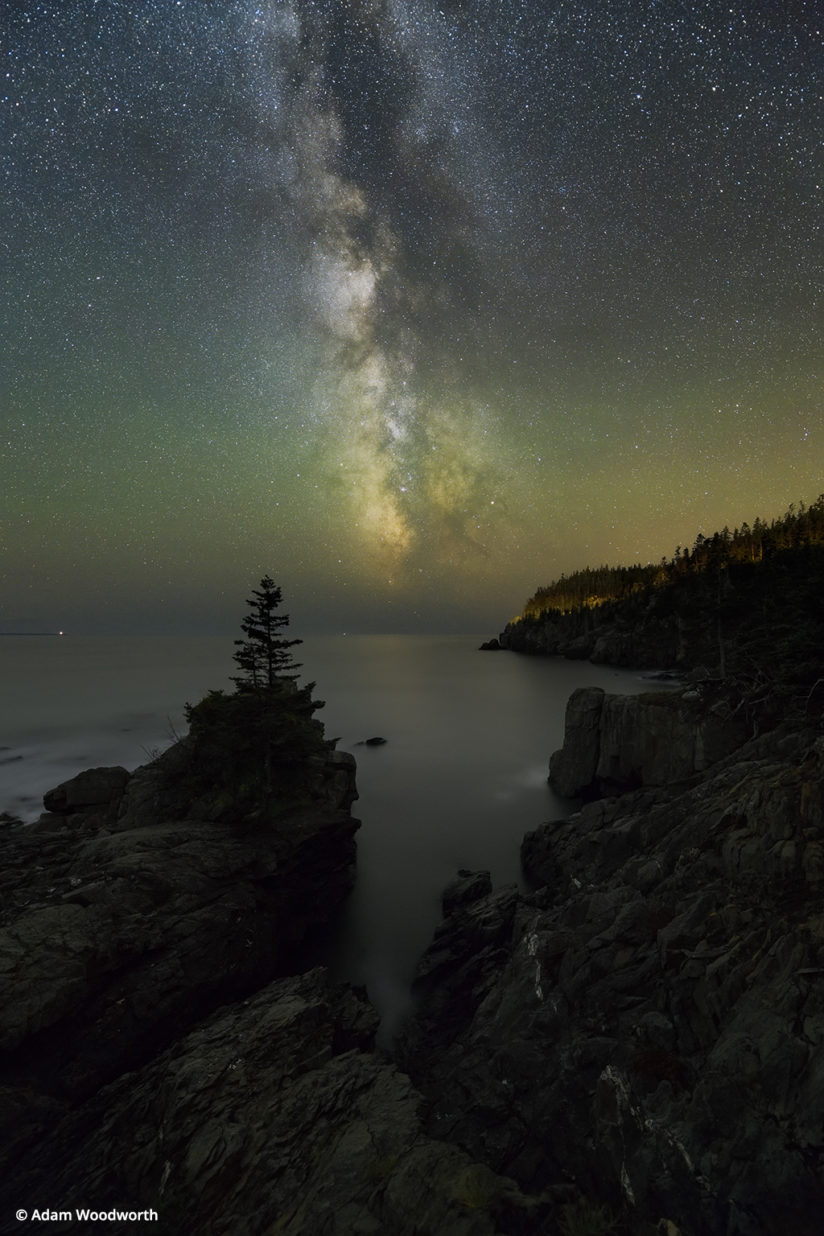
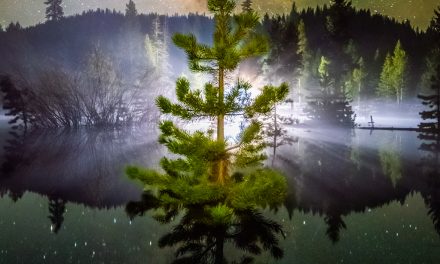
Nikon D850, AF-S NIKKOR 14-24mm F2.8G ED at 14mm and f/2.8. Ten shots for the sky at ISO 25,600 and 10 seconds each, aligned and averaged for pinpoint stars and low noise in Starry Landscape Stacker software. Two shots for the foreground at ISO 1600 and 10 minutes each. The star-stacked sky result and the foreground images were manually blended in Photoshop for maximum depth of field and low noise.
The Focus Peaking feature of the D850 is a very welcome addition for my style of photography. Focusing for the stars at night can be a bit of a challenge. This is one of the first things I teach in my Milky Way photography workshops. The most effective way to do this is to zoom in on a bright star near the center of your frame—avoid using stars at the edge of the frame, since lens distortion could mean stars at the edge are slightly out of focus or just difficult to focus compared to the rest of the stars in the frame. Next, manually focus the star in Live View until it is a small pinpoint of light. This is often harder than it sounds, trying to determine if a star is a focused pinpoint of light or a blurry ball of light. The D850 makes this easier with its Focus Peaking feature. Focus Peaking works with manual focus, so make sure to switch your lens to manual focus mode, and it will help you know when you’ve got the star close to being a pinpoint of light by coloring the star a bright red, which indicates an object is in focus.
Lastly, the touch screen functionality of the LCD is a nice workflow improvement, making it intuitive to move around a 100 percent preview of an image and faster to pick a focus point in Live View, and also simplifies menu navigation in many cases.
For my type of landscape photography, the D850 is a very welcome upgrade from the D810: more resolution without loss of quality, better high ISO handling, and many comforts that make shooting in the field much easier, such as a tilt-screen, Focus Peaking and Focus Shift. I look forward to more dark nights in the middle of nowhere with the Nikon D850.
The post Nikon D850 Hands-On Review appeared first on Outdoor Photographer.