We put the Groundhog Max ATV/UTV Disc Plow to the test and found out if it truly works.
If you do anything with this article, take this with you: This thing really works.
I know, I was skeptical myself at first. I watched YouTube videos online, where they had the ATV disc plow out but never really showed how long it takes to do, say, an acre.
With most videos, the manufacturers would come out and say “It took X amount of hours to get through one acre!” Then you’d at least have an idea, and something to gauge against when you really gave it the test.
The fact that they couldn’t even give an approximate time had me questioning if it really worked as well as it seemed to. Was it a rock solid design? Or was it going to require multiple passes until I even really scratched the surface?
I reached out to customer service at Bad Dawg Accessories and started to ask for more information. Was it a pull behind? Would it work on my 1994 Polaris Sportsman 400? Does it come with a receiver kit, because my four wheeler doesn’t have one? Does it get deep enough on hard surface to help with weed control? The questions kept going on and on, and it felt like I was peppering shots at sporting clays.
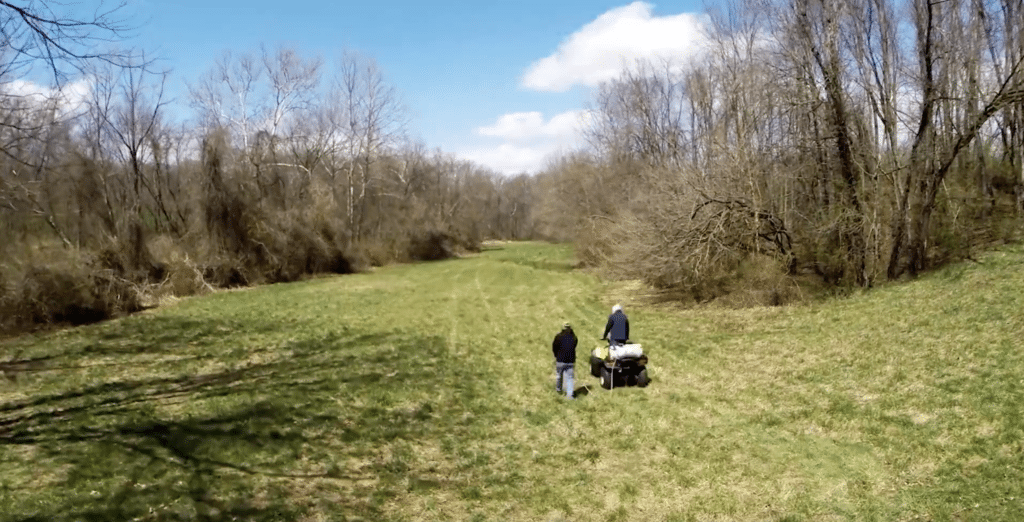
I had a million of them, but I spoke with an actual person (imagine that!) named Keith and he told me if he was a salesman, the best way for him to sell it to me was to show me how well it worked in person.
So, that’s exactly what we did.
Some Context
Just to get you up to speed…
I have been putting together a series of videos and articles focusing on exactly how much it really costs to put in a food plot. Luckily, I have teamed up with a some great companies that have helped me along the way (and in turn prevented me from spending some of my own dollars), but nonetheless, I am still adding up everything from start to finsh and seeing where things end up.
The one thing I wanted to do with this project was diversify with a few different types of food plots, both perennials and annuals, and also utilized both no-plow and regular seeds. I felt by doing this, it will give you the best insight to the type of planting, work, and up front costs that will go in to your food plot before you even begin.
Here’s a quick rundown of where we stand:
After speaking with Whitetail Institute, we were able to receive both the soil sampling and the seed, which was a big plus. I didn’t realize how important testing your soil was, and probably wasted a lot of time in the past.
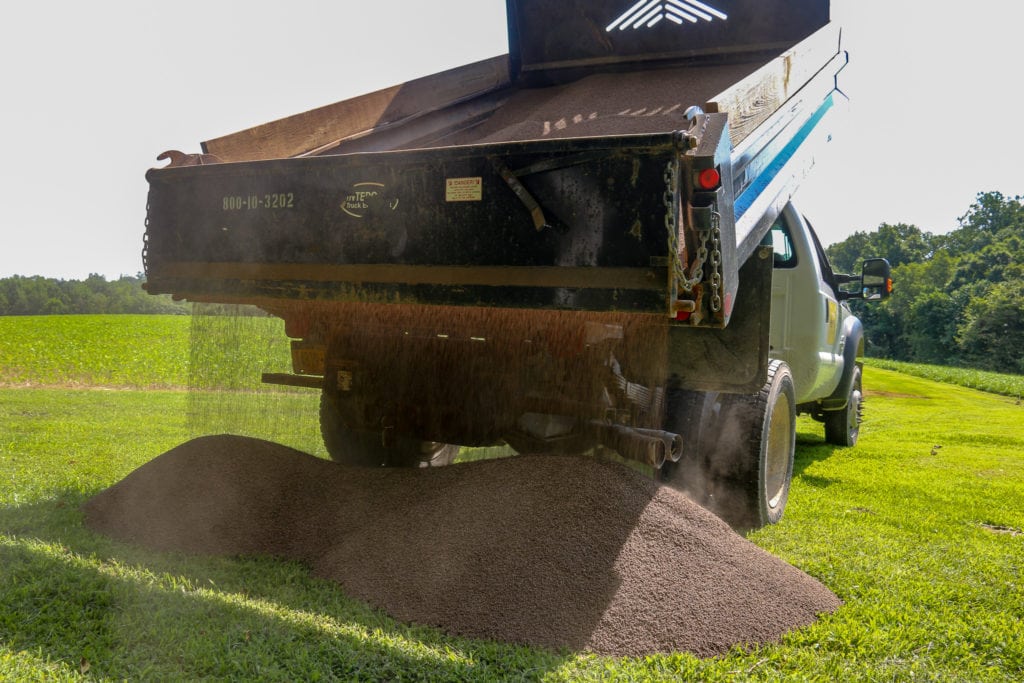
Then, when it came time to lime the food plots, we linked up with a company called Baker Lime out of Pennsylvania who provides pelletized lime in bulk. That saved us hundreds of dollars for our five acre food plot. For what it’s worth, Baker Lime is available throughout the entire Mid-Atlantic from New York and the Northeast down to the Carolinas, and has the best pricing on bulk lime we could find. They’re highly recommended.
After I was able to get my soil samples back, spread my lime, and spray my food plots with herbicides, I was ready to disc plow the fields.
My biggest issues for a couple of the food plots were basic, and likely really common: accessing them with farm equipment was a pain in the butt. So, I did what most of us would do, and turned to the internet to find a solution.
Eventually I found the Groundhog Max ATV Disc Plow, which runs off downward pressure from the ATV that’s hauling it, and everything appeared as though it could work.
But, like with the majority of my product reviews, I wanted to make sure it truly worked before I gave it my stamp of approval.
Preparation
Food plots are only as good as you prepare them to be. Soil samples, getting the correct pH level, and ensuring good soil-to-seed contact are all very important.
There are two things I did in preparation for this disc plow test. One had to do with my four wheeler and the other involved preparing the ground.
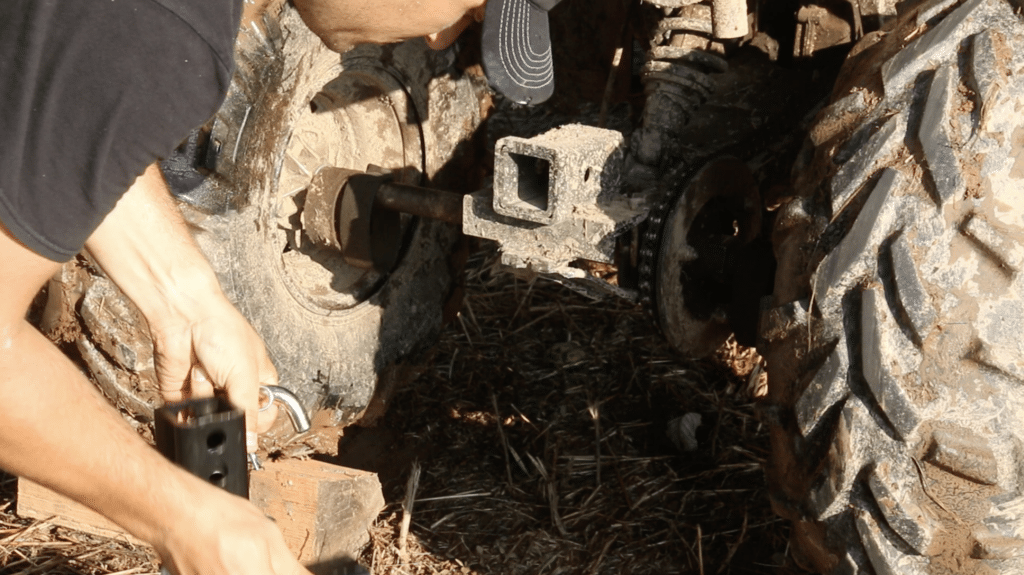
Since I own a two-stroke, 1994 Polaris Sportsman 400, I was worried it may just not have enough power to do the job right. Truthfully, the evolution of ATVs went from a joy ride to a work horse after this one came out, and the 1994 version of an ATV pales in comparison to today’s machines. The first thing I knew I had to do was get my four-wheeler serviced. Luckily for me, I have Billet Motorsports right in my backyard here in southern Pennsylvania.
Mike, the owner of Billet Motorsports, was not only able to get my ATV running top notch, but he also helped me custom fabricate a two-inch receiver hitch. With his expertise, we were able to ensure that my Polaris was going to be strong enough for the Groundhog Max. This was a vital part of the entire process, and thanks to Mike, I was well squared away.
We started up with the actual preparing of the ground. Since I had watched several YouTube videos and looked through several forums, I was already on to something. Most of the people who were not having success with the Groundhog Max all shared a common denominator: They all failed to get proper weed control up front.
The Groundhog Max actually did fairly well in the areas where there was still short, green grass. It did, however, do much better on ground that was killed off with glyphosate.
Part two of the process was to spray and kill off the ground plants, and since we dig deeper in that in another article, I’ll continue on with the Groundhog Max.
Set Up
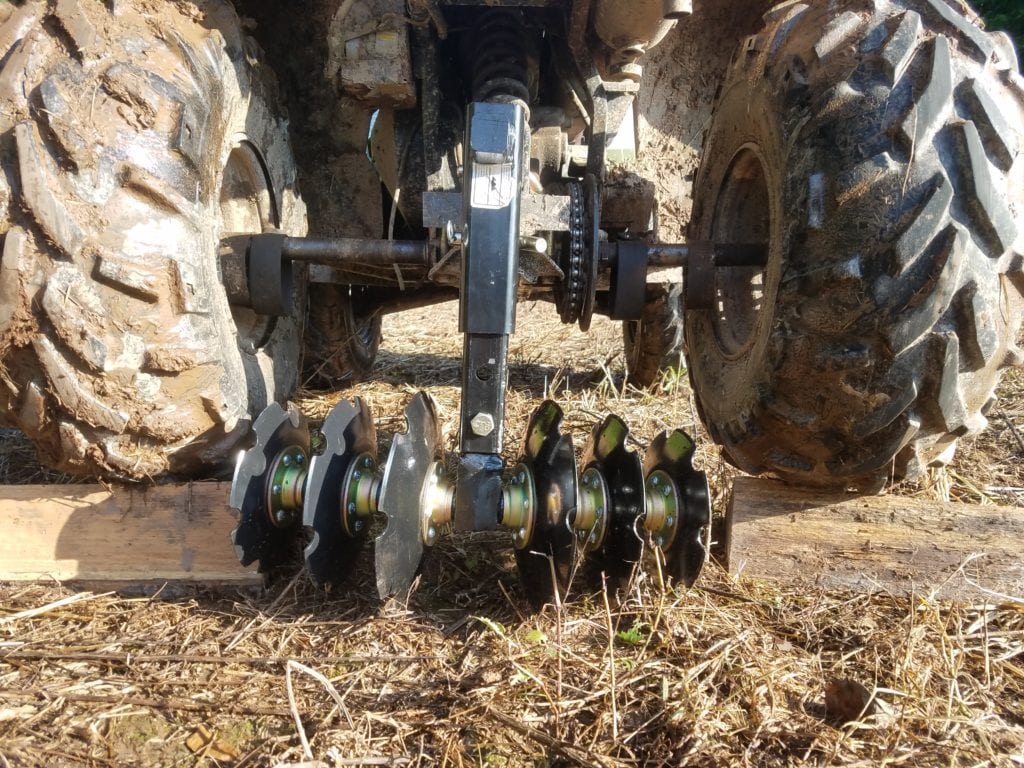
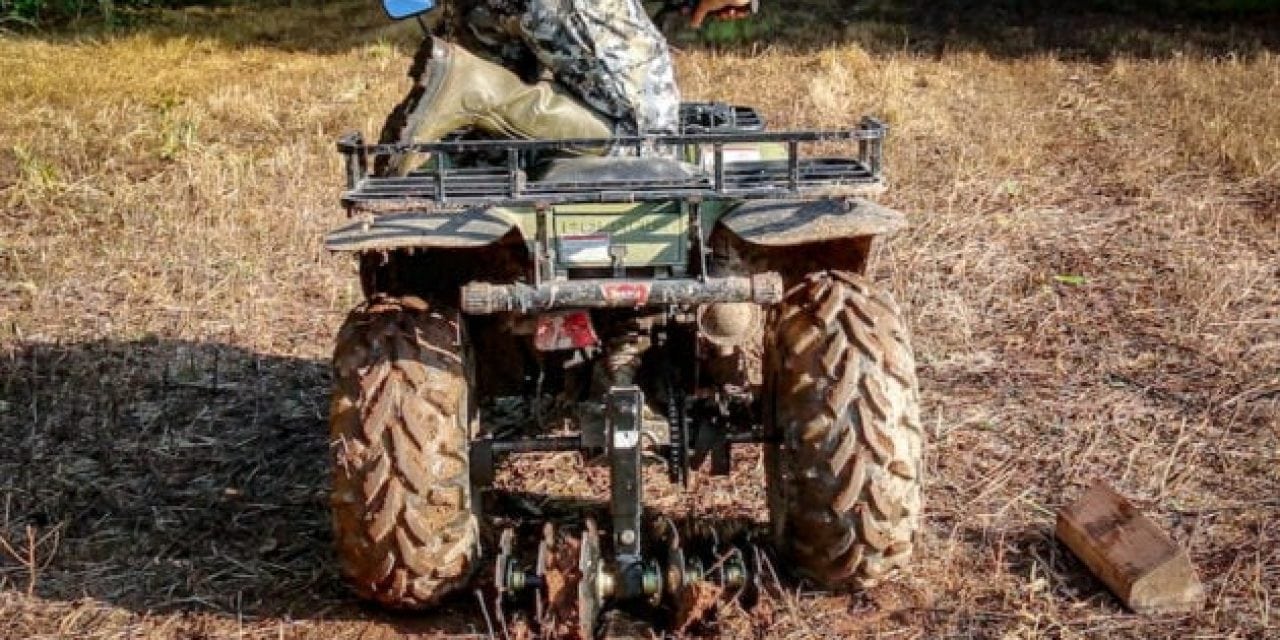
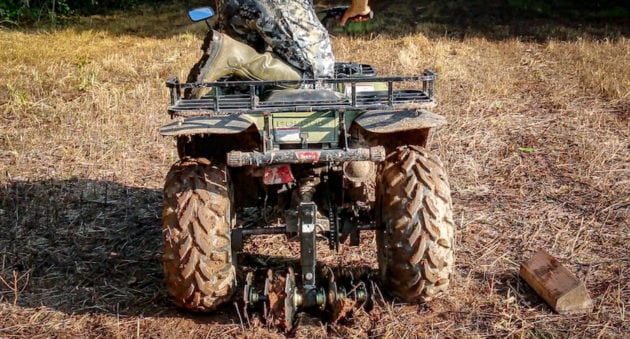
Once you have your hitch ready and your land killed off with a herbicide, you should be ready to go. The way the Groundhog Max works is by using downward pressure. The weight of the ATV/UTV goes in a downward pressure rather than a pull behind. This ensures that disc plow is just below ground level to cut through and plow the soil.
On my first attempt at using the Groundhog Max, I found that it was set a little too low. I raised it up two holes and found that encouraged the perfect aggressive cut. It may take a little tweaking, but adjustments aren’t much of a hassle when the Groundhog Max is installed properly.
Here’s what I found to be the best way to zero in on that perfect cut: Start by lifting your tires at least a four-inches to provide clearance for the disc plow. Attach the Groundhog Max to the hitch, and raise it up to transport mode. You can keep it in this raised position until you’re ready to begin plowing.
From transport mode, you should be able to drop it into the working mode fairly easily. Then just adjust the discs to the desired depth.
On one of my plowing days, my tires sank a little deeper in the soil since it was a little moist, so I kept the discs two-inches below the tires. For a more hard ground I dropped it a little deeper.
Putting it to the test
With my first acre plot in the remote area that I was, I expected this to take a few hours. I was wrong.
I put the Polaris in low gear and four-wheel drive, and took off without being timid. I quickly realized that the Bad Dawg Groundhog Max was keeping up.
If you can drive fast and watch it work the entire way, you know you’ve got something good. I was able to complete the full acre plot in under an hour. When I wasn’t moving around the camera gear or grabbing a couple drinks, I was speeding through that acreage without any hassles or issues.
The Groundhog Max certainly is something you need to see to actually get it. You can watch the video above, or you can attach it to your machine and prove it to yourself.
Either way, you’ll see the difference it can make.
Like what you see here? You can read more articles by Dustin Prievo here. Follow him and his hunting team, Top Pin Outdoors, on Twitter, Facebook and Instagram.
NEXT: WE PUT THE SCENT CRUSHER GEAR ROLLER BAG TO THE ULTIMATE TEST: FIREFIGHTER AND HOCKEY GEAR
WATCH
The post Gear Review: Does the Groundhog Max ATV/UTV Disc Plow Really Work? appeared first on Wide Open Spaces.