Exploring new photographic techniques and teaching them to others is one of the most rewarding aspects of being a professional wildlife photographer. This motivates me on a constant journey to experiment with new and innovative photographic styles. Using creative blurs for wildlife photos is one of those techniques.
Over the last several months, I experimented with creative blurs on a diversity of wildlife subjects. Not only have I learned a lot, but I have had a blast practicing. Here are four images from my recent photographic adventures around the world and the techniques I used to capture them.
There are hundreds of ways to produce creative blurs. My intention is not to give you a comprehensive study of the concepts. Rather, my hope is that you will enjoy viewing these images as much as I enjoyed creating them, and that they will inspire you to travel, get out there and make your own.
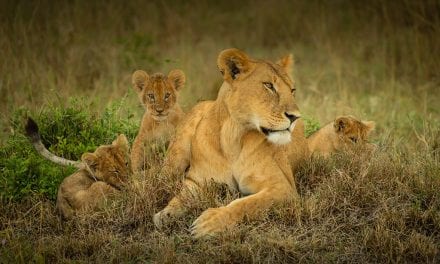
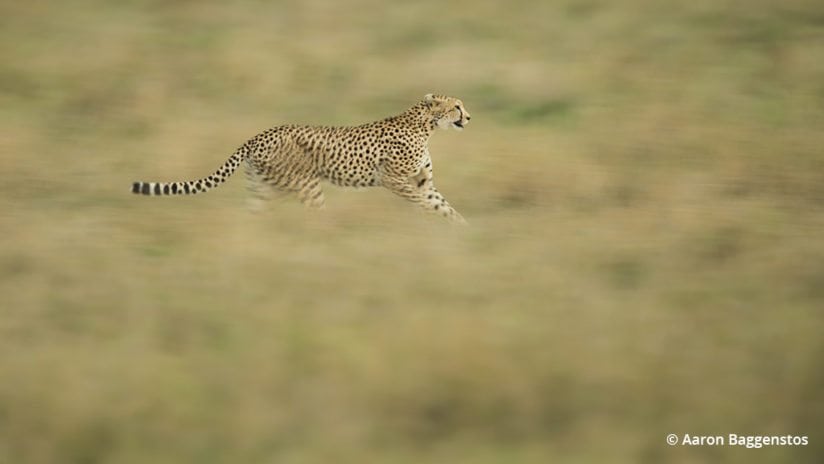
Pan Blurs

Have a solid tripod to support your camera when shooting any kind of creative blur. Unwanted vibration is the nemesis of this type of photography. On an African safari tour, it is virtually impossible to set up a tripod in the vehicles, so I shoot off beanbags or a monopod mounted to the side of the vehicle using a Really Right Stuff Safari Rig. A polarizer or neutral density filter on sunny days allows shooting at slower shutter speeds and larger apertures and thus avoiding diffraction.
This type of blur is fairly popular. The camera settings are not difficult to master but, as with all creative blurs, they take incredible patience, practice and a bit of luck. I attempt panning images on overcast days as low light is beneficial in achieving the slow shutter speeds required. My favorite shutter speeds fall between 1/10 to 1/125 sec. I usually determine my shutter speed on the fly based on the subject’s speed, distance and angle of movement. Experiment with different shutter speeds and dial it in before the action occurs. In general, the faster the shutter speed, the less motion blur you will get, and the slower the shutter speed, the lower your “keeper” ratio will be. A fine balancing act, for sure.
Once you configure your settings, the real secret here is perseverance. If your subjects, like mine, are wild and unpredictable, expect to take a few hundred before you get the perfect shot. Stick with it, and you will produce stunning results.
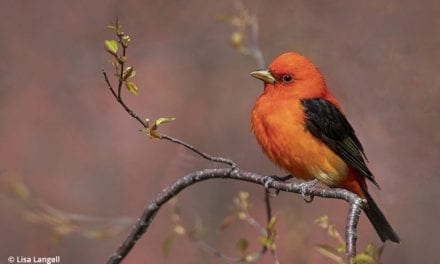
Wing Blurs
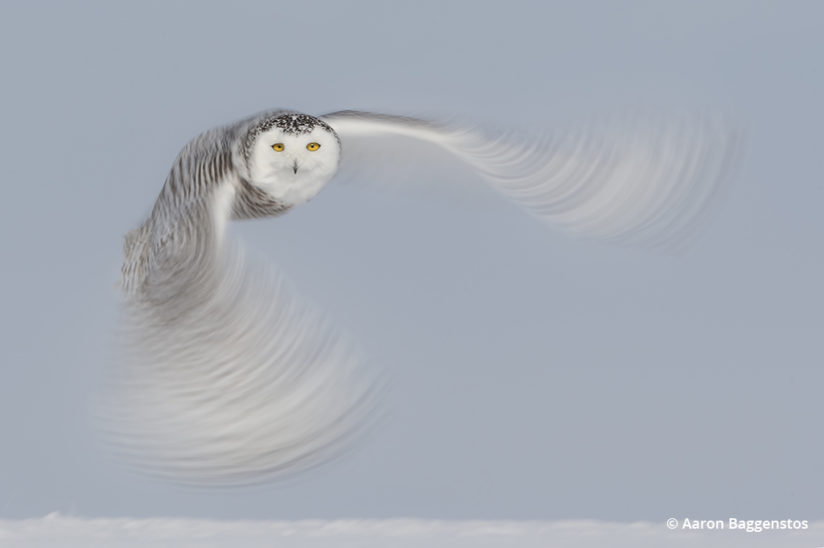
Snowy owls are among my favorite birds in the world. Their massive wings and graceful flight place them as the crown jewel for nature photographers. Until recently, accomplishing this type of image was met with little success, but repetition and persistence proved to be the key—I took more than 1,000 unusable photos over three weeks in the field to capture this one striking frame. In this case, my efforts came with a high reward when National Geographic published the image on its website and used it as a marketing piece for an international photo contest.
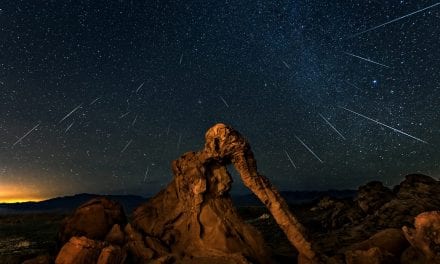
Zoom Blurs
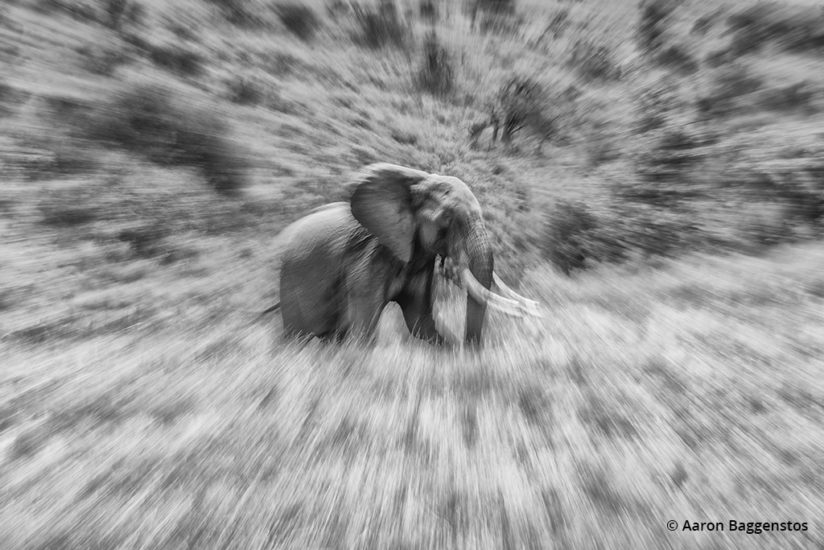
Using a zoom lens, you can attain this type of image using slow shutter speeds and a tripod. For this technique, I recommend practicing on a stationary subject first (a tree or flower). To start, try a one-second exposure, allowing the subject to ‘burn’ into the sensor before zooming at the very end to create the streaks. Then experiment with increasingly fast shutter speeds like 1/25 and zoom throughout the duration of the exposure. You will find quite a bit of creative control in this technique.
One important suggestion here is to position both your subject (usually the eye of the animal) and focal point in the center of the frame. That way, your streaks lead directly toward your subject. If the focus point is off to the side, the lines will point in that direction. You can crop in post processing to get your subject out of the center, which most photographers prefer. Once you get the hang of it, attempt this on more difficult moving subjects.
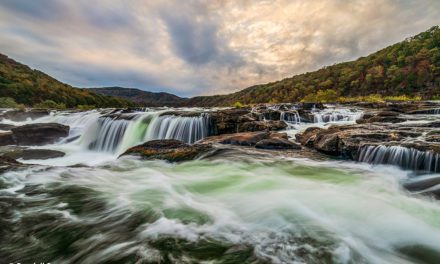
Water Blurs
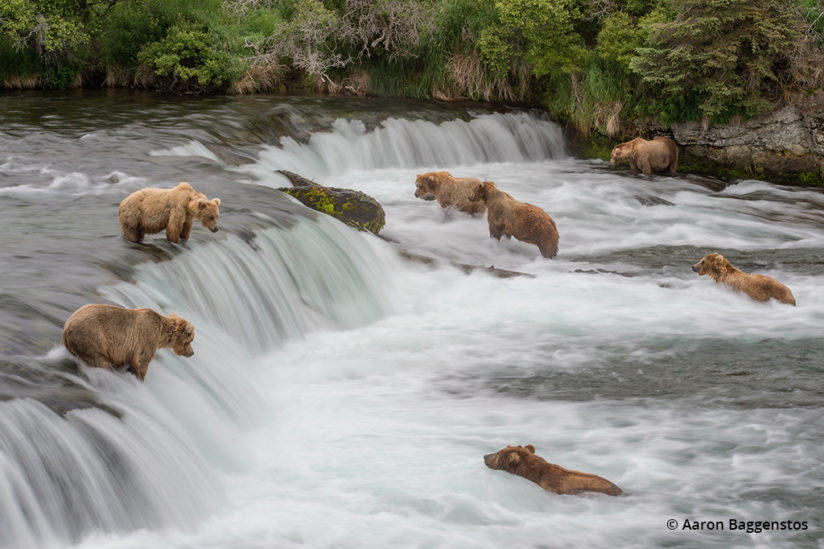
I shoot this type of image the same way I would a waterfall, but incorporating wildlife adds a level of difficulty. In this example, if any of the bears move at all during the slow exposure, they will surely blur and ruin the effect. Again, take lots of frames with the hope that one will come out perfectly. Choose a stable platform for your tripod, use a shutter release, and activate mirror lockup to prevent shutter slap. Any small vibration will kill the sharpness of the animal’s appearance. In post, I applied selective sharpening on the bears for an added level of detail.
Creative blurs are a fun yet challenging method to produce unique-looking images. I have had a blast experimenting with different techniques with some great success along the way. My hope is that these images serve as an inspiration for creating your own spectacular wildlife photos. See you out there.
Aaron Baggenstos is an award-winning professional wildlife photographer from Seattle, Washington. He specializes in leading photography tours and workshops in Alaska, Yellowstone, Costa Rica and Africa. See more of his work at aaronbaggenstos.com.
The post Creative Blurs For Wildlife Photos appeared first on Outdoor Photographer.