What are the photographic dreams that you would like to fulfill?
Have you ever thought of your bucket list of photographic locations? Where in the world would you go? What would you want to see?
I would like to take you on a tour of my five favorite dream adventure locations to help you get your bucket list jump started!
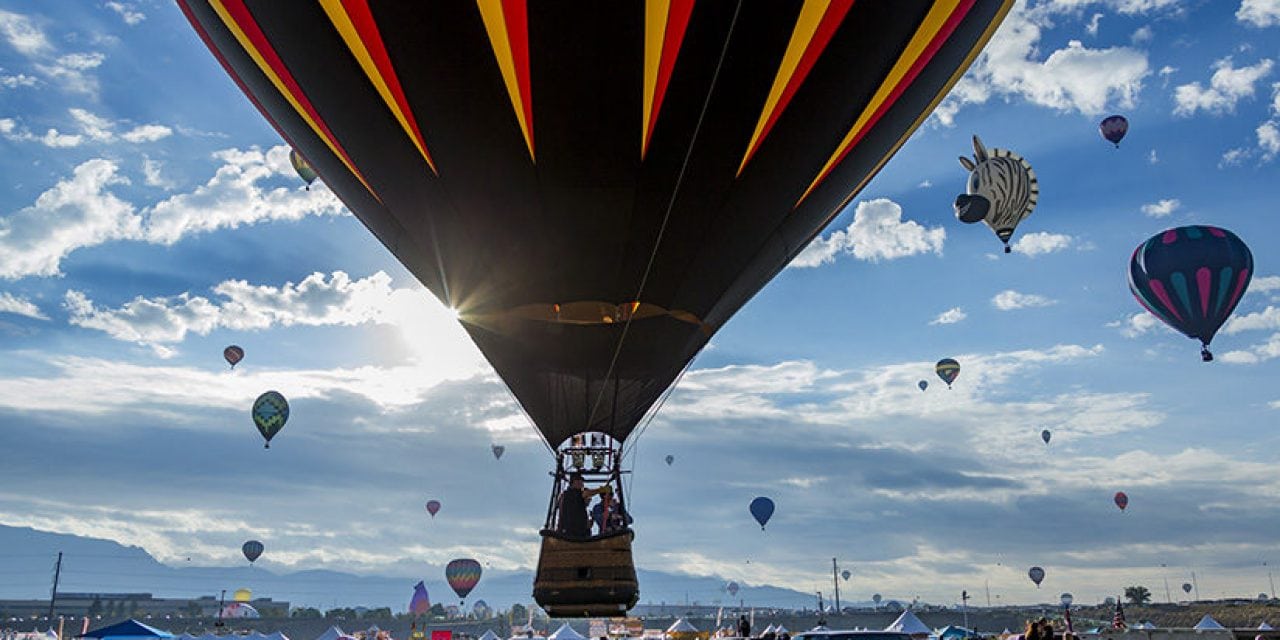
Flying in a Hot-Air Balloon
Wow, who hasn’t dreamt of the romance and beauty of flying in a hot air balloon? I was mesmerized from the first hot-air balloon event that I attended in Norwalk, Connecticut many years ago.
I was so taken with the concept of flying in a hot-air balloon that a few weeks after I captured my first images, I drove to another balloon event in upstate New York and ended up flying.
It wasn’t long afterwards that I would buy a balloon and found a pilot to teach me how to fly.
As a matter of fact, I am on my way to the balloon capital of the world, Albuquerque, New Mexico for the largest gathering of hot air balloons in the world, the Albuquerque International Balloon Fiesta, sponsored and presented by Canon which runs October 7-15 this year (2017). There will be more than 600 balloons flying every day, weather permitting. Hot-air balloons fly in the morning when winds are gentle and temperatures are cool.
There are so many activities for you to capture there. There is Dawn Patrol where 6-10 balloons lift off in the dark, a laser light show and finally the stars of the show, the hundreds of hot-air balloons filling the skies.
I use a photo vest to keep the necessary accessories with me at all times as bringing a camera bag or backpack can be a challenge. I carry spare lenses, batteries and digital media on my person so I will not be without anything that I need.
Here is what I will have with me as I make my way thru the crowds of people and the balloons:
- Two camera bodies (I use a Canon EOS 5D Mark IV and the 1DX Mark II)
- A wide angle lens like the EF 16-35mm f/2.8 III
- A telephoto lens like the EF 70-200mm 2.8 IS L lens or the EF 28-300mm 3.5-5.6 IS L lens
- Spare batteries
- Extra digital media
- Lens cloth
- A headlamp for the dark hours
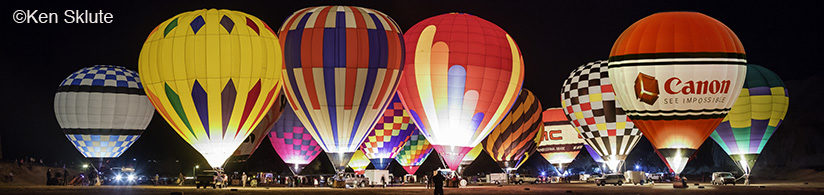
Since we will be photographing in the dark, I tend to bring fast lenses (2.8 or faster) so I can use as low of an ISO to make images in the dark as the Dawn Patrol inflates and then flies into the pre-dawn sky.
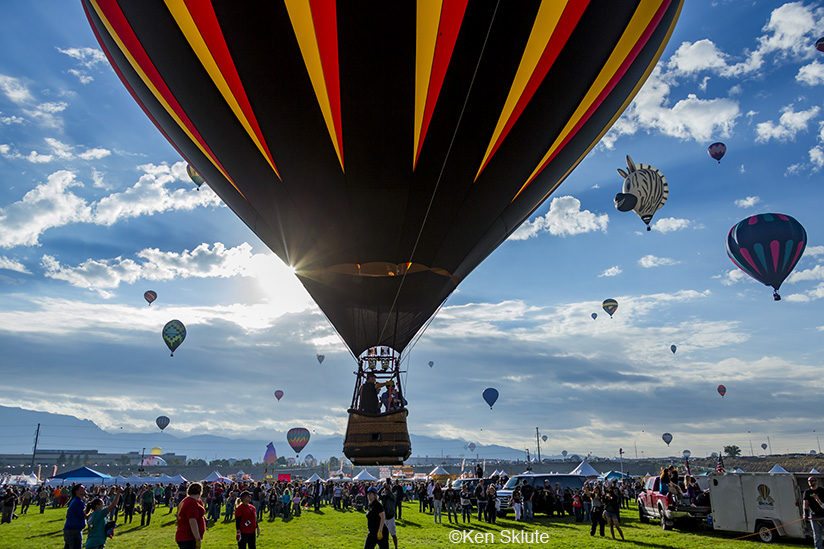
Once the balloons begin to inflate, you will find a huge smile on your face as you have the chance to start to create backlit images of the inflating waves of balloons. You will find colorful fabric being inflated by gasoline-powered fans beckoning you to come and make images. Before long the skies will fill with those gorgeous balloons providing you unending possibilities of spectacular compositions.
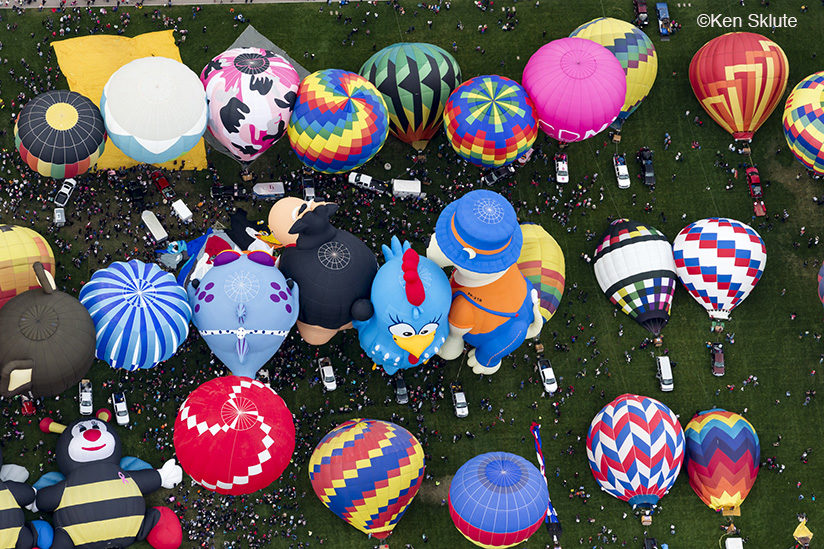
If you are able to spend a few days at Fiesta, you should consider making arrangements to fly in a hot air balloon and shoot from the air, passing over other balloons as they inflate. The experience will amaze you!
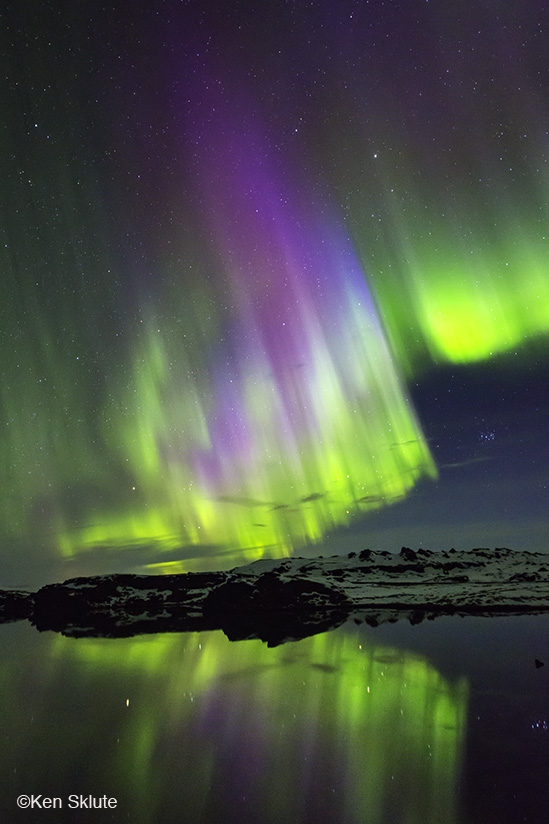
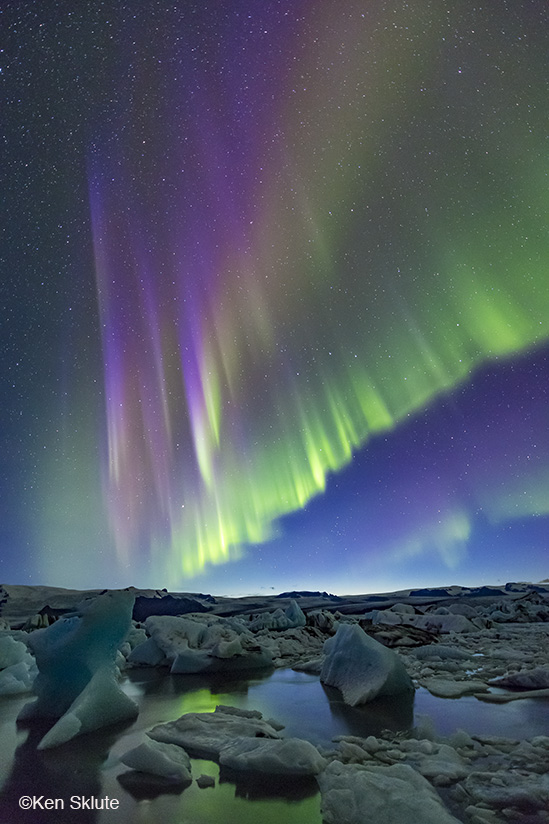
Aurora Borealis
Another of my absolute favorite dreams, looking up to the heavens and watching the sky dance! Witnessing the northern lights has been at the top of my bucket list since I was a teenager.
Viewing the Aurora is a rather intricate series of steps that you need to arrange.
First, you will find yourself packing lots of warm clothes since you will most likely be traveling to a city near the Arctic Circle. The warm clothing comes into play because you will be traveling between mid-September and mid-April when the winter nights are long and cold near those latitudes. Places to see the Aurora Borealis include Alaska, the Northwest Territories of Canada, Iceland, and Nordic countries like Finland and Norway.
One unusual thing is having to sleep during the daylight hours since you will be awake searching for the “lights” through the night. Meals will be adjusted a little bit differently because of the long nights – be sure to bring snacks to hold you over during the night.
However, what makes all of these efforts worth it will be the spectacular, omnidirectional show of color across the sky.
Tools you will need to help you successfully capture the Aurora:
- Wide Angle, fast lens such as the Canon EF 14 mm 2.8, EF 24 mm 1.4 or the EF 16-35 mm 2.8 III
- Sturdy tripod and head
- A cable release or intervelometer
- GPS
- Hand warmers
- Extra batteries
Since all images of the Aurora will be taken in the dark of night, sometimes with the moon above the horizon and other times there will be no moon, you should always use a sturdy tripod to support your camera. You will want to consider working with high ISO’s like 3200, 6400 or even higher, in order to keep your exposure times as short as possible. The Aurora is always moving and changing, at times slowly or can be rather fast. I would suggest keeping your shutter speeds fast (that could be one second long or up to 30 seconds) so that you can freeze the dancing of the Aurora.
As you are scouting the shooting location, look for some beautiful elements to act as a foreground for the moving colors across the sky.
Providing multiple layers in your frame will hold your viewers’ attention, allowing them to enjoy the layers of subject matter in your images of the Aurora Borealis.
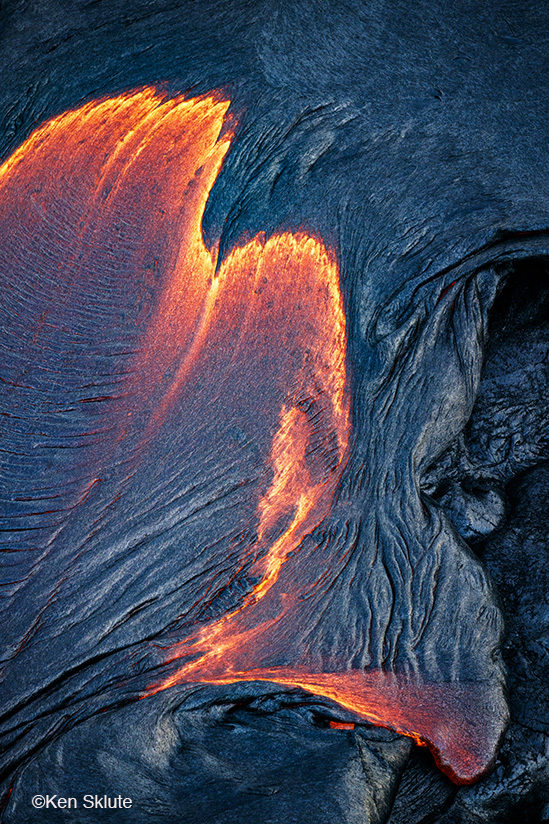
Hiking A Volcano
This is another of my first and longest bucket list items. It is so amazing to look into the Earth’s core and see molten rock bubbling, exploding and running into the ocean, creating brand new land. I will try to explain the glow, the sounds of the explosions and crackling of the 2,000 degree lava as it flows down the path of least resistance. The images I am sharing are from a trip I took to the Big Island of Hawaii.

Hiking out to reach the ocean entry or flying in a helicopter over the Pali (hillside) will have you rising in the middle of the night to be out and in place during the best viewing time – the transition from night to day.
If conditions allow hiking, I generally begin my hike around 3 a.m. since it may take nearly three hours to reach the coast. It is not always accessible or safe by hiking so . he only way to determine this is to hire a guide to safely take you out and back. This is NOT something that anyone should try on their own.
My absolute favorite way to reach the ever-changing lava is by helicopter. I fly with a very knowledgeable team of pilots who know the lay of the land. They can and will put me directly over the lava flow, and if it is safe, provides me a perfect view of what breakout is happening. Going by helicopter means being at the airport about 90 minutes before sunrise in order to begin capturing imagery as soon as the light is right.
When flying in a helicopter or small plane, you will want to minimize what you take with you. There won’t be room for a camera bag of any kind nor a real way of changing lenses inside the helicopter, so this would require a little bit of pre-visualizing what lens you might need. I fly with a UV filter on all of my lenses, which is a great tool to use for the setting I start the flight with freshly charged batteries, fresh digital media, no lens hoods or anything that could come off of the camera due to the wind created by having the doors off of the aircraft. Nobody would want anything falling out of the copter as we move along.
Within a moving or hovering aircraft, you will need to be ready at all times to capture images. The amount of time that you are in the air will depend upon your budget so be ready to snap images quickly.
There is one more option to see the lava enter the ocean and that is from a boat that will bring you within 30-50 feet of the flow, depending upon the steam that is directed by the wind. This steam is sulphuric and the boat captains did a great job of steering us all away.
Which ever method that you choose, you will be ecstatic seeing this fantastic example of Mother Nature.
Here’s the equipment I use to capture lava flows:
- Two camera bodies
- A wide angle lens like the Canon EF 16-35mm 2.8 or the 24-105 mm f/4 IS L lens
- Telephoto lens such as the Canon EF 100-400mm f/4.5-5.6L IS USM
- A Photographers vest to keep everything handy
- Extra camera batteries
- Extra digital Media
- A lens cloth in case of moisture on your lens (it is Hawaii, land of Rainbows)
Let’s talk camera settings.
- In a moving vehicle of any kind, the mode I choose is mostly TV or shutter speed priority. I use this in conjunction with Auto ISO. This allows me to maintain my shutter speed throughout the flight, regardless of the light level. Setting my shutter speed to 1/2000 sec will guarantee solid, sharp imagery.
- I do not need much depth of field so I will select an aperture in the “sweet spot” for my lens (two f/stops down from wide open)
- I like to rely on autofocus to be certain of sharp images.
- I also enable the Image Stabilization to help eliminate vibration and any movement from the moving vehicle.
- White balance is chosen by setting the presets to the source of illumination. If the sun is the source, I use the Sun preset.
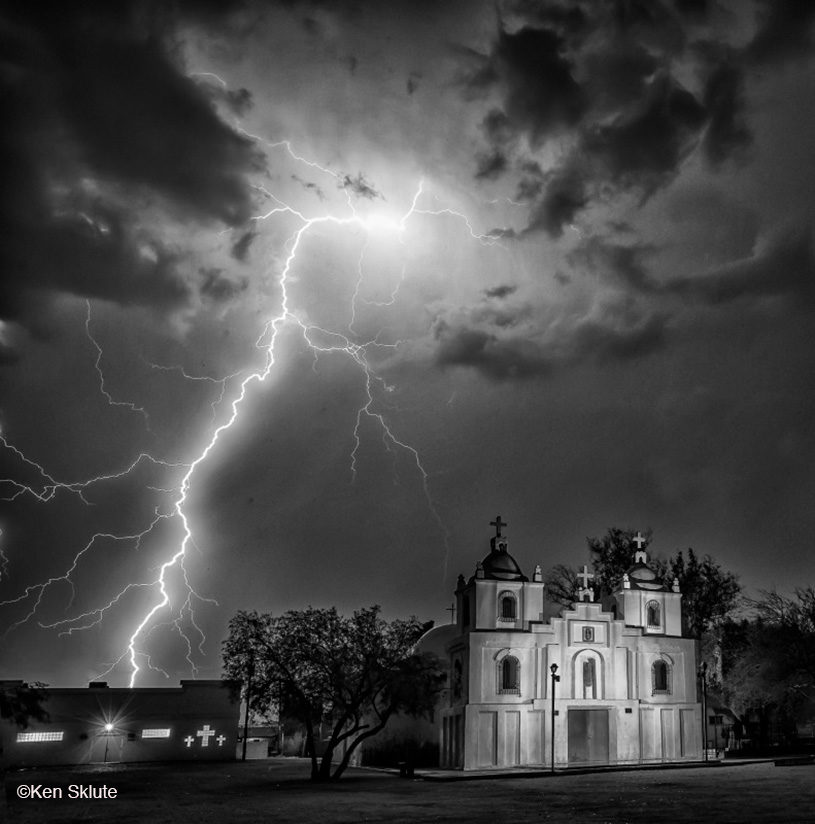
Chasing a Monsoon Storm
Living in the southwest desert offers certain benefits photographically. I’d like you to imagine visiting the desert during the summertime. Here in Phoenix, Arizona we have a bucket-list type of season every summer called Monsoon. Each day, we have isolated, photogenic cells build during the heat of the day, culminating in a daily thunderstorm.
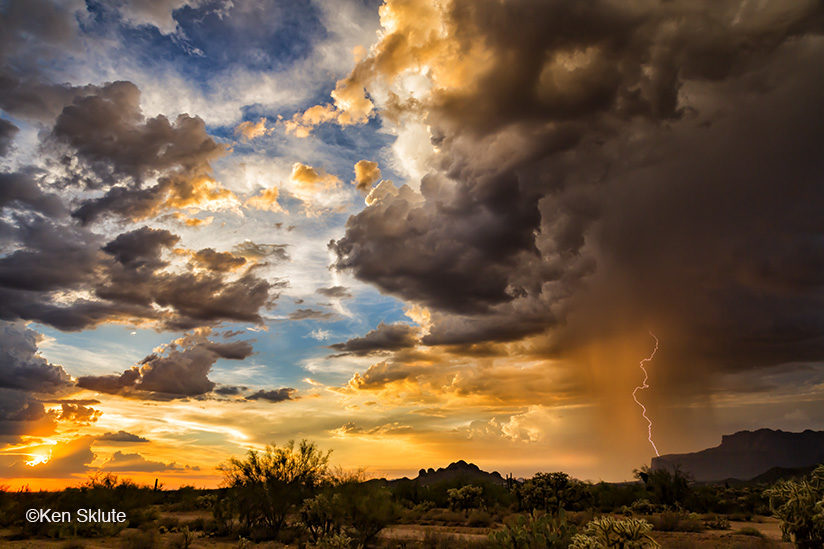
These monsoon thunderstorms are lightning generating and often kick up dust storms called haboobs. This is the time of year where morning, noon and night provide excellent weather-related opportunities for amazing sunsets, thunderstorms, dust storms, dust devils, suitable more for a landscape photographer.
Dimensional cumulus clouds will be your subjects from sunrise throughout most of the day. Once those cumulus clouds start to tower, you will see lightning start to develop and transform the puffy, pretty clouds into dramatic storms that are fun and easy to chase, providing colorful sunsets that transfer into the evening storms. You will have long, productive fun days with many photo opportunities.
Here are some items to have in your camera bag to capture images of the monsoon in the desert:
- Multiple camera bodies
- Wide angle lenses like the Canon EF 14mm 2.8, 16-35mm 2.8 or 24mm Tilt/Shift
- A sturdy tripod (or two)
- An intervelometer or cable release
- Lightning trigger
- Lens cloth and a blower bulb (to keep your lens dry and clean)
- Camera back pack (rolling back packs do not do well in the desert)
I most often capture my landscape photographs on a tripod and with Av or aperture priority. This allows me to control the depth of field. I use a cable release to fire the camera so I don’t move it, especially if the exposures start to get long later in the day or at night.
I also like to use the preset WB settings to match the light that I am shooting in rather than relying on Auto WB.
If you spend a week photographing in the desert, you will find it hard to leave. It is truly a photographer’s paradise. Come and see for yourself.
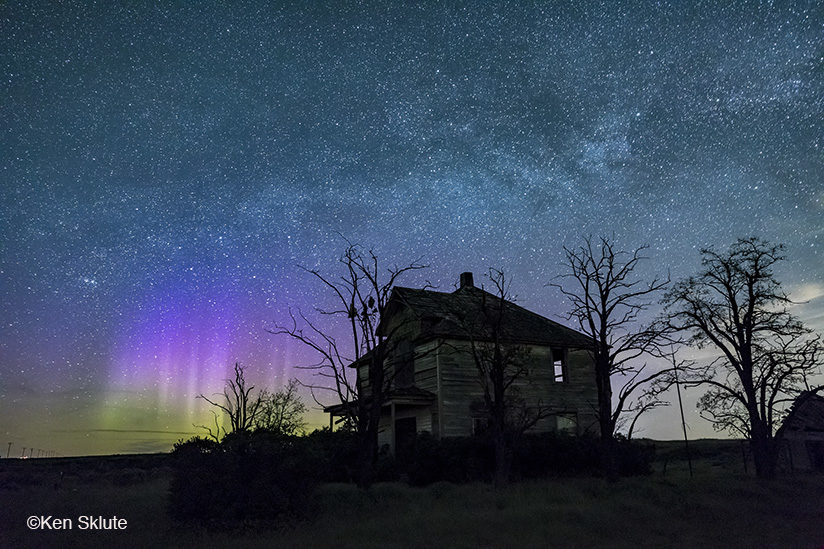
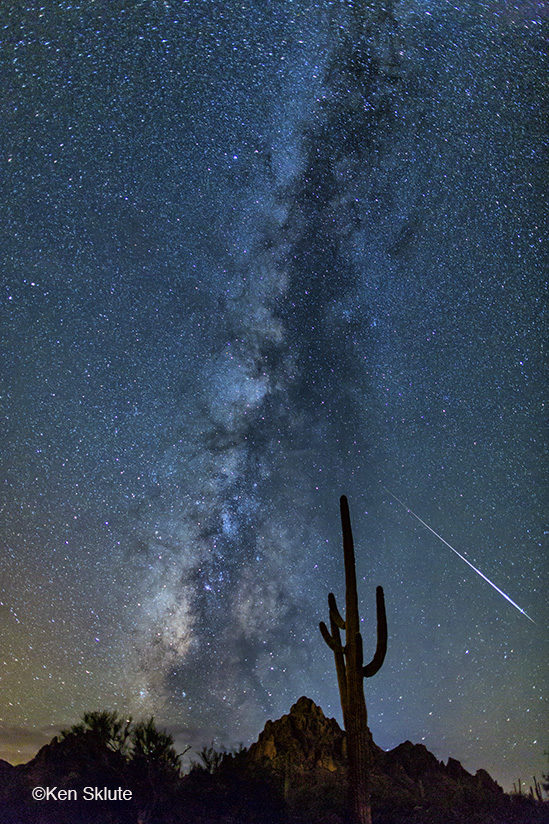
Capturing the Milky Way
As we reach my final bucket list item for many outdoor photographers, you will see that we are going back into the dark of night to capture the vibrance and color of the nighttime sky.
The Milky Way and its spectacular galactic core visit the northern hemisphere from mid-April though mid-September.
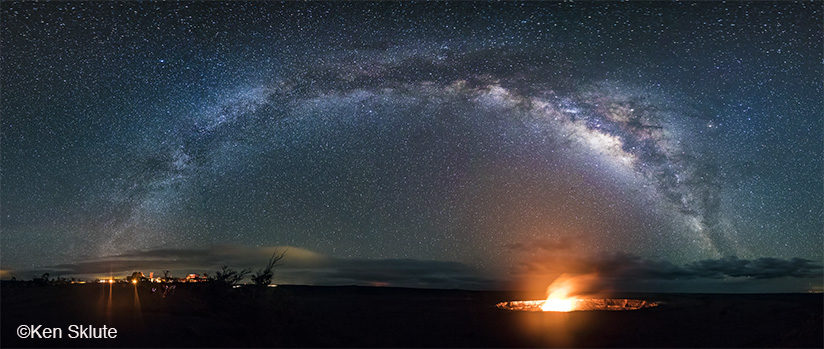
There are not too many nights that are Milky Way friendly. What is necessary is a clear, dark sky. Many of us have to drive one-two hours away from our light-polluted neighborhoods.
The best time to make images of the Milky Way is during the New Moon, when there is no moon and the sky is the darkest. Early in the season, the Milky Way rises in the eastern sky and slowly anchors itself in the southern sky.
Here are some recommendations on what to have with you and the settings for correctly exposing the dark night sky:
- Wide angle lens like the EF 14 mm 2.8
- Sturdy tripod
- Cable release or an intervelometer
- No UV or skylight filter in front of your lens
- Use Tungsten white balance
- 30 second exposure
- 2.8 or faster lens
- 6400 ISO
Pack a cooler and a chair to be comfortable outside in the dark, enjoying the beauty of the galaxies in front of you!
To me, the best part about a bucket list is that it’s never too soon to get started nor is it ever too late to begin! Once you accomplish one of your bucket list items, you can simply add a new one to the list. It’s a list with no end, so start yours today!
The post Checking Off Your Photo Bucket List appeared first on Outdoor Photographer.